

PressPlay
-
Posts
41 -
Joined
-
Last visited
Content Type
Profiles
Forums
Events
Everything posted by PressPlay
-
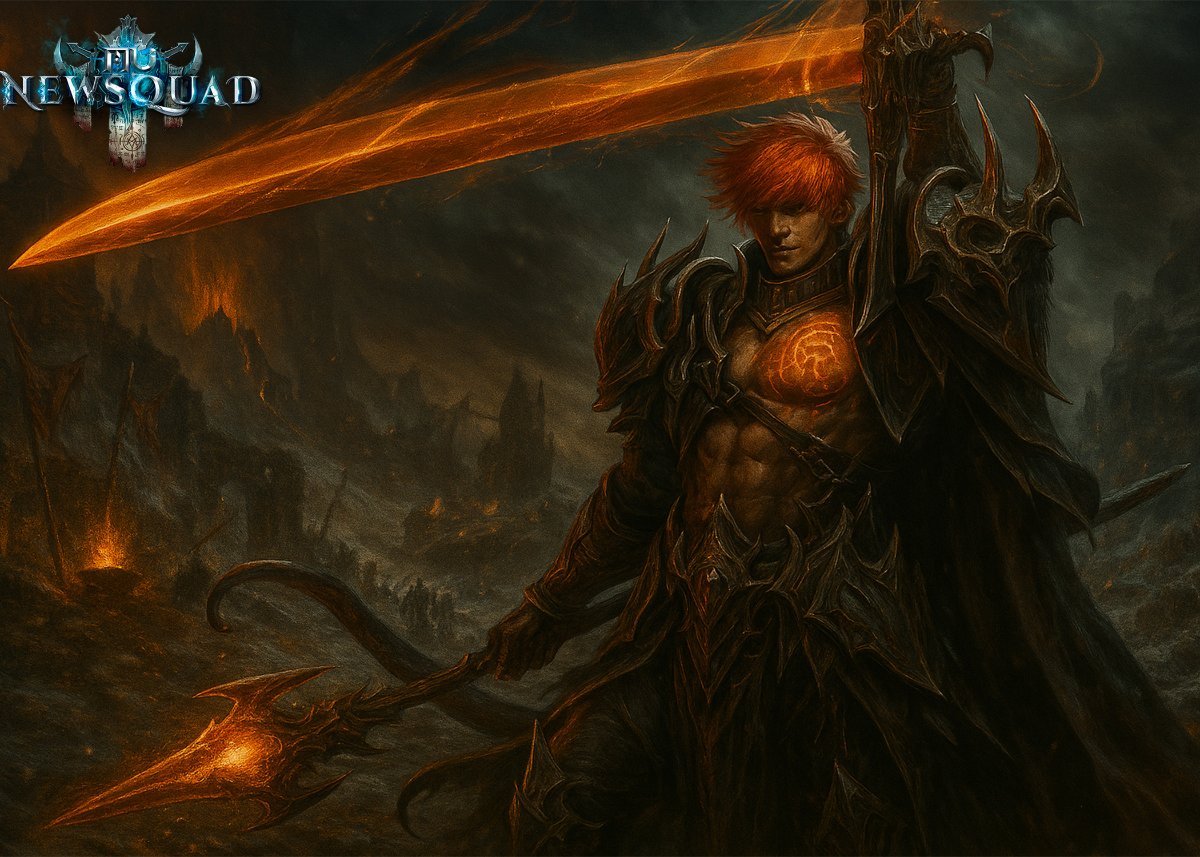
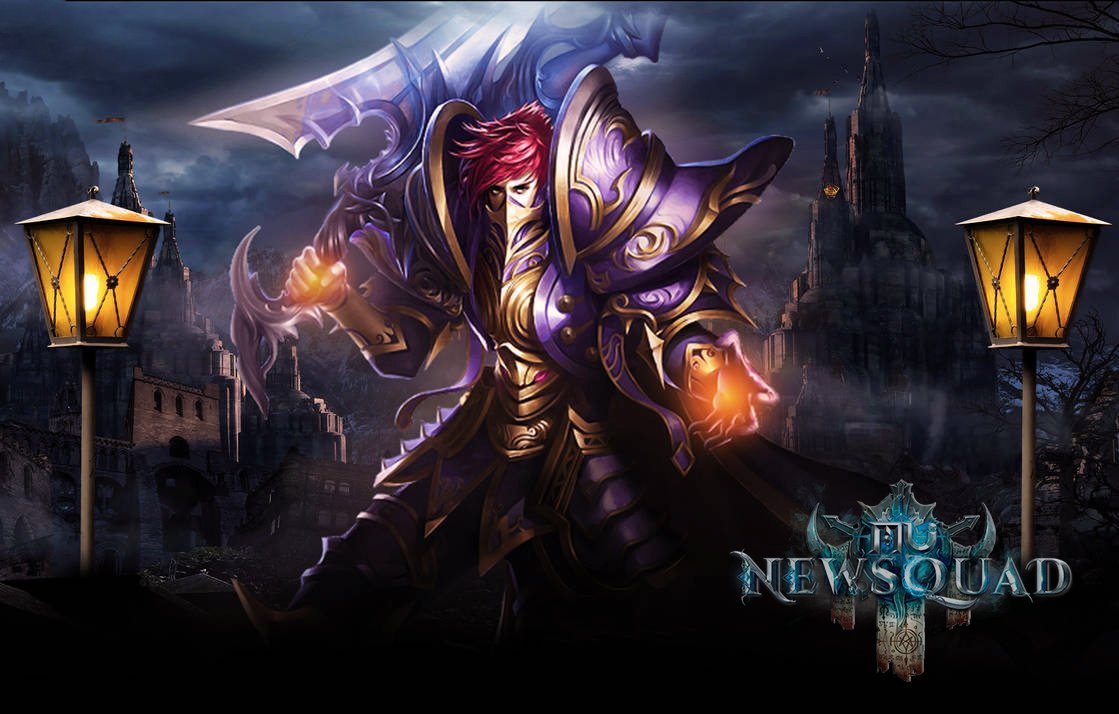
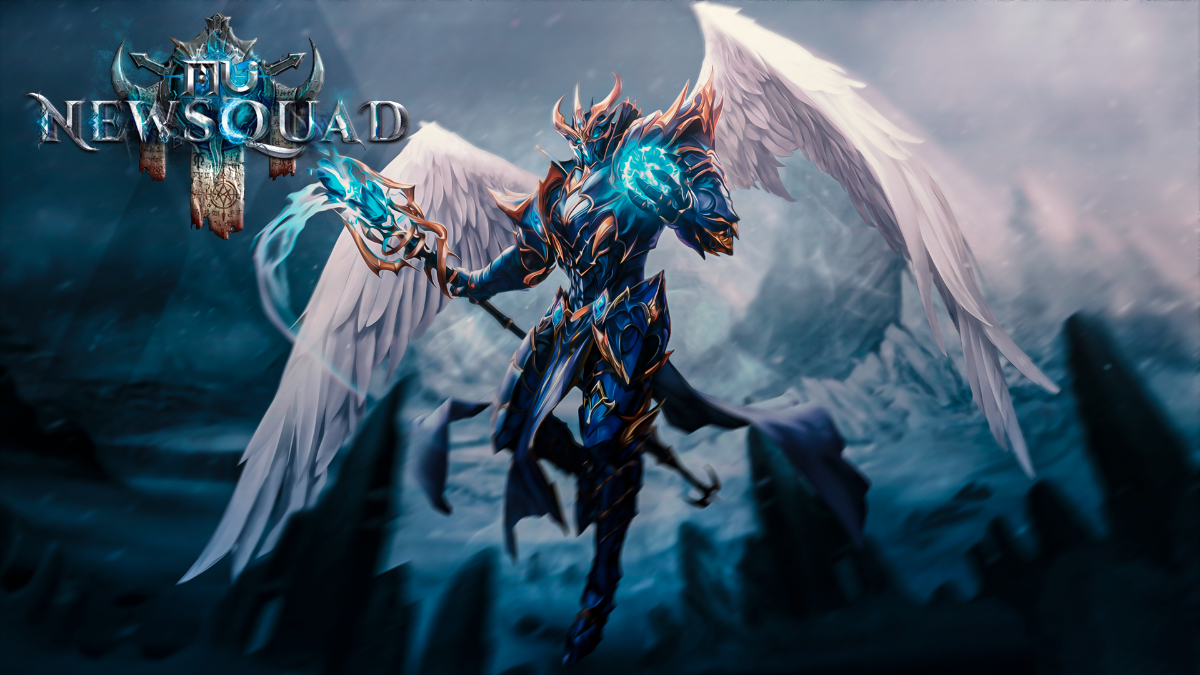
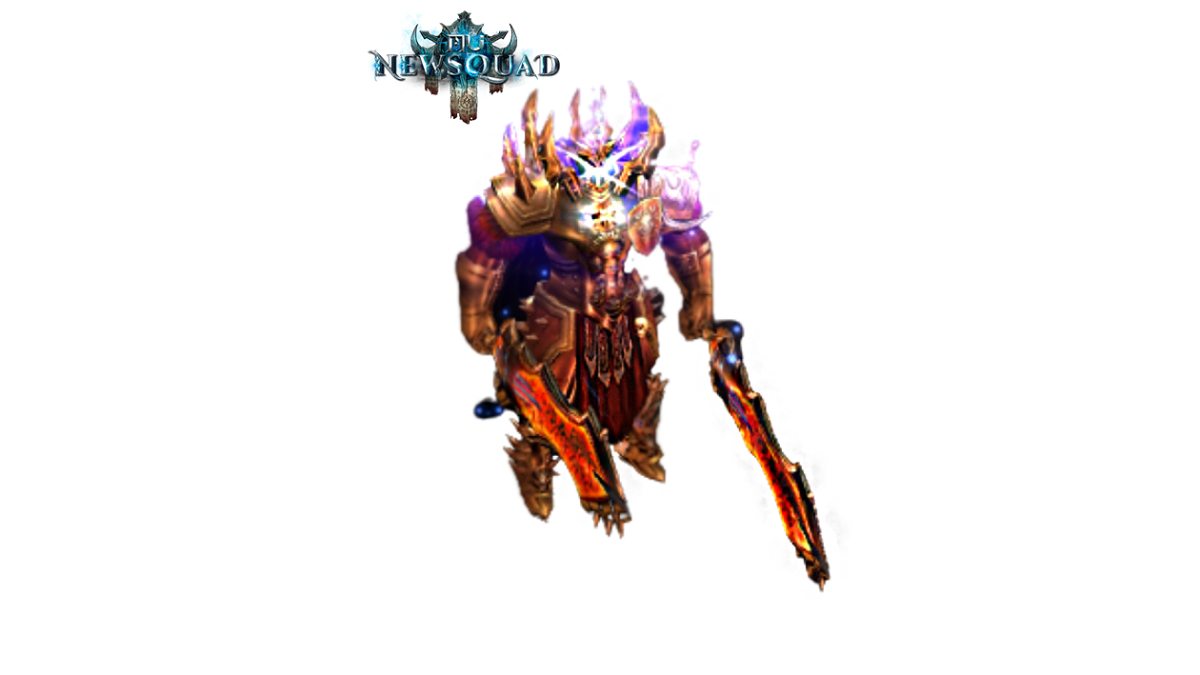
Illusion Knight Lore Illusion Knights are chosen from among the Elite Fighters who have undergone rigorous training and honed their sword skills to perfection. They are experts in close-quarters combat and excel in swift, precise strikes that can swiftly dispatch their foes. The class embodies the ideals of mastery over weaponry, discipline, and elegance in battle. The origins of the Illusion Knights can vary depending on their place of Origin. In some script pages, it is said that the Illusion Knights were born in Vulcanus and can conjure dual-fire blades that bring havoc to their opponents. In some interpretations, they may come from an ancient order of swordsmen; in others, they might be descendants of legendary warriors. Regardless of their background, these blade masters are renowned for their exceptional swordplay and are highly respected on the battlefield. They have access to a variety of combat techniques, including powerful sword skills, swift blade pierces using their infamous conjured blade in their off-hand, and crowd-control abilities. Their skills often focus on dealing high burst damage, executing precise strikes, and maintaining excellent mobility. Illusion Knights are versatile and can adapt to different combat scenarios. They can excel in both single-target encounters, where their precise strikes can swiftly dispatch opponents, as well as in AoE situations, where they can unleash devastating sword techniques to cleave through multiple enemies. I. Illusion Knight Mechanics and Playstyle Weapon Mastery Illusion Knights specialize in wielding various swords and blades with exceptional skill and precision, including conjuring a secondary blade from the elemental powers themselves. They have access to a wide range of sword-based skills and techniques, allowing them to deliver powerful strikes and combos to their enemies. These skills can include sweeping slashes, thrusts, spinning attacks, and other sword-based maneuvers. Physical Damage These Blademasters are known for their high physical damage output. They can damage their opponents significantly through well-timed strikes, critical hits, and powerful blade techniques. Their skills often focus on delivering strong single-target damage to quickly eliminate enemies. Durability and Defense Illusion Knights possess high durability and defense, allowing them to withstand enemy attacks due to their high agility requirements. Versatility in Combat Illusion Knights have a versatile playstyle, allowing them to adapt to different combat scenarios. They can engage enemies in close-quarters combat, relying on their blade skills and physical prowess. Additionally, they may have the ability to switch between close-range combat to mid-range combat allowing them to strike opponents from a distance due to skills like Wing Glaive. Illusion conjuring Besides having the power to conjure blades out of raw elemental substance, they can conjure illusions of themselves that aid them in battle dealing damage to their opponents while mirroring the Knight's movements. II. Illusion Knight Evolutions & Quests Evolution Requirements Quest NPC Quest Illusion Knight Character Level 1 N/A N/A Mirage Knight Character level 150 or Higher Sebina the Priest Devias [183.32] [Part 1] " Secure the Scroll of the Emperor " [Part 2] " The Three Treasures of MU " Illusion Master [For the 1st and 2nd Parts of the Quest] 2nd Quest Completed Character level 380 or higher [For the 3rd Part of the Quest] Character level 400 Apostle Devin Cywolf [228.49] [Part 1] " Prove your Strength " [Part 2] " Infiltrate the Barracks of Balgass " [Part 3] " Into the Realm of Darkness " Mystic Knight Character Level 800 Cent Lorencia [131.147] [Part 1] " Qualification test " [Part 2] " New Battle I " [Part 3] " New Battle II " body { background-color: black; color: white; } table { width: 80%; margin: 20px auto; border-collapse: collapse; border: 2px solid white; } th, td { padding: 10px; text-align: center; border: 1px solid white; } th { background-color: #333; } tr:nth-child(even) { background-color: #222; } tr:nth-child(odd) { background-color: #444; } caption { font-size: 1.5em; margin-bottom: 10px; } III. Character Formulas STAT FORMULA Health 80 + (Level * 1.4) + (VIT * 2.6) Shield Defense ((STR + AGI + ENE) * 2) + ((VIT * 5) * (Level / 200)) + (Level * 12) + (DEF * 2) Ability Gauge 200 + (STR * 0.3) + (AGI * 0.2) Mana 350 + (Level * 1) + (ENE * 2) Minimum Attack Power (STR / 7) + (AGI / 11) Maximum Attack Power (STR / 4) + (AGI / 8 ) Attack Speed AGI / 25 Defense AGI / 6 PvM Attack Rate (Level * 3) + (AGI / 2) + (STR * 1.5) PvP Attack Rate (Level * 4) + (AGI * 2) + (STR * 4) PvM Defense Rate 300 (standard value) PvP Defense Rate (Level * 1.5) + (VIT * 1.6) + (AGI * 0.6) Minimum Elemental Damage (STR / 22) + (AGI / 24) Maximum Elemental Damage (STR / 17) + (AGI / 19) Elemental Defense 0 (standard value) Elemental Attack Rate (Level * 3) Elemental Defense Rate (Level / 2) IV. Character Specializations 0% bonus base Defense under 1500 AGI 7% bonus base Defense between 1500 and 2000 AGI 15% bonus base Defense over 2000 AGI 0% bonus base Attack Power under 800 STR 7% bonus base Attack Power between 800 and 1300 STR 15% bonus base Attack Power over 1300 STR V. Wings body { background-color: #000; color: #fff; font-family: Arial, sans-serif; } table { width: 80%; border-collapse: collapse; } th, td { border: 1px solid #fff; padding: 10px; text-align: center; } th { background-color: #333; } tr:nth-child(odd) { background-color: #222; } tr:nth-child(even) { background-color: #333; } Level Class/Requirements Wings 1 Illusion Knight " Small Iron Cloak " 150 Illusion Knight " Cloak of Steel " 250 Mirage Knight " Cloak of Ebony " 500 Illusion Master " Cloak of Death " 1000 Mystic Knight " Cloak of Hatred " VI. Custom Changes & Balancing [ADDED] Twisting Slash to IK as its Tier 1 skill. [UPDATED] Wind Glaive: Now it is a Tier 2 skill (from Tier 4). Now requires 480 AGI (from 720 AGI). AoE Range is now 1 (from 2). [UPDATED] Charge Slash: Now it is a Tier 3 skill (from Tier 2). Now requires 840 AGI (from 380 AGI). Cast Range is now 4 (from 3). Now has the "gap-closer" when attacking from max range enabled before the Master Tree upgrade. AoE Range is now 1 (from 2). [UPDATED] Illusion Avatar: Now requires 250 ENE (from 350 ENE). Now has a cooldown of 45 seconds. Duration is now 25 seconds (from 60 seconds). HP Formula is now 8000 + VIT*80 (from 15000 + VIT*150). DMG Formula is now 20 + AGI*0.04 + STR*0.12 (from 150 + AGI*0.6 +STR*0.15). It now fully ignores armor. Attack Speed is now 1 attack every second (from 1 attack every 0.4 seconds). [UPDATED] Illusion Blade: Now requires 500 STR & 250 ENE (from 500 STR). Now it is a Tier 4 skill (from Tier 3). Formula: STR/10 + AGI/22 (from STR/7 + AGI/15). [UPDATED] [Master Tree] "Charge Slash Strengthener" now requires 15 Points (from 10) and now the increase is 90 (from 35). [UPDATED] [Master Tree] "Charge Slash Mastery" now requires 15 Points (from 10) and now it increases the Skill Damage by 60 (instead of increasing the Cast Range by 1 tile). [UPDATED] [Master Tree] "Wind Glaive Strengthener" now requires 15 Points (from 10) and now the increase is 80 (from 22). [UPDATED] [Master Tree] "Wind Glaive Mastery" now requires 15 Points (from 10) and now also increases the Skill Damage by 55. [UPDATED] [Master Tree] "Blade Strengthener" nerfed from 18 ~ 107 ~ 244 (level 1 / 10 / 20) to 2 ~ 23 ~ 34 (level 1 / 10 / 20) - matching rest of weapons increases. [UPDATED] [Master Tree] "Illusion Avatar Mastery" nerfed from 3 ~ 22 ~ 50 (level 1 / 10 / 20) to 2 ~ 21 ~ 34 (level 1 / 10 / 20). [UPDATED] [Master Tree] "Illusion Blade Strengthener" tweaked from 5 ~ 50 ~ 100 (level 1 / 10 / 20) to 18 ~ 68 ~ 90 (level 1 / 10 / 20). [UPDATED] [Enhancement Tree] Removed "Cast Range Enhancement" & "Hits per Cast Enhancement" of Wind Glaive. [UPDATED] [Enhancement Tree] "Skill Damage Enhancement" of Wind Glaive now requires 20 Points and the increase is now 300 (as a special increase). [UPDATED] [Enhancement Tree] Removed "Splash Damage Enhancement" & "Attack Speed Enhancement" of Blade Storm. [UPDATED] [Enhancement Tree] Replaced "Hits per Cast Enhancement (+2)" of Blade Storm with Hits per Cast Enhancement (+1)".

-
Kundun Mage Lore The Kundun Mages are descendants of the ancient Atlans civilization, which possessed advanced knowledge of magic and the elements. After the fall of Atlans, the survivors sought refuge over the MU continent and passed down their magical traditions through the generations. These teachings eventually gave birth to the Kundun Mage class. The Kundun Mages possess a deep understanding of the elemental forces that govern the world focusing their vision on casting only white magic, as opposed to their name. They can tap into these energies and channel them through their spells, manipulating fire, ice, lightning, and other elemental forces to devastating effect. They are adept at both offensive and defensive magic, making them versatile and formidable spellcasters on the battlefield. To become a Kundun Mage, individuals must undergo rigorous training and study under skilled mentors. They learn to attune themselves to the elements and harness their powers through intricate spellcasting rituals and incantations. Kundun Mages are also known for their intelligence and wisdom, as their magic requires a deep understanding of the arcane arts and the forces they seek to control. In battle, Kundun Mages rely heavily on their arsenal of spells to defeat enemies. They can rain down fireballs from the sky, freeze foes in place with icy spells, and unleash lightning storms. Their versatility allows them to adapt to various combat situations, making them a valuable asset in any group or solo play. The Kundun Mage class embodies the raw power of the elements and the ancient magical traditions of the Atlans civilization. With their formidable spellcasting abilities, they stand as formidable opponents and valuable allies in the ongoing struggle for supremacy in the world of MU. I. Kundun Mage Mechanics and Playstyle Spellcasting Mastery Kundun Mages excel at spellcasting and rely heavily on their extensive repertoire of offensive and defensive spells. They have a wide range of elemental spells at their disposal, allowing them to deal damage to multiple enemies simultaneously or focus on single-target attacks. Their spells often have a high AoE range, making them effective at crowd control and dealing damage to groups of enemies. Elemental Manipulation Kundun Mages can harness and manipulate various elements, such as fire, ice, lightning, and more. They can switch between different elemental spells to exploit enemy weaknesses or adapt to different combat situations. This versatility allows them to effectively deal with a variety of opponents and challenges. AoE Damage Kundun Mages are known for their devastating AoE spells. These spells can inflict damage to multiple enemies within a specific area, making them excellent for clearing groups of monsters or dealing with large-scale PvP battles such as Castle Siege events or Arca Wars. Kundun Mages are often sought after for their ability to quickly decimate hordes of enemies. They can unleash powerful spells that hit multiple targets at once, clearing waves of monsters efficiently. This makes them valuable in party situations where crowd control and clearing mobs are essential. Mana Management Kundun Mages heavily rely on their energy stat to increase the power of their spells. They require a substantial amount of mana to cast their spells effectively. Efficient mana management is crucial for sustaining their spellcasting abilities during prolonged battles, especially in the early stages of the game. Playstyle Kundun Mages are best suited for players who enjoy a strategic and tactical approach to combat. They require careful positioning, timing, and spell selection to maximize their effectiveness. Kundun Mages can excel in both solo and group play, bringing immense damage and utility to the battlefield. Overall, the Kundun Mage class offers a dynamic and spell-centric playstyle, combining devastating AoE damage and elemental manipulation. Mastering the class requires a deep understanding of spell mechanics, intelligent spell selection, and effective mana management. II. Kundun Mage Evolutions & Quests Evolution Requirements Quest NPC Quest Kundun Mage Character Level 1 N/A N/A Light Master Character level 150 or Higher Sebina the Priest Devias [183.32] [Part 1] " Secure the Scroll of the Emperor " [Part 2] " The Three Treasures of MU " Shine Wizard [For the 1st and 2nd Parts of the Quest] 2nd Quest Completed Character level 380 or higher [For the 3rd Part of the Quest] Character level 400 Apostle Devin Cywolf [228.49] [Part 1] " Prove your Strength" [Part 2] " Infiltrate the Barracks of Balgass " [Part 3] " Into the Realm of Darkness " Luminous Wizard Character Level 800 Cent Lorencia [131.147] [Part 1] " Qualification test " [Part 2] " New Battle I " [Part 3] " New Battle II " body { background-color: black; color: white; } table { width: 80%; margin: 20px auto; border-collapse: collapse; border: 2px solid white; } th, td { padding: 10px; text-align: center; border: 1px solid white; } th { background-color: #333; } tr:nth-child(even) { background-color: #222; } tr:nth-child(odd) { background-color: #444; } caption { font-size: 1.5em; margin-bottom: 10px; } III. Character Formulas STAT FORMULA Health 80 + (Level * 1.3) + (VIT * 2.4) Shield Defense ((STR + AGI + ENE) * 2) + ((VIT * 5) * (Level / 200)) + (Level * 12) + (DEF * 2) Ability Gauge 200 + (AGI * 0.35) + (ENE * 0.2) Mana 250 + (Level * 1.5) + (ENE * 1) Minimum Magical Damage ENE / 5 Maximum Magical Damage ENE / 3.5 Attack Speed AGI / 22 Defense AGI / 4 PvM Attack Rate (Level * 3) + (AGI * 1.2) + (ENE * 0.75) PvP Attack Rate (Level * 4) + (AGI * 2.5) + (ENE * 3.5) PvM Defense Rate 300 (standard value) PvP Defense Rate (Level * 1.5) + (VIT * 1) + (AGI * 2) Minimum Elemental Damage ENE / 20 Maximum Elemental Damage ENE / 15 Elemental Defense 0 (standard value) Elemental Attack Rate (Level * 3) Elemental Defense Rate (Level / 2) IV. Character Specializations 0% bonus base Defense under 800 AGI. 7% bonus base Defense between 800 and 1300 AGI. 15% bonus base Defense over 1300 AGI. 0% bonus base Magical DMG under 1500 ENE. 7% bonus base Magical DMG between 1500 and 2000 ENE. 15% bonus base Magical DMG over 2000 ENE. V. Wings body { background-color: #000; color: #fff; font-family: Arial, sans-serif; } table { width: 80%; border-collapse: collapse; } th, td { border: 1px solid #fff; padding: 10px; text-align: center; } th { background-color: #333; } tr:nth-child(odd) { background-color: #222; } tr:nth-child(even) { background-color: #333; } Level Class/Requirements Wings 1 Kundun Mage " Small White Cloak " 150 Kundun Mage " White Cloak" 250 Light Master " Cloak of Innocence " 500 Shine Wizard " Cloak of Brilliance " 1000 Luminous Wizard " Cloak of Luminosity " VI. Custom Changes & Balancing [UPDATED] KM can now learn & use the Decay skill as its long-range less DPS alternative to Blast. [UPDATED] Dragon Violent: Now it is a Tier 2 skill (from Tier 3). Now requires 480 ENE (from 820 ENE). AoE Range is now 4 (from 3). [UPDATED] Reflection Barrier: Now it is a Tier 3 skill (from Tier 2). [UPDATED] Slightly reduced the STR required to equip Mastery (Bloodangel, Darkangel, etc.) & Tier 2 Socket set items of KM. [UPDATED] Tweaked the base Magical DMG of the KM's Magic Books: Elemental Magic Book: 10~20 (from 15~27). Shining Feather Magic Book: 24~36 (from 35~47). Bloodangel Magic Book: 40~52 (from 55~67). Darkangel Magic Book: 55~67 (from 65~77). Holyangel Magic Book: 70~82 (from 75~87). Blue Eye Magic Book: 100~112 (from 95~107). Silver Heart Magic Book: 115~127 (from 105~117). Manticore Magic Book: 130~142 (from 115~127). Brilliant Magic Book: 145~157 (from 125~137). [UPDATED] [Master Tree] "Shining Bird Mastery" now requires 15 points & it now increases both Cast Range & AoE Range. [UPDATED] [Master Tree] "Dragon Violent Strengthener" nerfed from 5 ~ 32 ~ 45 (level 1 / 10 / 20) to 5 ~ 24 ~ 32 (level 1 / 10 / 20). [ADDED] [Master Tree] "Decay Strengthener" to the KM's Master Tree, with 21 ~ 120 ~ 162 increase (level 1 / 10 / 20). [UPDATED] [Master Tree] "Blast Strengthener" (KM only) tweaked from 8 ~ 52 ~ 71 (level 1 / 10 / 20) to 8 ~ 49 ~ 66 (level 1 / 10 / 20). [UPDATED] [Master Tree] "Reflection Barrier Proficiency" nerfed from 8s ~ 51s ~ 70s (level 1 / 10 / 20) to 3s ~ 24s ~ 33s (level 1 / 10 / 20). [UPDATED] [Master Tree] "Reflection Barrier Strengthener" nerfed from 1.13% ~ 3.44% ~ 7% (level 1 / 10 / 20) to 1.08% ~ 2.32% ~ 4.03% (level 1 / 10 / 20). [UPDATED] [Enhancement Tree] Removed "Splash Damage Enhancement" of Shining Bird. [UPDATED] [Enhancement Tree] Removed "Hits per Cast Enhancement" & "Attack Speed Enhancement" of Spear Storm. [UPDATED] [Enhancement Tree] Removed "Attack Speed Enhancement", "AoE Range Enhancement" & "Splash Damage Enhancement" of Dragon Violent.

-
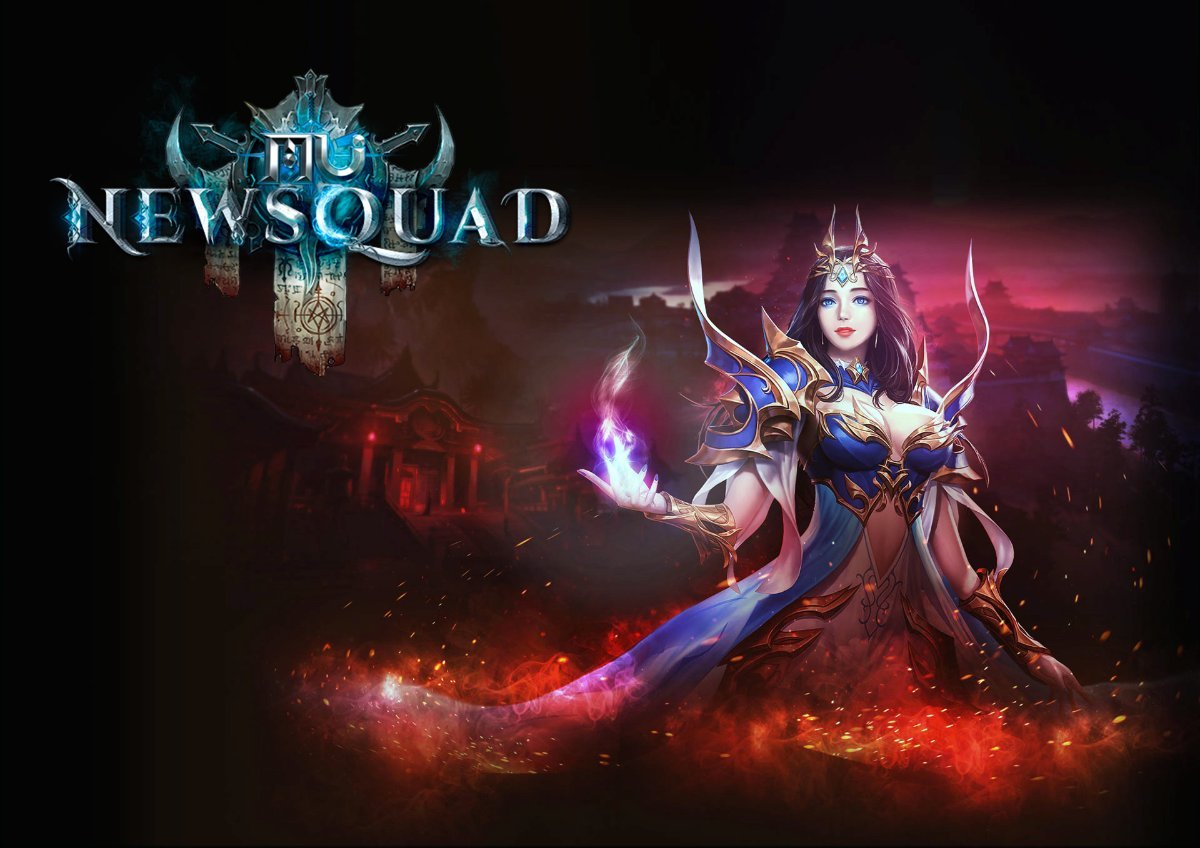
Lemuria Lore Lemuria is typically portrayed as a mage specializing in the arcane arts, focusing on harnessing the forces of nature and elemental magic. They have a deep understanding of the elemental energies and can channel them to unleash devastating spells upon their enemies. These mages often have a scholarly background, studying ancient texts and mastering the secrets of elemental magic. They have a natural affinity for harnessing the powers of fire, ice, lightning, and other elemental forces. With their expertise, Energy Mages can conjure powerful spells that deal elemental damage, control the battlefield with AoE attacks, and provide support buffs or debuffs to allies or enemies. Their relations with the Mages of Kundun are solid as the bond between them grew over the years providing great power and knowledge increase. I. Lemuria Mechanics and Playstyle Spellcasting Lemuria relies on casting spells to deal damage. They have access to a variety of offensive spells, with their signature skill being the Magical Shot. Their weapons, the Orbs, allow them to deal great amounts of magical damage, vanishing their foes. Magic is the main way to deal damage and control the battlefield. They have many offensive spells that can be cast from a distance. Their spells, including fire, ice, and lightning, are primarily elemental-based, allowing for versatile gameplay. Elemental Magic Lemurians are often associated with elemental magic. They can harness and manipulate various fundamental forces, such as fire, ice, and lightning. This allows them to cast spells of different elements, each with its unique effects and damage types. Long-range Attacks These mages excel at long-range combat. They can attack enemies from a safe distance, avoiding close-quarters combat. This provides them with an advantage in battles against melee-focused classes. AoE Spells The class also possesses AoE spells that can damage multiple enemies within a designated area. These spells are particularly useful for crowd control and dealing with groups of enemies. Support Abilities In addition to offensive spells, may possess support abilities. These can include spells that provide buffs to allies and utility spells that can heal party members, recover SD during PvP battles, or blessings that increase attack and defense. II. Lemuria Evolutions & Quests Evolution Requirements Quest NPC Quest Lemuria Character Level 1 N/A N/A Warmage Character level 150 or Higher Sebina the Priest Devias [183.32] [Part 1] " Secure the Scroll of the Emperor " [Part 2] " The Three Treasures of MU " Archmage [For the 1st and 2nd Parts of the Quest] 2nd Quest Completed Character level 380 or higher [For the 3rd Part of the Quest] Character level 400 Apostle Devin Cywolf [228.49] [Part 1] " Prove your Strength " [Part 2] " Infiltrate the Barracks of Balgass " [Part 3] " Into the Realm of Darkness " Mist Mage Character Level 800 Cent Lorencia [131.147] [Part 1] " Qualification test " [Part 2] " New Battle I " [Part 3] " New Battle II " body { background-color: black; color: white; } table { width: 80%; margin: 20px auto; border-collapse: collapse; border: 2px solid white; } th, td { padding: 10px; text-align: center; border: 1px solid white; } th { background-color: #333; } tr:nth-child(even) { background-color: #222; } tr:nth-child(odd) { background-color: #444; } caption { font-size: 1.5em; margin-bottom: 10px; } III. Character Formulas STAT FORMULA Health 80 + (Level * 1.3) + (VIT * 2.4) Shield Defense ((STR + AGI + ENE) * 2) + ((VIT * 5) * (Level / 200)) + (Level * 12) + (DEF * 2) Ability Gauge 200 + (AGI * 0.35) + (ENE * 0.2) Mana 250 + (Level * 1.3) + (ENE * 1) Minimum Magical Damage ENE / 6 Maximum Magical Damage ENE / 4.5 Attack Speed AGI / 22 Defense AGI / 4 PvM Attack Rate (Level * 3) + (AGI * 1.2) + (ENE * 0.75) PvP Attack Rate (Level * 4) + (AGI * 2.5) + (ENE * 3.5) PvM Defense Rate 300 (standard value) PvP Defense Rate (Level * 1.5) + (VIT * 1) + (AGI * 2) Minimum Elemental Damage ENE / 20 Maximum Elemental Damage ENE / 15 Elemental Defense 0 (standard value) Elemental Attack Rate (Level * 3) Elemental Defense Rate (Level / 2) IV. Character Specializations 0% bonus base Defense under 800 AGI 7% bonus base Defense between 800 and 1300 AGI 15% bonus base Defense over 1300 AGI 0% bonus base Magical DMG under 1500 ENE 7% bonus base Magical DMG between 1500 and 2000 ENE 15% bonus base Magical DMG over 2000 ENE V. Wings body { background-color: #000; color: #fff; font-family: Arial, sans-serif; } table { width: 80%; border-collapse: collapse; } th, td { border: 1px solid #fff; padding: 10px; text-align: center; } th { background-color: #333; } tr:nth-child(odd) { background-color: #222; } tr:nth-child(even) { background-color: #333; } Level Class/Requirements Wings 1 Lemuria " Small Wings of Cruse " 150 Lemuria " Wings of Curse" 250 Warmage " Wings of Despair " 500 Archmage " Wings of Eternity " 1000 Mist Mage " Wings of Explosion " VI. Custom Changes & Balancing [UPDATED] Marvel Burst now requires 440 ENE (from 310 ENE). [UPDATED] Unleash Marvel now requires 400 AGI (from 550 AGI). [UPDATED] Ultimate Force Cast Range is now 4 (from 6) & AoE Range is now 1 (from 5). [UPDATED] Cure: Cooldown: 2s (from 4s). [UPDATED] Blessing: Now requires 640 ENE (from 735 ENE). Cooldown removed. [UPDATED] Removed LEM's Basic Heal, Basic SD Recovery, Basic Defense & Basic Damage from game. [UPDATED] Slightly reduced the STR required to equip Tier 2 Socket set items of LEM. [UPDATED] [Master Tree] "Marvel Burst Strengthener" nerfed from 8 ~ 52 ~ 71 (level 1 / 10 / 20) to 4 ~ 29 ~ 40 (level 1 / 10 / 20). [UPDATED] [Master Tree] "Blessing Strengthener" nerfed from 6 ~ 38 ~ 52 (level 1 / 10 / 20) to 2 ~ 13 ~ 18 (level 1 / 10 / 20). [UPDATED] [Enhancement Tree] Replaced "Hits per Cast Enhancement" with "Cast Range Enhancement" & removed "AoE Range Enhancement" of Ultimate Force. [UPDATED] [Enhancement Tree] Removed the "Maximum Targets Enhancement" of Unleash Marvel. [UPDATED] [Enhancement Tree] Replaced "Splash Damage Enhancement" of Unleash Marvel with "Hits per Cast Enhancement". [UPDATED] [Enhancement Tree] Removed "AoE Range Enhancement" & "Hits per Cast Enhancement" of Marvel Burst.

-
Rune Wizard Lore The Rune Wizard is a powerful and mystical class. This class delves into the arcane arts, wielding the forces of magic through ancient runes and spells. The lore behind the Rune Wizard is a captivating tale of a scholar who unlocked the secrets of ancient knowledge to become a master of magic. In the realm of MU, the Rune Wizard class emerged from the magical city of Icarus. It is said that within the depths of the city's vast library, a young scholar named Orlamu discovered a long-forgotten book known as the "Codex of Power." This ancient tome contained the wisdom of ancient civilizations, including profound knowledge of runic magic. Driven by an insatiable thirst for knowledge and a desire to harness the true potential of magic, Orlamu dedicated himself to studying the Codex. He spent years deciphering its ancient texts, unraveling the intricate connections between runes, symbols, and spells. Through relentless research and experimentation, Orlamu became a master of rune magic, unlocking immense power previously unseen in the realm. With his newfound mastery, Orlamu shared his knowledge with the people of Icarus, establishing the Rune Wizard class as a beacon of magical wisdom. These highly skilled individuals devoted their lives to the pursuit of magical enlightenment and the preservation of ancient knowledge. Rune Wizards possess a unique connection with runes, magical symbols imbued with the essence of elemental forces. They inscribe these runes onto their bodies or channel their power through staves, enabling them to manipulate the very fabric of reality. By combining the correct runes and chanting incantations, Rune Wizards can unleash devastating spells, control elemental energies, and summon powerful entities to aid them in battle. As the Rune Wizards' reputation grew, they became respected figures in the realm of MU. They were sought after as advisors, scholars, and protectors of ancient relics. Their expertise in magic made them invaluable assets in the defense of the realm against dark forces that threatened its balance. The Rune Wizard class in MU Online is characterized by its vast array of spells and magical abilities. They can wield various elements, such as fire, ice, and lightning, manipulating these forces to unleash destructive attacks, protective barriers, or debilitating crowd control effects. Through their dedication to the arcane arts, Rune Wizards continue to unlock the secrets of ancient magic and expand their knowledge. They embark on quests to recover lost artifacts, decipher forgotten spells, and explore the deepest realms of magic. Their journey is one of enlightenment, seeking to unravel the mysteries of the universe and safeguard the realm from the encroaching darkness. I. Rune Wizard Mechanics and Playstyle Spellcasting and Elemental Magic The Rune Wizard specializes in casting a wide variety of spells, ranging from offensive to defensive and supportive abilities. They have access to elemental magic, including fire, ice, lightning, and more. Each element offers different types of spells and effects, allowing Rune Wizards to adapt their playstyle to various situations. The Rune Wizard same like other wizards relies heavily on magic to deal damage and control the battlefield. They have many offensive spells that can be cast from a distance. Their spells, including fire, ice, and lightning, are primarily elemental-based, allowing for versatile gameplay. Mana Management Mana management is crucial for Dark Wizards as their spells consume mana. Dark Wizards may need to strategically use potions to replenish their mana during intense battles, at least in the game's early stages. AoE Damage Wizards excel at dealing with AoE damage, making them formidable against groups of enemies. They can unleash powerful spells that hit multiple targets at once, clearing waves of monsters efficiently. This makes them valuable in party situations where crowd control and clearing mobs are essential Rune Wizards excel at dealing damage to multiple targets simultaneously. They have access to powerful AoE spells that can hit multiple enemies within a designated area, making them efficient at clearing groups of monsters or dealing damage in PvP battles. PvP and PvE Strengths Rune Wizards have a versatile playstyle that allows them to excel in both PvP and PvE scenarios. They can deal significant damage to multiple targets in PvE, making them efficient at killing mobs both on the spot and in the open world. In PvP, their elemental versatility and burst damage give them the tools to take on opponents and control the flow of battles. Overall, the Rune Wizard class offers an engaging and dynamic gameplay experience with its focus on spellcasting, elemental magic, and strategic decision-making. Players who choose the Rune Wizard can enjoy the versatility of adapting their playstyle to different situations, unleashing devastating spells, and mastering the intricate art of rune magic in the ever-evolving world of NewSquad. II. Rune Wizard Evolutions & Quests Evolution Requirements Quest NPC Quest Rune Wizard Character Level 1 N/A N/A Rune Spell Master Character level 150 or Higher Sebina the Priest Devias [183.32] [Part 1] " Secure the Scroll of the Emperor " [Part 2] " The Three Treasures of MU " Grand Rune Master [For the 1st and 2nd Parts of the Quest] 2nd Quest Completed Character level 380 or higher [For the 3rd Part of the Quest] Character level 400 Apostle Devin Cywolf [228.49] [Part 1] " Prove your Strength " [Part 2] " Infiltrate the Barracks of Balgass " [Part 3] " Into the Realm of Darkness " Majestic Rune Wizard Character Level 800 Cent Lorencia [131.147] [Part 1] " Qualification test " [Part 2] " New Battle I " [Part 3] " New Battle II " body { background-color: black; color: white; } table { width: 80%; margin: 20px auto; border-collapse: collapse; border: 2px solid white; } th, td { padding: 10px; text-align: center; border: 1px solid white; } th { background-color: #333; } tr:nth-child(even) { background-color: #222; } tr:nth-child(odd) { background-color: #444; } caption { font-size: 1.5em; margin-bottom: 10px; } III. Character Formulas STAT FORMULA Health 80 + (Level * 1.3) + (VIT * 2.4) Shield Defense ((STR + AGI + ENE) * 2) + ((VIT * 5) * (Level / 200)) + (Level * 12) + (DEF * 2) Ability Gauge 200 + (AGI * 0.35) + (ENE * 0.2) Mana 250 + (Level * 1.3) + (ENE * 1) Minimum Magical Damage ENE / 6 Maximum Magical Damage ENE / 4 Attack Speed AGI / 19 Defense AGI / 4 PvM Attack Rate (Level * 3) + (AGI * 1.2) + (ENE * 0.75) PvP Attack Rate (Level * 4) + (AGI * 2.5) + (ENE * 3.5) PvM Defense Rate 300 (standard value) PvP Defense Rate (Level * 1.5) + (VIT * 1) + (AGI * 2) Minimum Elemental Damage ENE / 20 Maximum Elemental Damage ENE / 15 Elemental Defense 0 (standard value) Elemental Attack Rate (Level * 3) Elemental Defense Rate (Level / 2) IV. Character Specializations 0% bonus base Defense under 800 AGI 7% bonus base Defense between 800 and 1300 AGI 15% bonus base Defense over 1300 AGI 0% bonus base Magical DMG under 1500 ENE 7% bonus base Magical DMG between 1500 and 2000 ENE 15% bonus base Magical DMG over 2000 ENE V. Wings body { background-color: #000; color: #fff; font-family: Arial, sans-serif; } table { width: 80%; border-collapse: collapse; } th, td { border: 1px solid #fff; padding: 10px; text-align: center; } th { background-color: #333; } tr:nth-child(odd) { background-color: #222; } tr:nth-child(even) { background-color: #333; } Level Class/Requirements Wings 1 Rune Wizard " Small Wings of Elf " 150 Rune Wizard " Wings of Elf " 250 Rune Spell Master " Wings of Spirit " 500 Grand Rune Master " Wings of Disillusion " 1000 Majestic Rune Wizard " Wings of Destiny " VI. Custom Changes & Balancing [UPDATED] Magic Arrow now requires 450 ENE (from 315 ENE). [UPDATED] Plasma Ball: Now requires 720 ENE (from 665 ENE). Cooldown is now 8 seconds (from 4 seconds). [UPDATED] Lightning Storm Cast Range is now 5 (from 3). [UPDATED] [Master Tree] "Plasma Ball Strengthener" nerfed from 5 ~ 32 ~ 45 (level 1 / 10 / 20) to 5 ~ 24 ~ 32 (level 1 / 10 / 20). [UPDATED] [Master Tree] "Plasma Ball Mastery" nerfed from 40 to 18. [UPDATED] [Master Tree] "Magic Arrow Strengthener" nerfed from 5 ~ 32 ~ 45 (level 1 / 10 / 20) to 2 ~ 19 ~ 28 (level 1 / 10 / 20). [UPDATED] [Master Tree] "Magic Arrow Mastery" now it removes the initial base Skill Damage of the skill, while increasing the arrows fired from 3 to 4. [UPDATED] [Master Tree] "Runic Burst Strengthener" nerfed from 1s ~ 10s ~ 20s (level 1 / 10 / 20) to 0.5s ~ 5s ~ 10s (level 1 / 10 / 20). [UPDATED] [Master Tree] "Runic Burst Mastery" nerfed from -20 seconds to -15 seconds. [UPDATED] [Master Tree] "Haste Strengthener" nerfed from 1s ~ 10s ~ 20s (level 1 / 10 / 20) to 0.5s ~ 5s ~ 10s (level 1 / 10 / 20). [UPDATED] [Master Tree] "Haste Mastery" nerfed from -30 seconds to -20 seconds. [UPDATED] [Enhancement Tree] Removed "Splash AoE Enhancement", "Maximum Splash Targets Enhancement" & "Hits per Cast Enhancement" of Magic Arrow. [UPDATED] [Enhancement Tree] Removed "Skill Damage Enhancement" & "Hits per Cast Enhancement" of Plasma Ball. [UPDATED] [Enhancement Tree] "Close Range Enhancement" now requires 15 Points instead of 10. [UPDATED] [Enhancement Tree] Removed "AoE Range Enhancement" & "Hits per Cast Enhancement" of Lightning Storm. [UPDATED] [Enhancement Tree] "Skill Damage Enhancement" of Lightning Storm now requires 20 Points and the increase is now 300 (as a special increase).
-
Grow Lancer Lore Long ago, in the ancient realm of MU, there was a peaceful tribe known as the Celts. The Celts were deeply connected to the natural world and revered the mystical energies that flowed through it. Among their people, there was a young warrior named Astharoth, who possessed an exceptional affinity for nature and combat. Astharoth was chosen by the spirits of the land to become the guardian of the sacred Grow Lancer. The Grow Lancer was a legendary polearm infused with the essence of nature's power, granting its wielder immense strength and control over the elements. It was said that the Grow Lancer was the embodiment of the spirits' will, entrusted to protect the balance of nature from those who sought to disrupt it. Guided by the spirits and armed with the Grow Lancer, Astharoth embarked on a perilous journey. He traveled across the land, battling monstrous creatures and facing numerous challenges along the way. As he fought, Astharoth discovered his true potential, honing his combat skills and learning to channel the primal forces of nature through his weapon. Throughout his quest, Astharoth encountered dark forces that threatened the harmony of MU. He stood against these malevolent beings, becoming a symbol of hope and resistance. With the Grow Lancer in hand, he unleashed devastating attacks, combining his physical prowess with elemental abilities that allowed him to command the power of wind, lightning, and earth. As Astharoth's legend grew, so did the fame of the Grow Lancer. Other warriors sought to follow in his footsteps, yearning to harness the same powers that made him a force to be reckoned with. These brave individuals were chosen by the spirits and initiated into the sacred order of the Grow Lancers, continuing Astharoth's legacy as guardians of nature. In the present era of MU, the Grow Lancer class represented those chosen warriors who have inherited the ancient traditions of the Celts and the power of the Grow Lancer. They are skilled melee fighters who combine swift and precise polearm strikes with nature-based abilities. Grow Lancers excel in close-quarters combat, unleashing devastating combos and powerful area-of-effect attacks. Through their connection with nature, Grow Lancers can tap into the elements, imbuing their attacks with the power of wind, thunder, and earth. They can summon powerful whirlwinds, and lightning strikes, and even call upon the earth itself to disrupt their enemies. With their agility and mastery over their polearm, Grow Lancers can swiftly maneuver around the battlefield, striking down foes with incredible precision. I. Grow Lancer Mechanics and Playstyle Lance Mastery Grow Lancers specialize in wielding long weapons, such as lances or halberds. They have access to a variety of weapon-specific skills and abilities that enhance their melee attacks, allowing them to deal significant damage to enemies in close-quarters combat. Elemental Abilities One of the distinguishing features of the Grow Lancer class is their connection to elemental powers. They can harness the forces of wind, thunder, and earth to augment their attacks and unleash devastating elemental abilities. These abilities provide additional damage and crowd control effects, allowing Grow Lancers to manipulate the battlefield to their advantage. Party Support Grow Lancers also bring utility to party play. They have support skills that can provide buffs and bonuses to allies, enhancing their effectiveness in group content. These supportive abilities can boost the overall damage, of the entire party, making Grow Lancers valuable assets in party gameplay. PvP and PvE Strengths Grow Lancers have a balanced playstyle that allows them to perform well in both PvP and PvM scenarios. They excel at engaging in melee combat and can deal burst damage to single targets or unleash AoE attacks to clear groups of enemies. Overall, the Grow Lancer class offers an engaging and dynamic gameplay style with its focus on melee combat, and elemental abilities. Players who choose the Grow Lancer can enjoy a versatile and visually striking playstyle, utilizing lances, elemental powers, and precise strikes to dominate the battlefield and emerge as formidable warriors in the world of MU. II. Grow Lancer Evolutions & Quests Evolution Requirements Quest NPC Quest Grow Lancer Character Level 1 N/A N/A Grow Lancer N/A N/A N/A Miracle Lancer [For the 1st and 2nd Parts of the Quest] 2nd Quest Completed Character level 380 or higher [For the 3rd Part of the Quest] Character level 400 Apostle Devin Cywolf [228.49] [Part 1] " Prove your Strength " [Part 2] " Infiltrate the Barracks of Balgass " [Part 3] " Into the Realm of Darkness " Shining Lancer Character Level 800 Cent Lorencia [131.147] [Part 1] " Qualification test " [Part 2] " New Battle I " [Part 3] " New Battle II " body { background-color: black; color: white; } table { width: 80%; margin: 20px auto; border-collapse: collapse; border: 2px solid white; } th, td { padding: 10px; text-align: center; border: 1px solid white; } th { background-color: #333; } tr:nth-child(even) { background-color: #222; } tr:nth-child(odd) { background-color: #444; } caption { font-size: 1.5em; margin-bottom: 10px; } III. Character Formulas STAT FORMULA Health 80 + (Level * 1.5) + (VIT * 3) Shield Defense ((STR + AGI + ENE) * 2) + ((VIT * 5) * (Level / 200)) + (Level * 12) + (DEF * 2) Ability Gauge 200 + (STR * 0.23) + (AGI * 0.23) Mana 350 + (Level * 0.8) + (ENE * 2) Minimum Attack Power (STR / 5.5) + (AGI / 9.5) Maximum Attack Power (STR / 3.5) + (AGI / 7) Attack Speed AGI / 22 Defense AGI / 5 PvM Attack Rate (Level * 3) + (AGI / 2) + (STR * 1.5) PvP Attack Rate (Level * 4) + (AGI * 2) + (STR * 4) PvM Defense Rate 300 (standard value) PvP Defense Rate (Level * 1.5) + (VIT * 1.6) + (AGI * 0.6) Minimum Elemental Damage (STR / 23) + (AGI / 23) Maximum Elemental Damage (STR / 18) + (AGI / 18) Elemental Defense 0 (standard value) Elemental Attack Rate (Level * 3) Elemental Defense Rate (Level / 2) IV. Character Specializations 0% bonus base Defense under 800 AGI 7% bonus base Defense between 800 and 1300 AGI 15% bonus base Defense over 1300 AGI 0% bonus base Attack Power under 1500 STR 7% bonus base Attack Power between 1500 and 2000 STR 15% bonus base Attack Power over 2000 STR V. Wings body { background-color: #000; color: #fff; font-family: Arial, sans-serif; } table { width: 80%; border-collapse: collapse; } th, td { border: 1px solid #fff; padding: 10px; text-align: center; } th { background-color: #333; } tr:nth-child(odd) { background-color: #222; } tr:nth-child(even) { background-color: #333; } Level Class/Requirements Wings 1 Grow Lancer " Small Cloak of Limit " 150 Grow Lancer " Cloak of Steel " 250 Grow Lancer " Cloak of Limit " 500 Miracle Lancer " Cloak of Transcendence " 1000 Shining Lancer " Cloak of Isolation" VI. Custom Changes & Balancing [UPDATED] Shining Peak: Now it is a Tier 5 skill - Mastery Skill (from Tier 4) Now requires Magic Pin Mastery from Master Tree in order to be learned and used. [UPDATED] Obsidian: Now requires 250 ENE (from 350 ENE). [UPDATED] Spin Step is now a Tier 0 skill (from Tier 1) and now requires 295 AGI (from 230 AGI). [UPDATED] Harsh Strike is now a Tier 1 skill (from Tier 0) and now requires 420 STR (from 200 STR). [UPDATED] Magic Pin is now a Tier 3 skill (from Tier 2) and now requires 785 AGI (from 520 STR). [UPDATED] Breche now requires 875 STR (from 585 AGI). [UPDATED] Wrath: Now requires 1000 AGI & 250 ENE (from 1200 STR). Can now be learned by Grow Lancer (instead of Miracle Lancer). Increased Damage: 14% (from 20%). Reduced Defense: 20% (from 25%). Duration: 7 + VIT/100 (from 12 + VIT/50). [UPDATED] Reduced the STR required to equip Alacran Lance & it now requires AGI as well. [UPDATED] Reduced the STR required to equip Pluma Lance & increased the AGI required. [UPDATED] Reduced the STR required to equip Vis Lance & it now requires AGI as well. [UPDATED] Reduced the STR required to equip Princie set items & increased the AGI required. [UPDATED] Reduced the STR required to equip Hirat set items & increased the AGI required. [UPDATED] [Master Tree] "Magic Arrow Strengthener" nerfed from 5 ~ 32 ~ 45 (level 1 / 10 / 20) to 2 ~ 19 ~ 28 (level 1 / 10 / 20). [UPDATED] [Master Tree] "Magic Pin Strengthener" nerfed from 8 ~ 52 ~ 71 (level 1 / 10 / 20) to 2 ~ 19 ~ 28 (level 1 / 10 / 20). [UPDATED] [Master Tree] "Obsidian Strengthener" nerfed from 7% ~ 40% ~ 54% (level 1 / 10 / 20) to 5% ~ 28% ~ 38% (level 1 / 10 / 20). [UPDATED] [Master Tree] "Circle Shield Strengthener" nerfed from 8 ~ 51 ~ 70 (level 1 / 10 / 20) to 2 ~ 18 ~ 25 (level 1 / 10 / 20). [UPDATED] [Master Tree] "Circle Shield Mastery" nerfed from 1% ~ 10% ~ 20% (level 1 / 10 / 20) to 0.5% ~ 5% ~ 10% (level 1 / 10 / 20). [UPDATED] [Master Tree] "Wrath Strengthener" nerfed from 1s ~ 10s ~ 20s (level 1 / 10 / 20) to 0.5s ~ 5s ~ 10s (level 1 / 10 / 20). [UPDATED] [Master Tree] "Wrath Proficiency" nerfed from -20s to -15s. [UPDATED] [Enhancement Tree] Replaced "AoE Range Enhancement" of Shining Peak with "Cast Range Enhancement". [UPDATED] [Enhancement Tree] "Shining Peak Enhancement" now start with +1 AoE Range (which means the skill can attack from 4 range but only when targeting the ground). Note: This gets in line with the actual Cast Range (when targeting something) once the "Cast Range Enhancement" is enabled. [UPDATED] [Enhancement Tree] Removed "Cast Range Enhancement", "Splash Damage Enhancement" & "Hits per Cast Enhancement" of Magic Pin. [UPDATED] [Enhancement Tree] "Skill Damage Enhancement" of Magic Pin now requires 20 Points and the increase is now 300 (as a special increase). [UPDATED] [Enhancement Tree] Removed "Hits per Cast Enhancement" of Breche. [UPDATED] [Enhancement Tree] "Skill Damage Enhancement" of Breche now requires 20 Points and the increase is now 600 (as a special increase).
-
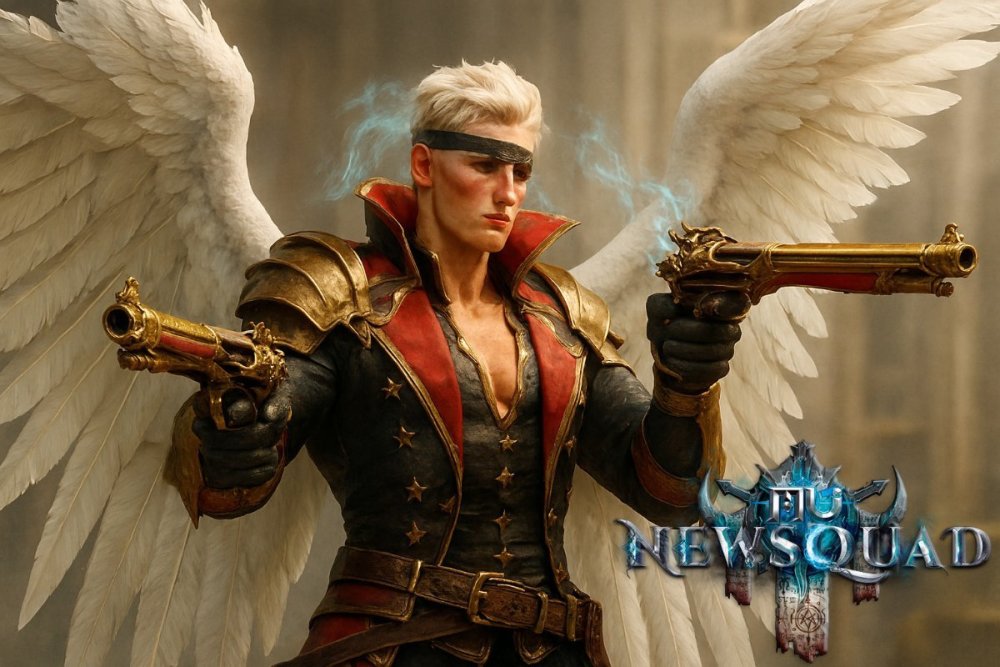
Gun Crusher Lore The lore behind the Gun Crusher revolves around a mysterious mercenary known as Acton Deadeye. Acton was a skilled gunslinger who roamed the vast continent of MU, taking on various dangerous missions and honing his combat skills. He had a reputation for being an unstoppable force on the battlefield, feared by both monsters and other mercenaries alike. One fateful day, Acton Deadeye encountered a powerful artifact known as the "Gun Flame." The Gun Flame was a legendary weapon said to harness the elemental powers of fire, giving its wielder immense destructive abilities. Intrigued by the artifact's potential, Acton made it his mission to unlock its true power and become the ultimate gunslinger. Through rigorous training and countless battles, Acton Deadeye mastered the Gun Flame and discovered that its true potential could only be fully realized by merging his spirit with the artifact. The fusion of Bustard's determination, combat prowess, and the Gun Flame's fiery power gave birth to a new being: the Gun Crusher. As a Gun Crusher, the character gains unparalleled control over the elemental forces of fire and unleashes devastating ranged attacks upon their foes. They possess exceptional agility, allowing them to dodge incoming attacks with ease. With their dual pistols, Gun Crushers rain down a hail of bullets on their enemies, shredding through their defenses and leaving a trail of destruction in their wake. However, wielding such powerful elemental forces comes with a price. The Gun Crusher must constantly battle to maintain control over the volatile energies of the Gun Flame, as failure to do so could result in catastrophic consequences. The character must rely on their inner strength, discipline, and mastery of firearms to keep the elemental powers in check and prevent them from overwhelming their existence. I. Gun Crusher Mechanics and Playstyle Ranged Attacks The Gun Crusher specializes in ranged combat, using dual pistols as their primary weapons. They have a variety of long-range skills that allow them to attack enemies from a distance, keeping them at bay while dealing consistent damage. Elemental Damage The Gun Crusher's attacks are imbued with elemental powers, primarily fire and ice. Elemental Control As Gun Crushers progress in their journey, they gain the ability to manipulate and control elemental energies. This allows them to enhance their attacks with different elemental effects, providing additional bonuses such as increased damage and crowd control. PvP and Group Dynamics Gun Crushers excel in PvP combat due to their ranged attacks and burst damage potential. They can be formidable opponents in PvP arenas and Castle Siege. Additionally, Gun Crushers can contribute to group dynamics by providing long-range support, dealing damage from a safe distance, and weakening enemies with their elemental skills. PvP and PvM Strengths The Gun Crusher is a versatile class that excels in both PvP and PvM scenarios. Their ranged attacks give them an advantage in engaging enemies from a safe distance, while their mobility allows them to quickly maneuver and outmaneuver opponents. Overall, the Gun Crusher class offers an engaging gameplay experience with its complex combat style, elemental powers, and long-ranged attacks. It rewards players who can effectively manage their positioning, evasion, and skill rotations to maximize their damage potential and survivability. II. Gun Crusher Evolutions & Quests Evolution Requirements Quest NPC Quest Gun Crusher Character Level 1 N/A N/A Gun Breaker Character level 150 or Higher Sebina the Priest Devias [183.32] [Part 1] " Secure the Scroll of the Emperor " [Part 2] " The Three Treasures of MU " Master Gun Breaker [For the 1st and 2nd Parts of the Quest] 2nd Quest Completed Character level 380 or higher [For the 3rd Part of the Quest] Character level 400 Apostle Devin Cywolf [228.49] [Part 1] " Prove your Strength " [Part 2] " Infiltrate the Barracks of Balgass " [Part 3] " Into the Realm of Darkness " Heist Gun Breaker Character Level 800 Cent Lorencia [131.147] [Part 1] " Qualification test " [Part 2] " New Battle I " [Part 3] " New Battle II " body { background-color: black; color: white; } table { width: 80%; margin: 20px auto; border-collapse: collapse; border: 2px solid white; } th, td { padding: 10px; text-align: center; border: 1px solid white; } th { background-color: #333; } tr:nth-child(even) { background-color: #222; } tr:nth-child(odd) { background-color: #444; } caption { font-size: 1.5em; margin-bottom: 10px; } III. Character Formulas STAT FORMULA Health 80 + (Level * 1.3) + (VIT * 2.4) Shield Defense ((STR + AGI + ENE) * 2) + ((VIT * 5) * (Level / 200)) + (Level * 12) + (DEF * 2) Ability Gauge 200 + (AGI * 0.35) + (ENE * 0.2) Mana 250 + (Level * 1.5) + (ENE * 1) Minimum Magical Damage ENE / 7 Maximum Magical Damage ENE / 5 Attack Speed AGI / 20 Defense AGI / 3 PvM Attack Rate (Level * 3) + (AGI * 1.2) + (ENE * 0.75) PvP Attack Rate (Level * 4) + (AGI * 2.5) + (ENE * 3.5) PvM Defense Rate 300 (standard value) PvP Defense Rate (Level * 1.5) + (VIT * 1) + (AGI * 2) Minimum Elemental Damage ENE / 20 Maximum Elemental Damage ENE / 15 Elemental Defense 0 (standard value) Elemental Attack Rate (Level * 3) Elemental Defense Rate (Level / 2) IV. Character Specializations 0% bonus base Defense under 800 AGI 7% bonus base Defense between 800 and 1300 AGI 15% bonus base Defense over 1300 AGI 0% bonus base Magical DMG under 1500 ENE 7% bonus base Magical DMG between 1500 and 2000 ENE 15% bonus base Magical DMG over 2000 ENE V. Wings body { background-color: #000; color: #fff; font-family: Arial, sans-serif; } table { width: 80%; border-collapse: collapse; } th, td { border: 1px solid #fff; padding: 10px; text-align: center; } th { background-color: #333; } tr:nth-child(odd) { background-color: #222; } tr:nth-child(even) { background-color: #333; } Level Class/Requirements Wings 1 Gun Crusher " Small Cloak of Limit " 150 Gun Crusher " Wings of Heaven " 250 Gun Breaker " Wings of Soul " 500 Master Gun Breaker " Wings of Accuracy " 1000 Heist Gun Crusher " Wings of Bloodshed " VI. Custom Changes & Balancing [UPDATED] Death Ice now have an "internal cooldown" and it is balanced around it, so it no longer consumes most of HP in few hits when Wings are equipped. [UPDATED] Ice Break AoE Range is now 1 (from 2). [UPDATED] Dark Plasma is now a Tier 3 skill (from Tier 2). [UPDATED] Death Fire: Now requires 740 ENE (from 630 ENE). AoE Range is now 1 (from 2). [UPDATED] Bursting Flare now requires 1400 ENE (from 1450) and its AoE Range is now 1 (from 2). [UPDATED] Fixed Fire: Reduced base Defense: 40% (from 50%). Increased base Magical DMG: 20% (from 30%). [UPDATED] Reduced the Attack Power of Entropy Gun from 45~51 to 15~21. [UPDATED] Reduced the Attack Power of Frere Magic Gun from 76~82 to 39~45. [UPDATED] Reduced the Attack Power of Weiwen Magic Gun from 106~112 to 76~82. [UPDATED] Reduced the STR required to equip Mastery (Bloodangel, Darkangel, etc.) set items of GC. [UPDATED] [Master Tree] "Death Fire Strengthener" nerfed from 3 ~ 22 ~ 50 (level 1 / 10 / 20) to 5 ~ 24 ~ 32 (level 1 / 10 / 20). [UPDATED] [Master Tree] "Death Fire Mastery" nerfed from 34 to 20. [UPDATED] [Master Tree] "Ice Break Strengthener" nerfed from 4 ~ 27 ~ 63 (level 1 / 10 / 20) to 5 ~ 24 ~ 32 (level 1 / 10 / 20). [UPDATED] [Master Tree] "Ice Break Mastery" nerfed from 34 to 20. [UPDATED] [Enhancement Tree] Removed "AoE Range Enhancement" of Bursting Flare. [UPDATED] [Enhancement Tree] Removed "Additional Hit per Cast", "Splash Damage Enhancement" & "Cast Range Enhancement" of Dark Plasma. [UPDATED] [Enhancement Tree] Replaced "Cooldown Removal Enhancement" of Ice Blast with "Splash Damage Enhancement". [UPDATED] [Enhancement Tree] Removed "Attack Speed Enhancement" of Ice Blast.
-
Rage Fighter Lore The origins of the Rage Fighters can be traced back to a remote village in the Land of Mu. Within this village, there was a sacred martial arts academy where warriors dedicated their lives to honing their combat skills. The most talented and dedicated warriors among them were chosen to become Rage Fighters. What sets Rage Fighters apart from other classes is their ability to harness the power of their spirits. Through intense training and discipline, they learn to tap into their inner strength, unleashing a force known as the "Dark Side." The Dark Side is a manifestation of the Rage Fighter's spiritual power. It grants them enhanced physical abilities, agility, and combat skills. The Dark Side is fueled by the fighter's intense emotions, particularly anger and determination. The Rage Fighters use their anger to channel the Dark Side, allowing them to unleash devastating attacks upon their enemies. One of the distinctive features of the Rage Fighter class is their proficiency in dual-wielding weapons. They can wield two weapons simultaneously, allowing for a rapid barrage of strikes and intricate combat techniques. This dual-wielding style combined with their mastery of martial arts makes them formidable opponents in battle. Rage Fighters see themselves as the protectors of the world against the forces of darkness. They are driven by a sense of justice and a desire to maintain balance and order. They stand on the frontlines, facing off against evil creatures and formidable enemies, ensuring the safety of the NewSquad content. As they progress in their journey, Rage Fighters can undergo a spiritual transformation known as "Fist Stigma." This transformation unlocks even greater powers, amplifying their combat abilities and granting them access to new devastating skills. The Fist Stigma allows them to tap into an even deeper connection with their inner spirit, empowering them to overcome formidable adversaries. I. Rage Fighter Mechanics and Playstyle Dual Wielding The Rage Fighter is a dual-wielding class, capable of equipping two one-handed weapons simultaneously. This allows them to deliver fast and devastating attacks, combining the power of both weapons for increased damage output. AoE Skills The Rage Fighter possesses a range of AoE skills like Dark Side that allow them to deal damage to multiple enemies simultaneously. These skills are particularly useful in crowd control situations and when facing groups of enemies. PvP Capabilities The Rage Fighter excels in PvP combat due to its high burst damage and quick attack speed. They can unleash devastating assaults on opponents, making them feared adversaries in PvP battles. Support Abilities While primarily an offensive class, the Rage Fighter also has some supportive abilities. They can utilize buffs to enhance their combat abilities or provide beneficial effects to their party members, contributing to the overall success of a group. Overall, the Rage Fighter offers a fast-paced and dynamic gameplay experience. Their mastery of martial arts, and dual-wielding capabilities, make them a formidable force on the battlefield, capable of dealing heavy damage and adapting to various combat situations. II. Rage Fighter Evolutions & Quests Evolution Requirements Quest NPC Quest Rage Fighter Character Level 1 N/A N/A Rage Fighter N/A N/A N/A Fist Master [For the 1st and 2nd Parts of the Quest] 2nd Quest Completed Character level 380 or higher [For the 3rd Part of the Quest] Character level 400 Apostle Devin Cywolf [228.49] [Part 1] " Prove your Strength " [Part 2] " Infiltrate the Barracks of Balgass " [Part 3] " Intro to the Realm of Darkness " Fist Blazer Character Level 800 Cent Lorencia [131.147] [Part 1] " Qualification test " [Part 2] " New Battle I " [Part 3] " New Battle II " body { background-color: black; color: white; } table { width: 80%; margin: 20px auto; border-collapse: collapse; border: 2px solid white; } th, td { padding: 10px; text-align: center; border: 1px solid white; } th { background-color: #333; } tr:nth-child(even) { background-color: #222; } tr:nth-child(odd) { background-color: #444; } caption { font-size: 1.5em; margin-bottom: 10px; } III. Character Formulas STAT FORMULA Health 80 + (Level * 1.4) + (VIT * 1.1) Shield Defense ((STR + AGI + ENE) * 2) + ((VIT * 3) * (Level / 200)) + (Level * 12) + (DEF * 2) Ability Gauge 200 + (STR * 0.4) Mana 350 + (Level * 0.8) + (ENE * 2) Minimum Attack Power (STR / 6) + (VIT / 10) Maximum Attack Power (STR / 4) + (VIT / 7) Attack Speed AGI / 25 Defense AGI / 5 PvM Attack Rate (Level * 3) + (AGI / 2) + (STR * 1.5) + (VIT / 2) PvP Attack Rate (Level * 4) + (AGI * 1) + (STR * 3) + (VIT * 2) PvM Defense Rate 300 (standard value) PvP Defense Rate (Level * 2) + (AGI * 0.6) + (VIT * 0.4) Minimum Elemental Damage (STR / 16) + (VIT / 28) + (AGI / 28) Maximum Elemental Damage (STR / 12) + (VIT / 23)+ (AGI / 23) Elemental Defense 0 (standard value) Elemental Attack Rate (Level * 3) Elemental Defense Rate (Level / 2) III. Character Specializations 0% bonus base Defense under 1500 AGI 7% bonus base Defense between 1500 and 2000 AGI 15% bonus base Defense over 2000 AGI 0% bonus base Attack Power under 800 STR 7% bonus base Attack Power between 800 and 1300 STR 15% bonus base Attack Power over 1300 STR V. Wings body { background-color: #000; color: #fff; font-family: Arial, sans-serif; } table { width: 80%; border-collapse: collapse; } th, td { border: 1px solid #fff; padding: 10px; text-align: center; } th { background-color: #333; } tr:nth-child(odd) { background-color: #222; } tr:nth-child(even) { background-color: #333; } Level Class/Requirements Wings 1 Rage Fighter " Small Cape of Fighter " 150 Rage Fighter " White Cloak " 250 Rage Fighter " Cape of Fighter " 500 Fist Master " Cape of Overrule " 1000 Fist Blazer " Cloak of Judgement " VI. Custom Changes & Balancing [UPDATED] Reworked RF so it now have only 2 builds (VIT & AGI). [UPDATED] Chain Drive is now a Tier 2 skill (from Tier 1) and now requires 490 VIT (from 280 VIT). [UPDATED] Dark Side now requires 760 AGI (from 560 AGI). [UPDATED] Dragon Roar now requires 345 AGI (from 260 AGI). [UPDATED] Ignore Defense now requires 250 ENE & 800 VIT (from 350 ENE). [UPDATED] Dragon Slasher now requires 700 VIT & 180 ENE (from 840 VIT). [UPDATED] Spirit Hook AoE Range is now 3 (from 1). [UPDATED] Dark Phoenix Shot Cast Range is now 3 (from 6). [UPDATED] Blood Howling: Cooldown reduced from 120 seconds to 90 seconds. DMG Formula buffed from (STR/3) to (STR*2)+(VIT*1). [UPDATED] Increase Health: Now requires 250 ENE & 500 AGI (from 350 ENE). [UPDATED] Removed Increase Block from game (including ML). [UPDATED] Reduced the Attack Power of Sacred Glove from 39~51 to 20~32. [UPDATED] Reduced the Attack Power of Holy Storm Claws from 85~97 to 70~82. [UPDATED] Reduced the STR & AGI required to equip Pantera Claws & Devast Claws. [UPDATED] Reduced the VIT required to equip Sacred Fire, Storm Zahard & Piercing Grove set items. [UPDATED] Replaced the Beast Uppercut weapon skill of Holy Storm Claws with the Killing Blow weapon skill. [UPDATED] Replaced the Killing Blow weapon skill of Piercing Blade Glove with the Beast Uppercut weapon skill. [UPDATED] Removed the Phoenix Shot skill (weapon skill replaced with Beast Uppercut). [UPDATED] [Master Tree] "Chain Drive Strengthener" buffed from 5 ~ 32 ~ 45 (level 1 / 10 / 20) to 17 ~ 96 ~ 137 (level 1 / 10 / 20). [UPDATED] [Master Tree] "Dark Side Strengthener" buffed from 5 ~ 32 ~ 45 (level 1 / 10 / 20) to 28 ~ 160 ~ 216 (level 1 / 10 / 20). [UPDATED] [Master Tree] "Glove Strengthener" nerfed from 18 ~ 107 ~ 244 (level 1 / 10 / 20) to 5 ~ 32 ~ 45 (level 1 / 10 / 20) - same as other one-hand weapons increases. [UPDATED] [Master Tree] "Increase Health Strengthener" nerfed from 11 ~ 66 ~ 89 (level 1 / 10 / 20) to 7 ~ 41 ~ 55 (level 1 / 10 / 20). [ADDED] [Enhancement Tree] A new Enhancement & its page - Chain Drive Enhancement: "Chain Drive Enhancement" -> "Weapon Damage Enhancement" -> "Additional Hit per Cast" -> "Cast Range Enhancement (+1)" -> "Hits per Cast Enhancement (+2)". [UPDATED] [Enhancement Tree] Removed "Attack Speed Enhancement" & "Hits per Cast Enhancement" of Spirit Hook. [UPDATED] [Enhancement Tree] "Skill Damage Enhancement" of Spirit Hook now requires 20 Points and the increase is now 600 (as a special increase). [UPDATED] [Enhancement Tree] Replaced "AoE Range Enhancement" of Dark Side with "Splash Damage Enhancement". [UPDATED] [Enhancement Tree] Replaced "Hits per Cast Enhancement" of Dragon Roar with "Cooldown Removal Enhancement".
-
Slayer Lore The Slayers are descendants of the ancient knights who were known as the "Abyss Knights." These Abyss Knights were renowned warriors who were charged with the duty of protecting the continent of Mu from evil forces. They dedicated their lives to battling darkness and preserving peace. Over time, the power of the Abyss Knights became tainted by darkness, and they eventually fell to corruption. However, a group of knights managed to resist the corrupting influence and remained loyal to their cause. These noble knights were known as the "Berserkers." The Berserkers were determined to cleanse their tainted lineage and rid the world of evil. They ventured into the abyss and engaged in fierce battles against the demonic forces within. Through their unwavering determination and exceptional combat skills, they emerged victorious and purified their bloodline. These purified knights became the Slayers, inheriting the power and legacy of their Abyss Knight ancestors. They embodied the essence of valor, strength, and righteousness. The Slayers swore to protect the continent of Mu and its inhabitants from any threat that might arise. Equipped with their mighty weapons, Slayers embarked on a lifelong journey, battling demons, monsters, and other malicious entities that sought to plunge the world into chaos. They honed their combat skills to perfection, becoming masters of close-quarters combat. The Slayers' combat style focuses on brute force and swift strikes, allowing them to deal devastating damage to their enemies. They possess an innate ability to tap into their inner energy, unleashing powerful combo attacks that can annihilate their foes. They can withstand formidable attacks and protect their comrades, earning a reputation as dependable protectors on the battlefield. Throughout their adventures, Slayers uncover ancient artifacts and forgotten knowledge that further augment their powers. They delve into dungeons, conquer challenging quests, and participate in epic battles to prove their worth and earn their place as legendary heroes of Mu. I. Slayer Mechanics and Playstyle Combat Style Slayers excel in close-quarters combat, relying on their exceptional physical strength and skill with various weapons. They can effectively wield swords, axes, and other melee weapons to deal devastating damage to enemies. Skills and Abilities The Slayer class has a wide array of skills and abilities that enhance their offensive capabilities. Active skills include powerful attacks, AoE abilities, and close-range skills. Buff skills enhance the Slayer's attributes, such as ignoring defense. Skills and Specializations Slayers have a range of skills and abilities that enhance their combat effectiveness. These skills include both offensive attacks and gap-closing maneuvers like Rush providing mobility, allowing Slayers to adapt to different situations and playstyles. High Physical Damage Slayers have access to powerful melee attacks, allowing them to deal significant damage to enemies in close combat. Playstyle The Slayer class is well-suited for players who enjoy close-quarters combat and dealing heavy damage. Players should focus on balancing offensive capabilities with survivability through gear and good positioning. Good positioning and timing are crucial when engaging in battles Party Support While Slayers excel in melee combat, they also have skills that benefit their party members. They can provide buffs and support effects to enhance the performance of their allies with skills like Demolish, making them valuable team players in group content such as party dungeons and raids. II. Slayer Evolutions & Quests Evolution Requirements Quest NPC Quest Slayer Character Level 1 N/A N/A Royal Slayer Character level 150 or Higher Sebina the Priest Devias [183.32] [Part 1] " Secure the Scroll of the Emperor " [Part 2] " The Three Treasures of MU " Master Slayer [For the 1st and 2nd Parts of the Quest] 2nd Quest Completed Character level 380 or higher [For the 3rd Part of the Quest] Character level 400 Apostle Devin Cywolf [228.49] [Part 1] " Prove your Strength " [Part 2] " Infiltrate the Barracks of Balgass " [Part 3] " Intro to the Realm of Darkness " Slaughterer Character Level 800 Cent Lorencia [131.147] [Part 1] " Qualification test " [Part 2] " New Battle I " [Part 3] " New Battle II " body { background-color: black; color: white; } table { width: 80%; margin: 20px auto; border-collapse: collapse; border: 2px solid white; } th, td { padding: 10px; text-align: center; border: 1px solid white; } th { background-color: #333; } tr:nth-child(even) { background-color: #222; } tr:nth-child(odd) { background-color: #444; } caption { font-size: 1.5em; margin-bottom: 10px; } III. Character Formulas STAT FORMULA Health 80 + (Level * 1.3) + (VIT * 2.4) Shield Defense ((STR + AGI + ENE) * 2) + ((VIT * 5) * (Level / 200)) + (Level * 12) + (DEF * 2) Ability Gauge 200 + (STR * 0.3) + (AGI * 0.2) Mana 350 + (Level * 1) + (ENE * 2) Minimum Attack Power (STR / 6) + (AGI / 10) Maximum Attack Power (STR / 4.5) + (AGI / 8.5) Attack Speed AGI / 23 Defense AGI / 6 PvM Attack Rate (Level * 3) + (AGI / 2) + (STR * 1.5) PvP Attack Rate (Level * 4) + (AGI * 2) + (STR * 4) PvM Defense Rate 300 (standard value) PvP Defense Rate (Level * 1.5) + (VIT * 1.6) + (AGI * 0.6) Minimum Elemental Damage (STR / 22) + (AGI / 24) Maximum Elemental Damage (STR / 17) + (AGI / 19) Elemental Defense 0 (standard value) Elemental Attack Rate (Level * 3) Elemental Defense Rate (Level / 2) IV. Character Specializations 0% bonus base Defense under 1500 AGI 7% bonus base Defense between 1500 and 2000 AGI 15% bonus base Defense over 2000 AGI 0% bonus base Attack Power under 800 STR 7% bonus base Attack Power between 800 and 1300 STR 15% bonus base Attack Power over 1300 STR V. Wings body { background-color: #000; color: #fff; font-family: Arial, sans-serif; } table { width: 80%; border-collapse: collapse; } th, td { border: 1px solid #fff; padding: 10px; text-align: center; } th { background-color: #333; } tr:nth-child(odd) { background-color: #222; } tr:nth-child(even) { background-color: #333; } Level Class/Requirements Wings 1 Slayer " Small Wings of Satan " 150 Slayer " Wings of Satan " 250 Royal Slayer " Wings of Dragon " 500 Master Slayer " Wings of Silence " 1000 Slaughterer " Wings of Condemnation " VI. Custom Changes & Balancing [UPDATED] Removed Rageful Blow as part of the SL skills (from ML as well). [UPDATED] Bat Flock: Now requires 815 AGI (from 515 AGI) Now the bats do 35% damage per second (from 40%). [UPDATED] Sword Inertia now requires 510 AGI (from 250 AGI). [UPDATED] Detection now requires 250 ENE & 1000 AGI (from 350 ENE). [UPDATED] Pierce Attack Cast Range is now 5 (from 4). [UPDATED] Demolish: Now requires 250 ENE (from 350 ENE). [UPDATED] [Master Tree] "Twisting Slash Strengthener" [SL only] buffed from 9 ~ 53 ~ 72 (level 1 / 10 / 20) to 20 ~ 113 ~ 153 (level 1 / 10 / 20). [UPDATED] [Master Tree] "Demolish Strengthener" buffed from -12s to -15s. [UPDATED] [Master Tree] "Demolish Mastery" nerfed from 23 ~ 112 ~ 150 (level 1 / 10 / 20) to 6 ~ 29 ~ 39 (level 1 / 10 / 20). [UPDATED] [Master Tree] "Bat Flock Mastery" nerfed from + 10s to + 3s. [UPDATED] [Enhancement Tree] Removed "AoE Range Enhancement", "Cast Range Enhancement" & "Hits per Cast Enhancement" of Pierce Attack. [UPDATED] [Enhancement Tree] "Skill Damage Enhancement" of Pierce Attack now requires 20 Points and the increase is now 600 (as a special increase). [UPDATED] [Enhancement Tree] Removed "Splash Damage Enhancement" & "Hits per Cast Enhancement" of Bat Flock. [UPDATED] [Enhancement Tree] Replaced "AoE Range Enhancement" of Sword Inertia with "Attack Speed Enhancement".

-
Summoner Lore The Summoners are descendants of the ancient tribe of the Kanturu, who possessed a deep understanding of magic and nature. In their pursuit of knowledge and power, the Kanturu people delved into the forbidden arts of summoning, forging a strong connection with the elemental forces of the world. Driven by their desire to maintain the balance between good and evil, Summoners learned to harness the powers of darkness and light. They are capable of communing with spirits, creatures, and mythical beasts, forming pacts and contracts with them to fight by their side. By forging these pacts, Summoners gain access to a wide array of abilities and summoning spells. To become a Summoner, individuals undergo rigorous training and initiation rituals. These rituals involve communing with ancient spirits, performing complex spells, and proving their worth through challenges and tests. Only those who exhibit exceptional magical aptitude and a strong connection with the natural world are deemed worthy of becoming Summoners. Once initiated, Summoners are granted the ability to summon and control various creatures to aid them in combat. They can summon elemental spirits, mythical creatures, and even powerful guardians. These summoned beings possess unique abilities and can provide additional firepower, protection, or utility to the Summoner. Summoners also have access to a wide range of offensive and supportive spells, allowing them to manipulate the elements, heal their allies, and weaken their enemies. They are versatile spellcasters who can adapt their strategies based on the situation at hand, making them formidable adversaries on the battlefield. I. Summoner Mechanics and Playstyle Summoning Creatures The core mechanic of the Summoner class is the ability to summon spirits to fight alongside them. Summoners can summon a variety of ethereal beings, including elementals, spirits, and guardians. These summoned creatures have their abilities and stats, and they can engage in combat or provide support to the Summoner. Buffs and Debuffs In addition to summoning spirits, Summoners possess a wide range of spells and abilities that can buff their allies or debuff their enemies. These spells can enhance the stats and abilities of the Summoner's party members, weaken enemies' defenses, or hinder their movements. Summoners can play a vital role in aiding their team and turning the tide of battles. PvP and PvM Capabilities Summoners excel in both PvP and PvM combat. In PvP, their summoned spirits can distract opponents and deal large amounts of curse damage. In PvM, the summons can provide additional damage output, making it easier for the Summoner to handle challenging monsters and bosses. Elemental Damage The Summoner possesses the power to imbue their attacks with elemental damage. They can harness the forces of Fire, Earth, Wind, and Water, allowing them to deal additional elemental damage to their enemies. They can deal pure magical damage or curse damage. By strategically utilizing the different elemental abilities, Summoners can exploit elemental weaknesses and gain an advantage in combat. AoE Spells Summoners possess powerful AoE spells that can deal damage to multiple enemies within a specific radius. These spells are especially useful when facing groups of enemies or in PvP battles, allowing the Summoner to damage multiple opponents simultaneously. II. Summoner Evolutions & Quests Evolution Requirements Quest NPC Quest Summoner Character Level 1 N/A N/A Bloody Summoner N/A N/A N/A Dimension Master [For the 1st and 2nd Parts of the Quest] 2nd Quest Completed Character level 380 or higher [For the 3rd Part of the Quest] Character level 400 Apostle Devin Cywolf [228.49] [Part 1] " Prove your Strength " [Part 2] " Infiltrate the Barracks of Balgass " [Part 3 ] " Into the Realm of Darkness " Dimension Summoner Character Level 800 Cent Lorencia [131.147] [Part 1 ] " Qualification test " [Part 2] " New Battle I " [Part 3] " New Battle II " body { background-color: black; color: white; } table { width: 80%; margin: 20px auto; border-collapse: collapse; border: 2px solid white; } th, td { padding: 10px; text-align: center; border: 1px solid white; } th { background-color: #333; } tr:nth-child(even) { background-color: #222; } tr:nth-child(odd) { background-color: #444; } caption { font-size: 1.5em; margin-bottom: 10px; } III. Character Formulas STAT FORMULA Health 80 + (Level * 1.3) + (VIT * 2.4) Shield Defense ((STR + AGI + ENE) * 2) + ((VIT * 5) * (Level / 200)) + (Level * 12) + (DEF * 2) Ability Gauge 200 + (AGI * 0.35) + (ENE * 0.2) Mana 250 + (Level * 1.4) + (ENE * 1) Maximum Magical Damage ENE / 7 Maximum Magical Damage ENE / 4.5 Maximum Curse Damage ENE / 7 Maximum Curse Damage ENE / 4.5 Attack Speed AGI / 22 Defense AGI / 4 PvM Attack Rate (Level * 3) + (AGI * 1.2) + (ENE * 0.75) PvP Attack Rate (Level * 4) + (AGI * 2.5) + (ENE * 3.5) PvM Defense Rate 300 (standard value) PvP Defense Rate (Level * 1.5) + (VIT * 1) + (AGI * 2) Minimum Elemental Damage ENE / 20 Maximum Elemental Damage ENE / 15 Elemental Defense 0 (standard value) Elemental Attack Rate (Level * 3) Elemental Defense Rate (Level / 2) III. Character Specializations 0% bonus base Defense under 800 AGI 7% bonus base Defense between 800 and 1300 AGI 15% bonus base Defense over 1300 AGI 0% bonus base Magical DMG under 1500 ENE 7% bonus base Magical DMG between 1500 and 2000 ENE 15% bonus base Magical DMG over 2000 ENE 0% bonus base Curse DMG under 1500 ENE 7% bonus base Curse DMG between 1500 and 2000 ENE 15% bonus base Curse DMG over 2000 ENE V. Wings body { background-color: #000; color: #fff; font-family: Arial, sans-serif; } table { width: 80%; border-collapse: collapse; } th, td { border: 1px solid #fff; padding: 10px; text-align: center; } th { background-color: #333; } tr:nth-child(odd) { background-color: #222; } tr:nth-child(even) { background-color: #333; } Level Class/Requirements Wings 1 Summoner " Small Wings of Curse " 150 Summoner " Wings of Cruse " 250 Bloody Summoner " Wings of Despair " 500 Dimension Master " Wings of Dimension " 1000 Dimension Summoner " Wings of Outer World " VI. Custom Changes & Balancing [UPDATED] Lightning Shock now requires 840 ENE (from 740 ENE). [UPDATED] Explosion: Now requires 400 ENE (from 280 ENE). Extra damage per second is now 50% of the initial damage (from 60%). [UPDATED] Requiem: Now requires 610 ENE (from 460). Extra damage per second is now 65% of the initial damage (from 75%). [UPDATED] Pollution now requires 650 ENE and 650 AGI (from 820 ENE). [UPDATED] Drain Life HP absorb: Formula: ((DMG*4)/100) + ENE/20 (from DMG/10 + ENE/25). [UPDATED] Damage Reflection: Cooldown removed. [UPDATED] Darkness: Base HP Reduction: 30% (from 25%). Curse DMG Increase: ENE/11 (from ENE/3.5). Defense Increase: ENE/12 (from ENE/4). [UPDATED] Berserker: Base DEF Reduction: 25% (from 30%). Base HP Reduction: 15% (from 20%). Magical DMG Increase: ENE/9 (from ENE/3.5). Attack Speed Increase: ENE/85 (from ENE/50). [UPDATED] Death Scythe: Now requires 600 AGI & 1200 ENE (from 1240 ENE). Cast & AoE Range is now 4 (from 3). [UPDATED] Aqua Beast: Now requires 700 AGI & 900 ENE (from 800 AGI & 1000 ENE). Cast Range is now 4 (from 5). [UPDATED] Fire Beast now requires 1600 ENE (from 1450 ENE). [UPDATED] Slightly reduced the STR & ENE required to equip Tier 1 Socket set items of SUM. [UPDATED] Slightly reduced the STR required to equip Tier 2 Socket set items of SUM. [UPDATED] [Master Tree] "Pollution Strengthener" nerfed from 6 ~ 39 ~ 53 (level 1 / 10 / 20) to 5 ~ 24 ~ 32 (level 1 / 10 / 20). [UPDATED] [Master Tree] "Pollution Proficiency" nerfed from from 32 to 18. [UPDATED] [Master Tree] "Pollution Mastery" nerfed from 32 to 18. [UPDATED] [Master Tree] "Chain Lightning Strengthener" nerfed from 5 ~ 32 ~ 45 (level 1 / 10 / 20) to 2 ~ 19 ~ 28 (level 1 / 10 / 20). [UPDATED] [Master Tree] "Berserker Strengthener" nerfed from 5 ~ 32 ~ 45 (level 1 / 10 / 20) to 2 ~ 19 ~ 28 (level 1 / 10 / 20). [UPDATED] [Master Tree] "Berserk Mastery" now increases Attack Speed by 10 instead of 20. [UPDATED] [Master Tree] "Darkness Mastery" now increases Defense by 80 instead of 300. [UPDATED] [Enhancement Tree] Replaced "Cooldown Removal Enhancement" of Fire Beast with "Attack Speed Enhancement". [UPDATED] [Enhancement Tree] Replaced "Hits per Cast Enhancement" of Fire Beast with "Cooldown Removal Enhancement". [UPDATED] [Enhancement Tree] Removed "AoE Range Enhancement" of Fire Beast. [UPDATED] [Enhancement Tree] Replaced "Cooldown Removal Enhancement" of Aqua Beast with "Attack Speed Enhancement". [UPDATED] [Enhancement Tree] Replaced "Hits per Cast Enhancement" of Aqua Beast with "Cooldown Removal Enhancement". [UPDATED] [Enhancement Tree] Removed "AoE Range Enhancement" of Aqua Beast. [UPDATED] [Enhancement Tree] Removed "Hits per Cast Enhancement" of Death Scythe. [UPDATED] [Enhancement Tree] Removed "Hits per Cast Enhancement" of Lightning Shock. [UPDATED] [Enhancement Tree] "Skill Damage Enhancement" of Lightning Shock now requires 20 Points and the increase is now 300 (as a special increase).

-
Dark Lord Lore The Dark Lord is a powerful warrior who possesses both strength and dark magic abilities. According to the game's lore, the Dark Lord is an ancient warrior who was once human but made a pact with the darkness to gain immense power. In his quest for power, the Dark Lord sought out forbidden knowledge and delved deep into dark magic, ultimately becoming a master of both physical combat and dark spells. The Dark Lord wields a mighty weapon known as the Scepter, which enhances his already formidable melee combat skills. This weapon is said to be infused with dark energy, allowing the Dark Lord to strike down his enemies with devastating force. In addition to his prowess in close-range combat, the Dark Lord also possesses a range of dark magic abilities. These abilities include commanding minions to aid him in battle and harnessing dark energy to unleash powerful spells. As the Dark Lord progresses in power and experience, he gains access to more potent skills and abilities. This allows players who choose the Dark Lord class to customize their playstyle and become a force to be reckoned with on the battlefield. The Dark Lord's story over the MU continent is one of redemption and the struggle against his inner darkness. He battles against the forces of evil, seeking to restore balance to the world and redeem himself from his past choices. Overall, the Dark Lord in Mu Online is a complex and formidable character class, blending martial prowess with dark magic to overcome his enemies. NewSquaders who choose the Dark Lord can experience a unique playstyle, combining close-range combat and powerful spells to dominate the battlefields. I. Dark Lord Mechanics and Playstyle Minion Summoning One of the iconic features of the Dark Lord is the ability to summon minions to aid in battle. These minions include the Dark Horse, a mount that provides mobility and additional attack power, and the Dark Raven, a loyal bird companion that assists in combat by attacking enemies. Enhancements The Dark Lord possesses a powerful buff that can affect both themselves and their allies or enemies enhancing critical strike damage. PvP Capacities The Dark Lord's versatility makes them formidable in PvP combat. They can engage in close-quarters combat, using their close-range skills and weapon mastery, while also employing dark magic spells to deal damage or hinder opponents. The combination of minion support damage-dealing abilities and buffs makes the Dark Lord a force to be reckoned with in PvP encounters. Tanking Capability With their strong armor and the companionship of the Dark Horses, Dark Lords can effectively serve as tanks. They can absorb damage and protect their party members during challenging encounters, allowing other classes to focus on dealing with damage. Overall, the Dark Lord in Mu Online offers a unique playstyle that combines close-range combat, dark magic, and the ability to summon and control minions. This versatility allows players to adapt to various situations, making the Dark Lord a popular choice for those seeking a well-rounded and formidable character class in the game. II. Dark Lord Evolutions & Quests Evolution Requirements Quest NPC Quest Dark Lord Character Level 1 N/A N/A Dark Lord N/A N/A N/A Lord Emperor [For the 1st and 2nd Parts of the Quest] 2nd Quest Completed Character level 380 or higher [For the 3rd Part of the Quest] Character level 400 Apostle Devin Cywolf [228.49] [Part 1] " Prove your Strength " [Part 2] " Infiltrate the Barracks of Balgass " [Part 3 ] " Into the Realm of Darkness " Empire Lord Character Level 800 Cent Lorencia [131.147] [Part 1 ] " Qualification test " [Part 2] " New Battle I " [Part 3] " New Battle II " body { background-color: black; color: white; } table { width: 80%; margin: 20px auto; border-collapse: collapse; border: 2px solid white; } th, td { padding: 10px; text-align: center; border: 1px solid white; } th { background-color: #333; } tr:nth-child(even) { background-color: #222; } tr:nth-child(odd) { background-color: #444; } caption { font-size: 1.5em; margin-bottom: 10px; } III. Character Formulas STAT FORMULA Health 80 + (Level * 1.2) + (VIT * 2.3) Shield Defense ((STR + AGI + ENE + CMD) * 2) + ((VIT * 5)*(Level / 200)) + (Level * 12) + (DEF * 2) Ability Gauge 200 + (STR * 0.2) + (AGI * 0.35) Mana 350 + (Level * 0.8) + (ENE * 2) Minimum Attack Power STR / 6 Maximum Attack Power STR / 3.5 Attack Speed AGI / 18 Defense AGI / 4 PvM Attack Rate (Level * 3) + (AGI * 1.25) + (STR * 0.75) PvP Attack Rate (Level * 4) + (AGI * 2.5) + (STR * 3.5) PvM Defense Rate 300 (standard value) PvP Defense Rate (Level * 1.5) + (VIT * 1) + (AGI * 2) Minimum Elemental Damage STR / 20 Maximum Elemental Damage STR / 15 Elemental Defense 0 (standard value) Elemental Attack Rate (Level * 3) Elemental Defense Rate (Level / 2) IV. Character Specializations 0% bonus base Defense under 800 AGI 7% bonus base Defense between 800 and 1300 AGI 15% bonus base Defense over 1300 AGI 0% bonus base Attack Power under 1500 STR 7% bonus base Attack Power between 1500 and 2000 STR 15% bonus base Attack Power over 2000 STR V. Wings body { background-color: #000; color: #fff; font-family: Arial, sans-serif; } table { width: 80%; border-collapse: collapse; } th, td { border: 1px solid #fff; padding: 10px; text-align: center; } th { background-color: #333; } tr:nth-child(odd) { background-color: #222; } tr:nth-child(even) { background-color: #333; } Level Class/Requirements Wings 1 Dark Lord " Small Cape of Lord " 150 Dark Lord " White Cloak " 250 Dark Lord " Cape of Lord " 500 Lord Emperor " Cape of Emperor " 1000 Empire Lord " Cloak of Dominator " VI. Custom Changes & Balancing [UPDATED] Energy no longer affects DL's damage, it is now a full STR character (damage-wise), like the SBK/SMG. [UPDATED] Fire Burst: Now requires 320 STR (from 230 STR). AoE Range is now 3 (from 4). [UPDATED] Fire Scream now requires 900 STR (from 520 STR). [UPDATED] Chaotic Diseier now requires 1100 STR (from 770 STR). [UPDATED] Electric Spark is now a Tier 2 skill (from Tier 3) and now requires 100 ENE (from 150 ENE & 250 CMD). [UPDATED] Summon: Now requires 180 ENE (from 150 ENE & 250 CMD). Cooldown is now 45 seconds (from 30 seconds). [UPDATED] Earthquake formula is now STR/12 + CMD/6 + HorseLVL*5 (from STR/10 + CMD/5 + HorseLVL*10). [UPDATED] Wind Soul: Cast Range is now 4 (from 3) AoE Range is now 1 (from 2). Now requires 1400 STR (from 1150). [UPDATED] Critical Damage: Now it is a Tier 3 skill (from Tier 2). Now requires 250 ENE (from 350 ENE). [UPDATED] Removed the Force Wave weapon skill from Battle Scepter & Master Scepter. Note: Force Wave adds "AoE" to the "Force" starting skill, and it is now available starting with Great Scepter. [UPDATED] Dark Horse Absorb % Damage is now a static 5%, no longer increased by the Horse level. [UPDATED] [Master Tree] "Fire Scream Strengthener" buffed from 5 ~ 32 ~ 45 (level 1 / 10 / 20) to 9 ~ 53 ~ 75 (level 1 / 10 / 20). [UPDATED] [Master Tree] "Fire Scream Mastery" buffed from 66 to 110. [UPDATED] [Master Tree] "Critical Damage Proficiency" nerfed from 8s ~ 51s ~ 70s (level 1 / 10 / 20) to 3s ~ 24s ~ 33s (level 1 / 10 / 20). [UPDATED] [Master Tree] "Critical Damage Mastery" nerfed from 1.07% ~ 4.56% ~ 6.05% (level 1 / 10 / 20) to 0.51% ~ 3.05% ~ 4.14% (level 1 / 10 / 20). [UPDATED] [Master Tree] "Critical Damage Mastery+" nerfed from 1.07% ~ 4.56% ~ 6.05% (level 1 / 10 / 20) to 0.56% ~ 1.69% ~ 3.03% (level 1 / 10 / 20). [UPDATED] [Enhancement Tree] Removed "AoE Range Enhancement" of Wind Soul. [UPDATED] [Enhancement Tree] Removed "AoE Range Enhancement" & "Hits per Cast Enhancement" of Chaotic Diseier. [UPDATED] [Enhancement Tree] Replaced "Cast Range Enhancement" of Fire Burst with "Attack Speed Enhancement". [UPDATED] [Enhancement Tree] Removed "Hits per Cast Enhancement" of Fire Burst. [UPDATED] [Enhancement Tree] "Skill Damage Enhancement" of Fire Burst now requires 20 Points and the increase is now 300 (as a special increase).
-
Elf Lore Over the MU continent, the Elf class is a graceful and agile race known for its unparalleled archery skills and deep connection with nature. They hail from the land of Noria, a lush and mystical realm where harmony between humans and nature is treasured. Legend has it that long ago when the world was threatened by dark forces, the Elves emerged from the enchanted forests to lend their aid. Endowed with natural beauty and exceptional dexterity, they quickly became the defenders of light and guardians of peace. The Elves are deeply attuned to the energies of nature and possess an innate ability to communicate with animals and plants. They have the remarkable talent to manipulate the elements, channeling their powers through their bows and arrows. The ancient art of archery is deeply ingrained in their culture, passed down from generation to generation. The Elves possess an ethereal beauty, with slender frames, pointed ears, and radiant features that reflect their connection with the natural world. Their attire is often crafted from organic materials such as leaves, feathers, and animal hide, further accentuating their affinity with nature. Nurtured by the enchanting forests of Noria, the Elves cultivate a profound understanding of the delicate balance between the physical and spiritual realms. They embrace the teachings of the ancients and draw strength from the energy that permeates the land. As they venture into battle, their arrows become extensions of their will, striking their enemies with precision and accuracy. In the ongoing struggle against the forces of darkness, the Elves serve as both hunters and protectors. They navigate the treacherous lands, uncovering hidden threats and safeguarding the innocent. Despite their peaceful nature, when provoked, they become fearsome adversaries, employing their mastery of archery and natural magic to vanquish any who threaten the realms they hold dear. The Elf class represents a harmonious fusion of grace, agility, and mystical prowess. With their unyielding dedication to preserving nature's sanctity and unwavering loyalty to the light, the Elves continue to shine as beacons of hope and defenders of the realm in the ever-evolving world of Mu. I. Elf Mechanics and Playstyle Agility and Evasion Elves possess high agility, granting them exceptional evasion and maneuverability. This allows them to swiftly dodge enemy attacks and position themselves advantageously on the battlefield. Their agility makes them particularly effective against melee opponents, as they can keep their distance and continuously strike from afar. Ranged Archery Combat Elves excel in long-range combat, utilizing their bows and arrows to deal damage from a distance. Their primary focus is on agility, allowing them to swiftly evade enemy attacks while maintaining a constant barrage of projectiles. Their ranged capabilities make them excellent damage dealers in party scenarios, where they can pick off enemies from a safe distance. Buffs and Support Abilities The Elf class also boasts a variety of supportive abilities that benefit both themselves and their allies. They possess a unique skill called "Buff " which can provide various boosts to nearby party members, enhancing their combat capabilities. These buffs may include increased attack and defense. Additionally, Elves have access to healing spells, enabling them to provide essential support in challenging battles. Balanced Playstyle Overall, the Elf class in Mu Online combines ranged combat, supportive abilities, and summoned creatures to offer a versatile and dynamic play style. Their proficiency in archery, combined with their support capabilities, makes them a valuable asset in both solo play and group encounters. With their agility and keen senses, Elves can adapt to various combat situations and contribute significantly to the overall success of their party. II. Elf Evolutions & Quests Evolution Requirements Quest NPC Quest Elf Character Level 1 N/A N/A Muse Elf Character level 150 or Higher Sebina the Priest Devias [183.32] [Part 1] " Secure the Scroll of the Emperor " [Part 2] " The Three Treasures of MU " High Elf [For the 1st and 2nd Parts of the Quest] 2nd Quest Completed Character level 380 or higher [For the 3rd Part of the Quest] Character level 400 Apostle Devin Cywolf [228.49] [Part 1] " Prove your Strength " [Part 2] " Infiltrate the Barracks of Balgass " [Part 3 ] " Into the Realm of Darkness " Noble Elf Character Level 800 Cent Lorencia [131.147] [Part 1 ] " Qualification test " [Part 2] " New Battle I " [Part 3] "New Battle II " body { background-color: black; color: white; } table { width: 80%; margin: 20px auto; border-collapse: collapse; border: 2px solid white; } th, td { padding: 10px; text-align: center; border: 1px solid white; } th { background-color: #333; } tr:nth-child(even) { background-color: #222; } tr:nth-child(odd) { background-color: #444; } caption { font-size: 1.5em; margin-bottom: 10px; } III. Character Formulas STAT FORMULA Health 80 + (Level * 1.3) + (VIT * 2.4) Shield Defense ((STR + AGI + ENE) * 2) + ((VIT * 5) * (Level / 200)) + (Level * 12) + (DEF * 2) Ability Gauge 200 + (STR * 0.3) + (AGI * 0.2) Mana 350 + (Level * 1) + (ENE * 2) Minimum Attack Power (STR / 6) + (AGI / 11) Maximum Attack Power (STR / 4) + (AGI / 9) Attack Speed AGI / 33 Defense AGI / 8 PvM Attack Rate (Level * 3) + (AGI / 2) + (STR * 1.5) PvP Attack Rate (Level * 4) + (AGI * 2) + (STR * 4) PvM Defense Rate 300 (standard value) PvP Defense Rate (Level * 1.5) + (VIT * 1.6) + (AGI * 0.6) Minimum Elemental Damage (STR / 22) + (AGI / 24) Maximum Elemental Damage (STR / 17 ) + (AGI / 19) Elemental Defense 0 (standard value) Elemental Attack Rate (Level * 3) Elemental Defense Rate (Level / 2) IV. Character Specializations 0% bonus base Defense under 1500 AGI 7% bonus base Defense between 1500 and 2000 AGI 15% bonus base Defense over 2000 AGI 0% bonus base Attack Power under 800 STR 7% bonus base Attack Power between 800 and 1300 STR 15% bonus base Attack Power over 1300 STR V. Wings body { background-color: #000; color: #fff; font-family: Arial, sans-serif; } table { width: 80%; border-collapse: collapse; } th, td { border: 1px solid #fff; padding: 10px; text-align: center; } th { background-color: #333; } tr:nth-child(odd) { background-color: #222; } tr:nth-child(even) { background-color: #333; } Level Class/Requirements Wings 1 Elf " Small Wings of Elf " 150 Elf " Wings of Elf " 250 Muse Elf " Wings of Spirit " 500 High Elf " Wings of Illusion " 1000 Noble Elf " Wings of Celestial Body " VI. Custom Changes & Balancing [UPDATED] Penetration now requires 360 AGI (from 280 AGI). [UPDATED] Ice Arrow now requires 250 ENE (from 350 ENE). [UPDATED] Multi-Shot now requires 880 AGI (from 640 AGI). [UPDATED] Dex Booster: Can now be learned by Muse Elf (instead of High Elf). Now requires 1000 AGI & 250 ENE (from 1000 AGI). [UPDATED] Focus Shot Cast Range is now 4 (from 5) and AoE Range is now 1 (from 2). [UPDATED] Removed SD Recovery, Heal, Greater Elemental Defense & Greater Elemental Damage skills from the game, including the 3rd/4th Tree. [UPDATED] Removed Cure & Bless from game & Master Skill Tree - they are now dedicated only to LEM. [UPDATED] Greater Damage & Greater Defense buffs only works in Valley of Loren and only during CS. [UPDATED] Removed the Triple Shot weapon skill from all starter (noria) Bows/Crossbows, it is now available starting with Tiger Bow (devias). [UPDATED] Increased the STR & AGI required to equip Combat Quiver & Devilwood Quiver, and they now require level 130 to be equipped. [UPDATED] Changes to Socket for ELF: Removed the Divine & Light Lord socket sets from the game. Seraphim (Tier 1) & Sticky (Tier 2) sets now require low AGI & low ENE in order to equip them (so they can be used by both AE & CS-EE). [UPDATED] Tweaked the base Attack Power of the ELF's Quivers: Combat Quiver: 20~30 (from 70~80). Devilwood Quiver: 70~80 (from 130~140). Bloodangel Quiver: 100~110 (from 175~185). Darkangel Quiver: 135~145 (from 220~230). Holyangel Quiver: 170~180 (from 265~275). Soul Quiver: 205~215 (from 310~320). Blue Eye Quiver: 240~250 (from 355~365). Silver Heart Quiver: 275~285 (from 400~410). Manticore Quiver: 310~320 (from 445~455). Brilliant Quiver: 345~355 (from 490~500). [UPDATED] Tweaked the base Attack Power of the ELF's Bows: Aileen Bow: 185~205 (from 200~220). Bloodangel Bow: 235~255 (from 295~315). Darkangel Bow: 290~310 (from 385~405). Holyangel Bow: 340~360 (from 475~495). Blessed Crossbow of Archangel: 360~380 (from 525~545) Soul Bow: 390~410 (from 565~585). Blue Eye Bow: 440~460 (from 655~675). Silver Heart Bow: 490~510 (from 745~765). Manticore Bow: 540~560 (from 835~855). Brilliant Bow: 590~610 (from 925~945). [UPDATED] [Master Tree] Tweaks related to bow/crossbow upgrades: Removed "Crossbow Strengthener" skill. "Bow Mastery" is now called "Bow Proficiency". "Crossbow Mastery" is now called "Bow Mastery" and it is unlocked by having 10 points in the "Bow Proficiency" skill, as well as now being a Tier 4 skill instead of a Tier 3 skill. Updated Bow Strengthener, Bow Proficiency and Bow Mastery tooltips to state that the upgrade works when equipping both Bows and Crossbows. [UPDATED] [Master Tree] "Triple Shot Strengthener" nerfed from 8 ~ 52 ~ 71 (level 1 / 10 / 20) to 2 ~ 19 ~ 28 (level 1 / 10 / 20). [UPDATED] [Master Tree] "Multi-Shot Strengthener" nerfed from 5 ~ 32 ~ 45 (level 1 / 10 / 20) to 2 ~ 19 ~ 28 (level 1 / 10 / 20). [UPDATED] [Master Tree] "Infinity Arrow Strengthener" nerfed from 1.2% ~ 6.68% ~ 9.02% (level 1 / 10 / 20) to 1% ~ 3.98% ~ 5.26% (level 1 / 10 / 20). [UPDATED] [Master Tree] "Greater Defense Strengthener" nerfed from 5.76% ~ 32.07% ~ 45.68% (level 1 / 10 / 20) to 3.34% ~ 18.6% ~ 26.49% (level 1 / 10 / 20). [UPDATED] [Master Tree] "Greater Defense Mastery" nerfed from 5.76% ~ 32.07% ~ 45.68% (level 1 / 10 / 20) to 3.34% ~ 18.6% ~ 26.49% (level 1 / 10 / 20). [UPDATED] [Master Tree] "Greater Damage Strengthener" nerfed from 5.76% ~ 32.07% ~ 45.68% (level 1 / 10 / 20) to 3.34% ~ 18.6% ~ 26.49% (level 1 / 10 / 20). [UPDATED] [Master Tree] "Greater Damage Mastery" nerfed from 5.76% ~ 32.07% ~ 45.68% (level 1 / 10 / 20) to 3.34% ~ 18.6% ~ 26.49% (level 1 / 10 / 20). [UPDATED] [Master Tree] "Ice Arrow Strengthener" now requires 15 Points, it increases the Skill Damage by 40 and it also reduces the Cooldown by 0.5 seconds. [UPDATED] [Enhancement Tree] "Party Healing Enhancement" buffed from 37 ~ 151 ~ 365 (level 1 / 10 / 20) to 62 ~ 249 ~ 603 (level 1 / 10 / 20). [UPDATED] [Enhancement Tree] "Greater Damage Enhancement" now has a maximum level of 20 (instead of 10) and the increase is now 15 ~ 60 ~ 135 (level 1 / 10 / 20). [UPDATED] [Enhancement Tree] "Greater Defense Enhancement" now has a maximum level of 20 (instead of 10) and the increase is now 8 ~ 39 ~ 101 (level 1 / 10 / 20). [UPDATED] [Enhancement Tree] Removed "Splash Damage Enhancement" of Focus Shot. [UPDATED] [Enhancement Tree] Replaced "Hits per Cast Enhancement (+2)" of Focus Shot with "Cast Range Enhancement (+2)". [UPDATED] [Enhancement Tree] Removed "Splash Damage Enhancement" of Triple Shot. [UPDATED] [Enhancement Tree] Removed "Splash Damage Enhancement" & "Hits per Cast Enhancement" of Multi-Shot. [UPDATED] [Enhancement Tree] "Skill Damage Enhancement" of Multi-Shot now requires 20 Points and the increase is now 600 (as a special increase). [UPDATED] [Enhancement Tree] Removed "Splash Damage Enhancement" & "Hits per Cast Enhancement" of Raining Arrow. [UPDATED] [Enhancement Tree] "Skill Damage Enhancement" of Raining Arrow now requires 20 Points and the increase is now 300 (as a special increase). [UPDATED] [Enhancement Tree] Removed "Splash Damage Enhancement" & "Attack Speed Enhancement" of Holy Bolt. [UPDATED] [Enhancement Tree] Replaced "Hits per Cast Enhancement (+1)" of Holy Bolt with "Hits per Cast Enhancement (+2)".
-
Magic Gladiator Lore According to the lore of the ancients, the Magic Gladiators are descendants of the ancient warrior clans who fought against the forces of darkness that threatened to engulf the world of Mu. These warriors were chosen for their exceptional talent and potential, and they underwent rigorous training to master both martial combat and the arcane arts. The Magic Gladiators draw their power from the forces of light and darkness, allowing them to wield a variety of magical spells while excelling in close-quarters combat. They are skilled with a wide range of weapons, including swords, axes, spears, and even magic staves. This versatility makes them formidable opponents in battles, capable of adapting to various combat situations. As the Magic Gladiators progress in their journey, they can unlock powerful abilities and skills unique to their class. These abilities often enhance their physical prowess, granting them increased strength and resilience. They can also harness elemental magic, such as fire, ice, and lightning, to deal devastating damage to their enemies. In the world of Mu, Magic Gladiators play a crucial role in defending the land from the forces of darkness. They are often seen as the last line of defense against the ancient evil that seeks to conquer the realm. Their ultimate goal is to bring balance and harmony to the realms by eliminating the darkness and restoring peace. I. Magic Gladiator Mechanics and Playstyle Dual Stats Magic Gladiators typically focus on increasing their Strength and Energy stats. Strength enhances their physical damage output, while Energy boosts their magical damage. Agility and Vitality are also important secondary stats that provide increased attack speed and survivability, respectively. Weapon diversity Magic Gladiators can equip a wide range of weapons, including swords, axes, spears, and magic staves. This versatility allows players to choose their preferred weapon type based on their play style. Strength builds Magic Gladiators excel in close-quarters combat, utilizing their physical strength to deal heavy damage with melee weapons. They can engage enemies directly, using their melee skills to unleash devastating combos and powerful strikes. Spellcasting Contrary to pure melee classes, Magic Gladiators can also harness magic spells to augment their damage and utility. They can cast elemental spells to inflict magical damage and crowd-control enemies. Adaptability Magic Gladiators have the advantage of being able to switch their playstyle when needed. They can switch between melee combat and spellcasting depending on the situation, allowing them to adapt to different opponents and environments. Overall, the Magic Gladiator in Mu Online offers a unique playstyle that combines the best of both melee and magical abilities. Players who enjoy a versatile and dynamic gameplay experience will find the Magic Gladiator class to be an exciting choice. II. Magic Gladiator Evolutions & Quests Evolution Requirements Quest NPC Quest Magic Gladiator Character Level 1 N/A N/A Magic Gladiator N/A N/A N/A Dual Master [For the 1st and 2nd Parts of the Quest] 2nd Quest Completed Character level 380 or higher [For the 3rd Part of the Quest] Character level 400 Apostle Devin Cywolf [228.49] [Part 1] " Prove your Strength " [Part 2] " Infiltrate the Barracks of Balgass " [Part 3 ] " Into the Realm of Darkness " Magic Knight Character Level 800 Cent Lorencia [131.147] [Part 1 ] " Qualification test " " [Part 2] 'New Battle I " " [Part 3] 'New Battle II " body { background-color: black; color: white; } table { width: 80%; margin: 20px auto; border-collapse: collapse; border: 2px solid white; } th, td { padding: 10px; text-align: center; border: 1px solid white; } th { background-color: #333; } tr:nth-child(even) { background-color: #222; } tr:nth-child(odd) { background-color: #444; } caption { font-size: 1.5em; margin-bottom: 10px; } III. Character Formulas STAT FORMULA Health 80 + (Level * 1.4) + (VIT * 2.7) Shield Defense ((STR + AGI + ENE) * 2) + ((VIT * 5) * (Level / 200)) + (Level * 12) + (DEF * 2) Ability Gauge 200 + (STR * 0.19) + (AGI * 0.25) + (ENE * 0.19) Mana 300 + (Level * 1.2) + (ENE * 1.5) Minimum Attack Power STR / 6 Maximum Attack Power STR / 4 Minimum Magical Damage ENE / 6.5 Maximum Magical Damage ENE / 3.6 Attack Speed AGI / 18 Defense AGI / 3 PvM Attack Rate (Level * 3) + (AGI * 1) + (ENE * 0.66) + (STR * 0.8) PvP Attack Rate (Level * 4) + (AGI * 2.5) + (STR * 3) + (ENE * 3) PvM Defense Rate 300 (standard value) PvP Defense Rate (Level * 1.5) + (VIT * 1) + (AGI * 2) Minimum Elemental Damage (STR / 21) + (ENE / 21) Maximum Elemental Damage (STR / 16) + (ENE / 16) Elemental Defense 0 (standard value) Elemental Attack Rate (Level * 3) Elemental Defense Rate (Level / 2) IV. Character Specializations 0% bonus base Defense under 800 AGI 7% bonus base Defense between 800 and 1300 AGI 15% bonus base Defense over 1300 AGI 0% bonus base Attack Power under 1500 STR 7% bonus base Attack Power between 1500 and 2000 STR 15% bonus base Attack Power over 2000 STR 0% bonus base Magical DMG under 1500 ENE 7% bonus base Magical DMG between 1500 and 2000 ENE 15% bonus base Magical DMG over 2000 ENE V. Wings body { background-color: #000; color: #fff; font-family: Arial, sans-serif; } table { width: 80%; border-collapse: collapse; } th, td { border: 1px solid #fff; padding: 10px; text-align: center; } th { background-color: #333; } tr:nth-child(odd) { background-color: #222; } tr:nth-child(even) { background-color: #333; } Level Class/Requirements Wings 1 Magic Gladiator " Small Wings of Heaven " 150 Magic Gladiator " Wings of Heaven " 250 Magic Gladiator " Wings of Darkness " 500 Dual Master " Wings of Ruin " 1000 Magic Knight " Wings of Annihilation " VI. Custom Changes & Balancing [UPDATED] Crusher Charge: Now requires 250 ENE & 400 AGI (from 350 ENE). Can be now learned by Magic Gladiator (instead of Dual Master). [UPDATED] Spiral Charge: Now requires 250 ENE & 1200 STR (from 350 ENE). Can be now learned by Magic Gladiator (instead of Dual Master). [UPDATED] Elemental Charge: Can be now learned by Magic Gladiator (instead of Dual Master). Magical DMG formula is now LVL/15 + ENE*0.03 (from LVL/14 + ENE*0.1). [UPDATED] Flame Strike: Now requires 620 STR (from 460 STR). Range & AoE is now 2 (from 3). Can now be used only when wearing a Two-Handed weapon. [UPDATED] Fire Slash now requires 950 STR (from 720 STR). [UPDATED] Chaos Blade: Now requires 1200 STR (from 950). Cast Range is now 1 (from 2). [UPDATED] Fire Blood: Now requires 1550 STR (from 1450). Can now be used only when wearing a Two-Handed weapon. [UPDATED] Ice Blood: Now requires 750 AGI & 1000 STR (from 700 AGI & 700 STR). Cast Range is now 2 (from 3). AoE Range is now 3 (from 2). Its Sword Explosion now does damage in a 2x2 range of the targets hit. Can now be used only when wearing a One-Handed weapon. [UPDATED] Havok Spear now requires 1150 ENE (from 1200 ENE). [UPDATED] Dark Blast AoE Range is now 1 (from 2). [UPDATED] Meteor Slap now requires 1400 ENE (from 1450 ENE) & its AoE Range is now 1 (from 2). [UPDATED] Removed the ENE & reduced the AGI required to equip Mastery (Bloodangel, Darkangel, etc.) Gladiator 2-Hand Swords while slightly increasing the STR required. [UPDATED] Removed the ENE required to equip Mastery (Bloodangel, Darkangel, etc.) Gladiator (1H) Swords. [UPDATED] Reduced the ENE required to equip Mastery (Bloodangel, Darkangel, etc.) set items of EMG. [UPDATED] Reduced the STR required to equip Tier 1 Socket set items of EMG. [UPDATED] Slightly reduced the AGI required to equip Mastery (Bloodangel, Darkangel, etc.) set items of SMG. [UPDATED] [Master Tree] "Gigantic Storm Strengthener" nerfed from 6 ~ 39 ~ 53 (level 1 / 10 / 20) to 5 ~ 24 ~ 32 (level 1 / 10 / 20). [UPDATED] [Master Tree] "Fire Slash Mastery" nerfed from 1.13% ~ 3.44% ~ 7% (level 1 / 10 / 20) to 1.13% ~ 2.71% ~ 5.14% (level 1 / 10 / 20). [UPDATED] [Enhancement Tree] Replaced "Cast Range Enhancement" of Dark Blast with "Attack Speed Enhancement". [UPDATED] [Enhancement Tree] Removed "Splash Damage Enhancement" of Dark Blast. [UPDATED] [Enhancement Tree] Replaced "Hits per Cast Enhancement" of Dark Blast with "Cast Range Enhancement (+2)". [UPDATED] [Enhancement Tree] Removed "Hits per Cast Enhancement" of Havok Spear. [UPDATED] [Enhancement Tree] Removed "AoE Range Enhancement", "Splash Damage Enhancement" & "Hits per Cast Enhancement" of Gigantic Storm. [UPDATED] [Enhancement Tree] Removed "Splash Damage Enhancement" of Evil Spirit. [UPDATED] [Enhancement Tree] "AoE Range Enhancement" of Evil Spirit now requires 20 points and now adds +2 AoE Range. [UPDATED] [Enhancement Tree] Removed "Splash Damage Enhancement" & "Hits per Cast Enhancement" of Chaos Blade. [UPDATED] [Enhancement Tree] Removed "Splash Damage Enhancement" & "Cast Range Enhancement" of Fire Slash. [UPDATED] [Enhancement Tree] Removed "Attack Speed Enhancement" of Fire Blood. [UPDATED] [Enhancement Tree] Replaced "Splash Damage Enhancement" of Fire Blood with "AoE Range Enhancement". [UPDATED] [Enhancement Tree] Removed "Attack Speed Enhancement", "Splash Damage Enhancement" & "Hits per Cast Enhancement" of Ice Blood. [UPDATED] [Enhancement Tree] "Skill Damage Enhancement" of Ice Blood now requires 20 Points and the increase is now 300 (as a special increase).
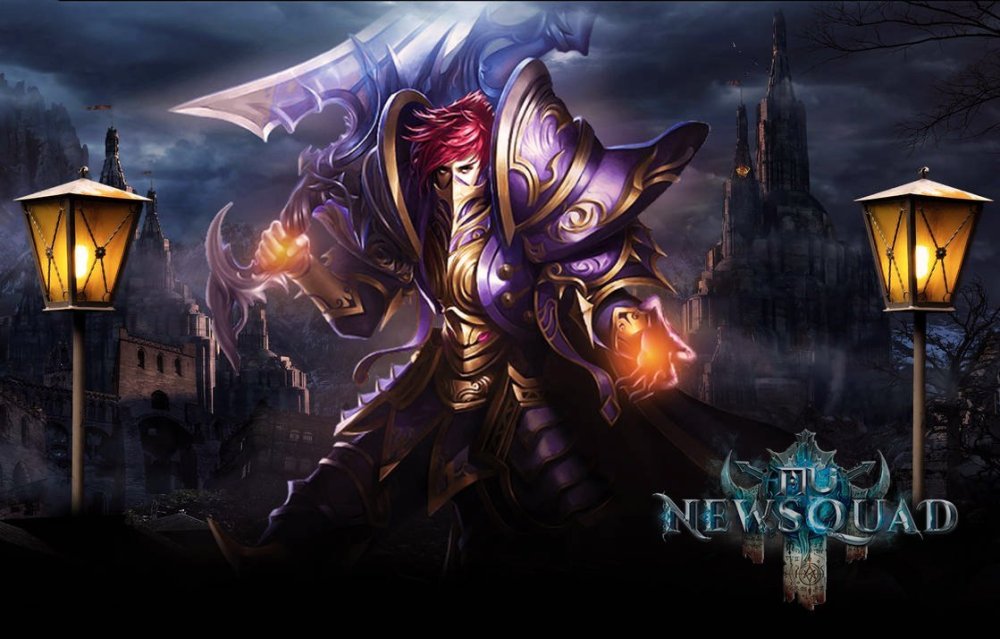
-
Dark Knight Lore The Dark Knights possessed unwavering loyalty and a deep connection to the forces of darkness. Through rigorous training and exposure to ancient rituals, these warriors unlocked their true potential and evolved into Blade Knights. This transformation empowered them with heightened physical abilities and mastery over various deadly weapons. The Blade Knights trace their origins back to the ancient continent of MU. Legends spoke of an era when darkness shrouded the land and demonic forces threatened its very existence. In the face of this looming peril, a group of elite warriors emerged, known as the Dark Knights. These warriors dedicated their lives to protecting the realm and its inhabitants from the forces of evil. Blade Knights are renowned for their proficiency in wielding a variety of weapons. They excel in close-quarters combat and can adapt to various combat situations. Whether a massive two-handed sword or dual-wielding blades, Blade Knights can unleash devastating attacks that cleave through enemies and leave a trail of destruction in their wake. These Knights are frontline warriors, often leading the charge into battle. They employ a combination of brute strength, and expert swordsmanship to overwhelm their opponents. Their versatility allows them to engage in solo combat and group battles, making them valuable assets in any party or guild. Once Blade Knights have achieved exceptional strength and skill, they can ascend further to become Blade Masters. The path to becoming a Blade Master is arduous, requiring the completion of challenging quests and overcoming powerful adversaries. As Blade Masters, their combat prowess peaks, allowing them to strike with unparalleled speed and devastating force. I. Dark Knight Mechanics and Playstyle The Dark Knight's playstyle revolves around being a durable melee combatant with strong offensive capabilities. They are adept at soaking up damage, engaging enemies in close combat, and providing support to their party members. Whether as a stalwart defender or a fearsome damage dealer, the Dark Knight class offers a versatile and engaging play experience over the New Squad grounds. Durability The Dark Knight excels in durability, making them a reliable front-line tank. They possess high base health and defense, allowing them to withstand significant amounts of damage from enemies. Their resilience is further enhanced by the ability to use defensive abilities and shields, providing additional protection against incoming attacks. Potent Close Combat Skills The Dark Knight specializes in close-quarters combat, wielding two-handed weapons, two one-handed, weapons, or one-handed swords and shields. They have access to a variety of skills that focus on dealing direct damage to enemies at close range. With their exceptional strength and proficiency in swordsmanship, Dark Knights can unleash devastating combos and strikes, obliterating foes in their path. Versatile Offensive and Defensive Skills Dark Knights possess a range of offensive and defensive skills that enhance their combat effectiveness. They can unleash powerful attacks blasting through enemies in the process. Additionally, they have access to defensive skills that bolster their survivability or provide support to their allies, such as damage reduction buffs or crowd control abilities. Party Support While the Dark Knight primarily focuses on their own survivability and damage output, they also bring supportive benefits to party play. They can provide defensive buffs to increase the overall durability of their allies or enhance their party members' damage output through party-wide buffs. This makes the Dark Knight a valuable asset in PvP group battles and PvE scenarios. Strategic Positioning Despite their strong defensive capabilities, Dark Knights must still consider their positioning in combat. They need to be mindful of their surroundings and maneuver to their advantage. Positioning themselves to draw enemy attention away from more fragile party members or trapping opponents in corners to maximize the effectiveness of their AoE skills are key tactical considerations. II. Dark Knight Evolutions & Quests Evolution Requirements Quest NPC Quest Dark Knight Character Level 1 N/A N/A Blade Knight Character level 150 or Higher Sebina the Priest Devias [183.32] [Part 1] " Secure the Scroll of the Emperor " [Part 2] " The Three Treasures of MU " Blade Master [For the 1st and 2nd Parts of the Quest] 2nd Quest Completed Character level 380 or higher [For the 3rd Part of the Quest] Character level 400 Apostle Devin Cywolf [228.49] [Part 1] " Prove your Strength " [Part 2] " Infiltrate the Barracks of Balgass " [Part 3] " Into the Realm of Darkness " Dragon Knight Character Level 800 Cent Lorencia [131.147] [Part 1] " Qualification test " [Part 2] " New Battle I " [Part 3] " New Battle II " body { background-color: black; color: white; } table { width: 80%; margin: 20px auto; border-collapse: collapse; border: 2px solid white; } th, td { padding: 10px; text-align: center; border: 1px solid white; } th { background-color: #333; } tr:nth-child(even) { background-color: #222; } tr:nth-child(odd) { background-color: #444; } caption { font-size: 1.5em; margin-bottom: 10px; } III. Character Formulas STAT FORMULA Health 80 + (Level * 1.5) + (VIT * 3) Shield Defense ((STR + AGI + ENE) * 2) + ((VIT * 5)*(Level / 200)) + (Level * 12) + (DEF * 2) Ability Gauge 200 + (STR * 0.2) + (AGI * 0.35) Mana 350 + (Level * 0.8) + (ENE * 2) Minimum Attack Power STR / 7 Maximum Attack Power STR / 4 Attack Speed AGI / 22 Defense AGI / 4 PvM Attack Rate (Level * 3) + (AGI * 1.25) + (STR * 0.75) PvP Attack Rate (Level * 4) + (AGI * 2.5) + (STR * 3.5) PvM Defense Rate 300 (standard value) PvP Defense Rate (Level * 1.5) + (VIT * 1) + (AGI * 2) Minimum Elemental Damage STR / 20 Maximum Elemental Damage STR / 15 Elemental Defense 0 (standard value) Elemental Attack Rate (Level * 3) Elemental Defense Rate (Level / 2) IV. Character Specializations 0% bonus base Defense under 800 AGI 7% bonus base Defense between 800 and 1300 AGI 15% bonus base Defense over 1300 AGI 0% bonus base Attack Power under 1500 STR 7% bonus base Attack Power between 1500 and 2000 STR 15% bonus base Attack Power over 2000 STR body { background-color: #000; color: #fff; font-family: Arial, sans-serif; } table { width: 80%; border-collapse: collapse; } th, td { border: 1px solid #fff; padding: 10px; text-align: center; } th { background-color: #333; } tr:nth-child(odd) { background-color: #222; } tr:nth-child(even) { background-color: #333 V. Wings Level Class/Requirements Wings 1 Dark Knight " Small Wings of Satan " 150 Dark Knight " Wings of Satan " 250 Blade Knight " Wings of Dragon " 500 Blade Master " Wings of Storm " 1000 Dragon Knight " Wings of Flame God " VI. Custom Changes & Balancing [UPDATED] Death Stab: Now requires 650 STR (from 550 STR). AoE Range is now 0 (from 1). [UPDATED] Rageful Blow: Now requires 900 STR (from 620 STR). AoE Range is now 4 (from 5). [UPDATED] Sword Blow: Cast Range is now 4 (from 3) AoE Range is now 4 (from 3). [UPDATED] Sword Fury: Now requires 1200 STR (from 1060 STR). Can now be learned by Blade Knight (instead of Blade Master). [UPDATED] Solid Protection: Can now be learned by Blade Knight (instead of Blade Master). [UPDATED] Strong Belief: Now requires 800 AGI (from 860 AGI). Can now be learned by Blade Knight (instead of Blade Master). [UPDATED] Reduced the STR required to equip Mastery (Bloodangel, Darkangel, etc.) set items of BK. [UPDATED] Slightly reduced the STR required to equip Mastery (Bloodangel, Darkangel, etc.) Knight Swords. [UPDATED] Changes to Socket for BK: Removed the Brave & Lazy Wind socket sets from the game. Titan (Tier 1) & Stormwing (Tier 2) sets now require low STR & low AGI in order to equip them (so they can be used by both SBK & ABK). [UPDATED] Reduced the STR needed for BA, DA, ... Brilliant Swords (BK) in order for them to be viable for ABKs (our equivalent of the default EBKs). [UPDATED] Increased the AGI needed for BA, DA, ... Brilliant Shields (BK). [UPDATED] Reduced the Defense Rate of all BA, DA, ... Brilliant Shields (BK). [UPDATED] Corrected the BA, DA, ... Brilliant Shields (BK) tooltip to reflect how their special effect works (it reduces damage received by their Defense Rate * the value based on Shield level - 0.1 at +0 up to 2.4 at +15). [UPDATED] [Master Tree] Removed "Sword Fury Strengthener" from the Master Tree. [UPDATED] [Master Tree] "Solid Protection Mastery" nerfed from 4 ~ 31 ~ 50 (level 1 / 10 / 20) to 3 ~ 19 ~ 29 (level 1 / 10 / 20). [UPDATED] [Enhancement Tree] Removed "Health Conversion Enhancement", "Damage Conversion Enhancement" & "Party Defense Enhancement" skills (part of Solid Protection Enhancement). [UPDATED] [Enhancement Tree] "Solid Protection Enhancement" nerfed from 63 ~ 90 ~ 120 (level 1 / 10 / 20) to 6 ~ 30 ~ 80 (level 1 / 10 / 20). [UPDATED] [Enhancement Tree] "Health Enhancement" (part of Solid Protection Enhancement) now has a maximum level of 20 (instead of 15) and the increase is now 103 ~ 241 ~ 462 (level 1 / 10 / 20). [UPDATED] [Enhancement Tree] "Party Damage Enhancement" (part of Solid Protection Enhancement) nerfed from 29 ~ 57 ~ 107 (level 1 / 10 / 20) to 4 ~ 19 ~ 53 (level 1 / 10 / 20). [UPDATED] [Enhancement Tree] Replaced "Splash Damage Enhancement" of Fire Blow with "Attack Speed Enhancement". [UPDATED] [Enhancement Tree] Removed Hits per Cast Enhancement of Fire Blow. [UPDATED] [Enhancement Tree] Removed "Cast Range Enhancement" of Fire Blow. [UPDATED] [Enhancement Tree] Skill Damage Enhancement of Fire Blow now requires 20 Points and the increase is now 600 (as a special increase). [UPDATED] [Enhancement Tree] Removed "AoE Range Enhancement" & "Hits per Cast Enhancement" of Death Stab. [UPDATED] [Enhancement Tree] "Skill Damage Enhancement" of Death Stab now requires 20 Points and the increase is now 600 (as a special increase). [UPDATED] [Enhancement Tree] Removed "Attack Speed Enhancement" of Rageful Blow. [UPDATED] [Enhancement Tree] Replaced "Hits per Cast Enhancement (+3)" of Rageful Blow with "Hits per Cast Enhancement (+1)". [UPDATED] [Enhancement Tree] Replaced "Attack Speed Enhancement"t of Sword Blow with "AoE Range Enhancement". [UPDATED] [Enhancement Tree] Removed "Splash Damage Enhancement" & "Hits per Cast Enhancement" of Sword Blow. [UPDATED] [Enhancement Tree] "Skill Damage Enhancement" of Sword Blow now requires 20 Points and the increase is now 300 (as a special increase). [UPDATED] [Enhancement Tree] Removed "AoE Range Enhancement" & "Splash Damage Enhancement" of Destruction. [UPDATED] [Enhancement Tree] "Skill Damage Enhancement" of Destruction now requires 20 Points and the increase is now 600 (as a special increase).
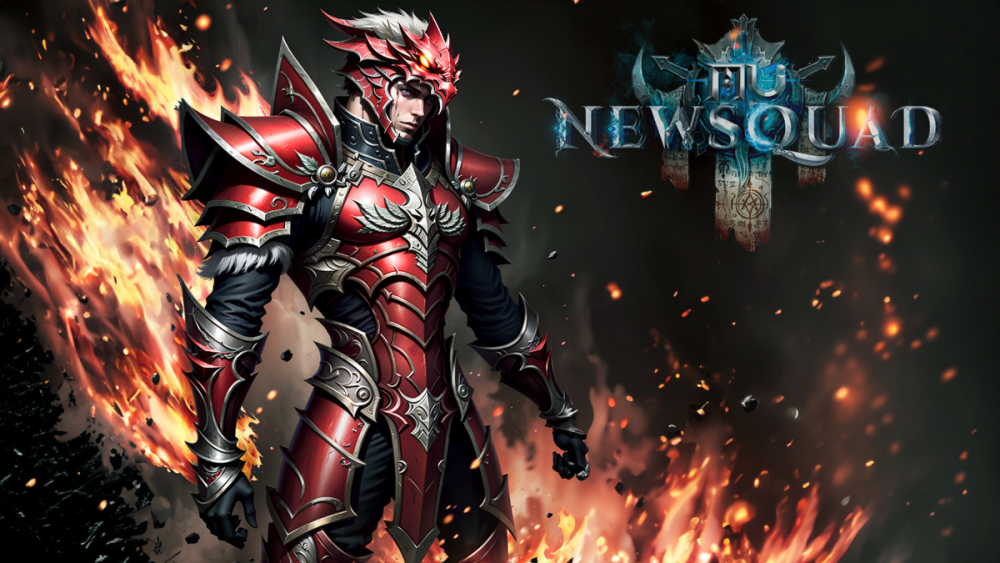
-
Dark Wizard Lore Long ago, the sorcerers of Arka roamed the lands, revered as wise scholars and protectors of ancient knowledge. They were attuned to the natural forces that shaped the world, harnessing the power of fire, ice, and lightning. The Arka descendants had an innate ability to manipulate these elemental energies, channeling them into devastating spells. As time passed, a group of these mages became deeply enamored with the mysteries of the arcane arts. They delved into forbidden knowledge, exploring the depths of magic beyond what was deemed safe. Consumed by their insatiable thirst for power, they abandoned their previous roles as guardians of wisdom and delved deeper into the study of elemental magic. Among them, a select group of scholars, seekers of forbidden knowledge, delved into the darkest aspects of magic, willing to embrace the shadows to gain ultimate power. These individuals, known as Dark Wizards, were drawn to the allure of arcane secrets and the untapped potential of dark magic. They sought out ancient tomes and esoteric rituals, exploring the forbidden depths of their craft. Through their relentless pursuit, they gained a deep understanding of the hidden forces in the shadows, even learning to control the evil spirits of the Underworld. A desire for power, knowledge, and control drives Dark Wizards. They manipulate the very essence of darkness and channel it into devastating spells and curses. Their mastery of dark magic allows them to cast spells that, inflict curses, and manipulate shadows to their advantage, while keeping the ability to harness and use the power of the elements, as their ancestors did. As Dark Wizards continued to advance in their magical prowess, some sought to unlock even more significant potential. These ambitious individuals embarked on a path of self-discovery, delving deeper into the mysteries of the soul and the intricate connections between life force and magic. Through their journey, they transcended their status as Dark Wizards, evolving into Soul Masters. Soul Masters are attuned to the inner energies of living beings and possess a unique understanding of the elemental plains. They have learned to manipulate this energy, using it to enhance their powers and cast devastating spells. With their heightened mastery over fire-based magic, Soul Masters can engulf their enemies in scorching flames, leaving a trail of destruction in their wake. The 'Soul Master' transformation is not only physical but also spiritual. They have transcended the boundaries of mere mortals, gaining insight into the very essence of existence. They embody the delicate balance between light and darkness, life and death, and their powers reflect this harmonious connection. I. Dark Wizard Mechanics and Playstyle The Dark Wizard playstyle revolves around strategic positioning, skill management, and the ability to control the battlefield. They are masters of magic, dealing devastating damage while maintaining control over groups of enemies. Their enhanced defense, their offensive capabilities, and crowd control make them a formidable force on the New Squad Battlefields. Magic-based Class The Dark Wizard relies heavily on magic to deal damage and control the battlefield. They have many offensive spells that can be cast from a distance. Their spells, including fire, ice, and lightning, are primarily elemental-based, allowing for versatile gameplay. Mana Management Mana management is crucial for Dark Wizards as their spells consume mana. Dark Wizards may need to strategically use potions to replenish their mana during intense battles, at least in the game's early stages. AoE Damage The Dark Wizard excels at dealing with AoE damage, making them formidable against groups of enemies. They can unleash powerful spells that hit multiple targets at once, clearing waves of monsters efficiently. This makes them valuable in party situations where crowd control and clearing mobs are essential. Crowd Control The Dark Wizard has access to spells that can crowd control enemies, such as slowing or disrupting their position. This enables the Dark Wizard to control the flow of battle and give their party members an advantage. The ability to slow down enemies is particularly useful in PvP encounters. Defense Despite their defensive stats and skills, they can also rely on their offensive abilities and crowd control to keep enemies at bay and avoid taking direct hits using spells like Teleport or Lightning. Positioning and timing are crucial for Dark Wizards to minimize damage received and maximize their effectiveness. Burst Damage Dark Wizards excel at dealing burst damage, particularly with their high-level spells. They can unleash devastating spells that can quickly eliminate foes. Timing and skill management are essential to maximize the potential of their burst damage capabilities. Support Abilities While primarily a damage-dealing class, Dark Wizards also possess some support abilities. They can provide utility to their party members through spells that provide a defensive magic shield or enhance magical damage. Dark Wizards can contribute to the success of a party by boosting their allies' effectiveness. II. Dark Wizard Evolutions & Quests Evolution Requirements Quest NPC Quest Dark Wizard Character Level 1 N/A N/A Soul Master Character level 150 or Higher Sebina the Priest Devias [183.32] [Part 1] " Secure the Scroll of the Emperor " [Part 2] " The Three Treasures of MU " Grand Master [For the 1st and 2nd Parts of the Quest] 2nd Quest Completed Character level 380 or higher [For the 3rd Part of the Quest] Character level 400 Apostle Devin Cywolf [228.49] [Part 1] " Prove your Strength " [Part 2] " Infiltrate the Barracks of Balgass " [Part 3] " Into the Realm of Darkness " Soul Wizard Character Level 800 Cent Lorencia [131.147] [Part 1] " Qualification test " [Part 2] " New Battle I " [Part 3] " New Battle II " body { background-color: black; color: white; } table { width: 80%; margin: 20px auto; border-collapse: collapse; border: 2px solid white; } th, td { padding: 10px; text-align: center; border: 1px solid white; } th { background-color: #333; } tr:nth-child(even) { background-color: #222; } tr:nth-child(odd) { background-color: #444; } caption { font-size: 1.5em; margin-bottom: 10px; } III. Character Formulas STAT FORMULA Health 80 + (Level * 1.3) + (VIT * 2.4) Shield Defense ((STR + AGI + ENE) * 2) + ((VIT * 5) * (Level / 200)) + (Level * 12) + (DEF * 2) Ability Gauge 200 + (ENE * 0.2) + (AGI * 0.35) Mana 250 + (Level * 1.5) + (ENE * 1) Minimum Magical Damage ENE / 5 Maximum Magical Damage ENE / 3 Attack Speed AGI / 16 Defense AGI / 3 PvM Attack Rate (Level * 3) + (AGI * 1.2) + (ENE * 0.75) PvP Attack Rate (Level * 4) + (AGI * 2.5) + (ENE * 3.5) PvM Defense Rate 300 (standard value) PvP Defense Rate (Level * 1.5) + (VIT * 1) + (AGI * 2) Minimum Elemental Damage ENE / 20 Maximum Elemental Damage ENE / 15 Elemental Defense 0 (standard value) Elemental Attack Rate (Level * 3) Elemental Defense Rate (Level / 2) IV. Character Specializations 0% bonus base Defense under 800 AGI 7% bonus base Defense between 800 and 1300 AGI 15% bonus base Defense over 1300 AGI 0% bonus base Magical DMG under 1500 ENE 7% bonus base Magical DMG between 1500 and 2000 ENE 15% bonus base Magical DMG over 2000 ENE V. Wings body { background-color: #000; color: #fff; font-family: Arial, sans-serif; } table { width: 80%; border-collapse: collapse; } th, td { border: 1px solid #fff; padding: 10px; text-align: center; } th { background-color: #333; } tr:nth-child(odd) { background-color: #222; } tr:nth-child(even) { background-color: #333; } Level Class/Requirements Wings 1 Dark Wizard " Small Wings of Heaven " 150 Dark Wizard " Wings of Heaven " 250 Soul Master " Wings of Soul " 500 Grand Master " Wings of Eternal " 1000 Soul Wizard " Wings of Elysium " VI. Custom Changes & Balancing [UPDATED] Twister now requires 140 ENE (from 155 ENE). [UPDATED] Inferno now requires 255 ENE (from 225). [UPDATED] Evil Spirit now requires 485 ENE (from 330 ENE). [UPDATED] Teleport now requires 300 AGI (from 250 AGI). [UPDATED] Ice Storm now requires 610 ENE and 500 AGI (from 850 ENE and 450 AGI). [UPDATED] Decay now requires 840 ENE (from 720 ENE). [UPDATED] Slightly reduced the STR required to equip Mastery (Bloodangel, Darkangel, etc.) & Tier 1 Socket set items of SM. [UPDATED] Meteor Strike now requires 1180 ENE (from 1220). [UPDATED] [Master Tree] Removed "Decay Strengthener" from the SM's Master Tree. [UPDATED] [Master Tree] "Soul Barrier Strengthener" nerfed from 1.81% ~ 10.02% ~ 13.52% (level 1 / 10 / 20) to 0.5% ~ 4.3% ~ 6% (level 1 / 10 / 20). [UPDATED] [Master Tree] "Soul Barrier Proficiency" nerfed from 8s ~ 51s ~ 70s (level 1 / 10 / 20) to 3s ~ 24s ~ 33s (level 1 / 10 / 20). [UPDATED] [Enhancement Tree] Replaced "Splash Damage Enhancement" of Meteor Strike with "Attack Speed Enhancement". [UPDATED] [Enhancement Tree] Removed "Hits per Cast Enhancement" of Meteor Strike. [UPDATED] [Enhancement Tree] "Skill Damage Enhancement" of Meteor Strike now requires 20 Points and the increase is now 250 (as a special increase). [UPDATED] [Enhancement Tree] Replaced "Hits per Cast Enhancement" of Meteor Storm with "Cooldown Removal Enhancement". [UPDATED] [Enhancement Tree] Removed "Hits per Cast Enhancement" & "Attack Speed Enhancement" of Meteor Storm. [UPDATED] [Enhancement Tree] Removed "Splash Damage Enhancement" of Evil Spirit. [UPDATED] [Enhancement Tree] "AoE Range Enhancement" of Evil Spirit now requires 20 points and now adds +2 AoE Range.

-
Acheron Guardian Periodically in Acheron, a Cursed Obelisk is summoned by Lord Kundun. This Obelisk empowers the surrounding elemental monsters and blesses them with strength. Kundun summons the obelisk consistently, attacking Alkmaar, Ubaid, or Debenter, in an attempt to kill unprepared NewSquaders. Help destroy Cursed Obelisk, and in doing so, receive some well-deserved loot along the way. How do I participate? You need to speak with Sir Lesnar, located in Lorencia (x131-y114). He will allow you entrance to the Acheron Guardian Event when the time is right. To enter, talk to him and click Dialogue Option 9 (Entering as Protector of Acheron). Gameplay The arena is an exact copy of Acheron but with only 3 of the sub-areas: Alkmaar, Ubaid & Debenter. The Event map is a different map than the actual Acheron map, and therefore are no other monsters in it except the event-related monsters. The game client will make a System Notice when the Acheron Guardian event starts. When started, the Cursed Obelisk will instantly spawn with the Boss Monsters summoned around it. The Cursed Obelisk is summoned randomly in one of the three maps once the Event starts, and you need to destroy it to complete the event. Cursed Obelisk's has a random Elemental Type. You must search each area to find which location the Cursed Obelisk is in. Each area has specific coordinates in which the Cursed Obelisk will spawn (center of the map). The higher-level Boss Monster can summon additional lower-level Monsters. All monsters and the obelisk are spawned with the same random Elemental Type. The Obelisk randomly summons a wave of Monsters Tier 1 Monsters that can be summoned These monsters can also be summoned by the Tier 2 Monsters and are usually weaker. CURSED GNOME CURSED HELLRAISER CURSED SALAMANDER CURSED SYLPHID CURSED UNDINE Tier 2 Monsters (These are the higher-level Boss Monsters) CURSED NORMUS- May summon additional Cursed Gnome Monsters. CURSED MUFF- May summon additional Cursed Hellraiser Monsters. CURSED SELLIHODEN- May summon additional Cursed Salamander Monsters. CURSED SILLA - May summon additional Cursed Sylphid Monsters. CURSED UKANVA - May summon additional Cursed Undine Monsters. Winning Acheron Guardian The Event is won by destroying the Cursed Obelisk under the 30-minute mark. When the Cursed Obelisk is taken down, all other monsters will instantly disappear. This Event will announce the Character Name of the winner, via System Notice.

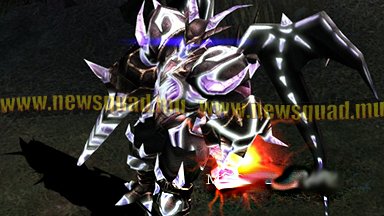
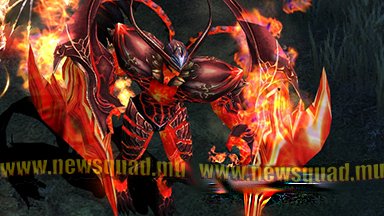
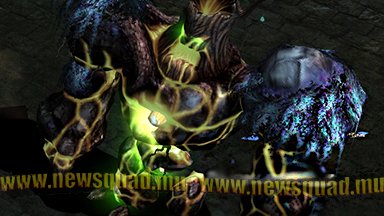
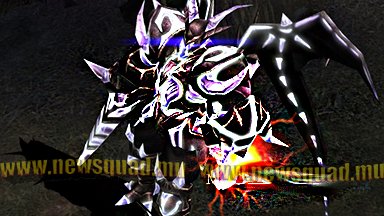
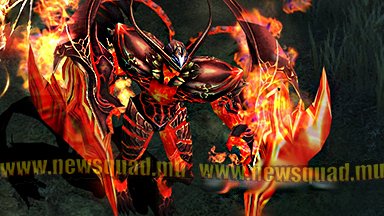
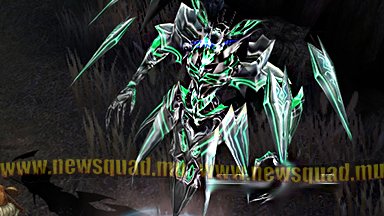
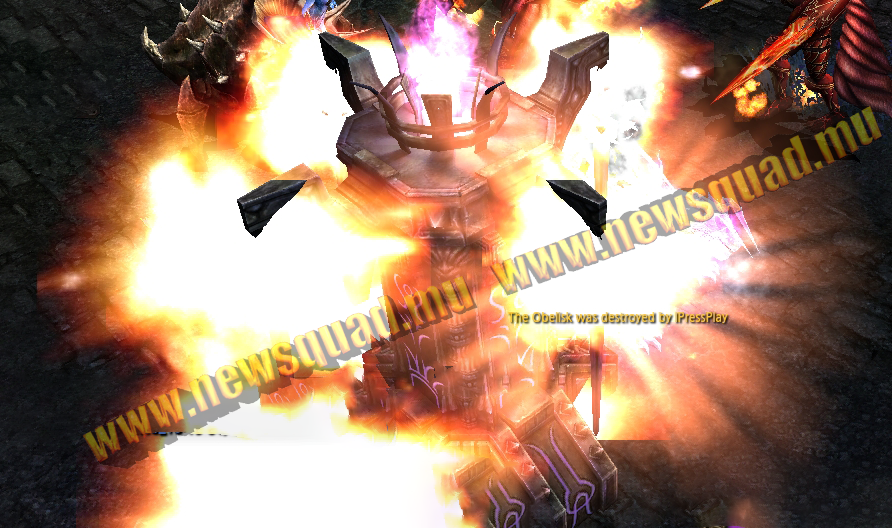
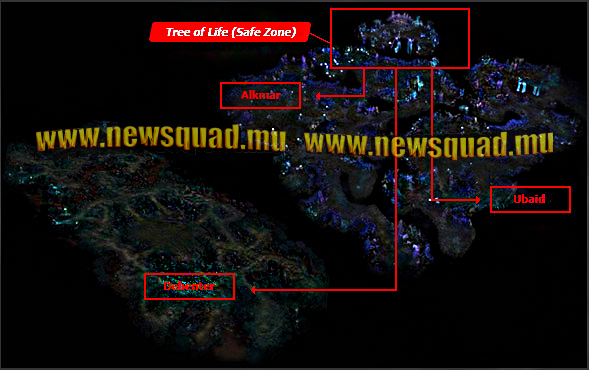
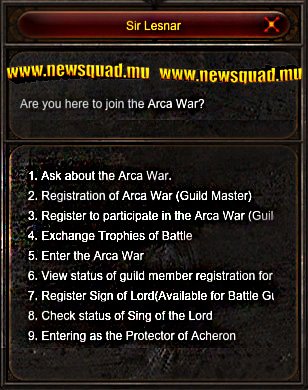
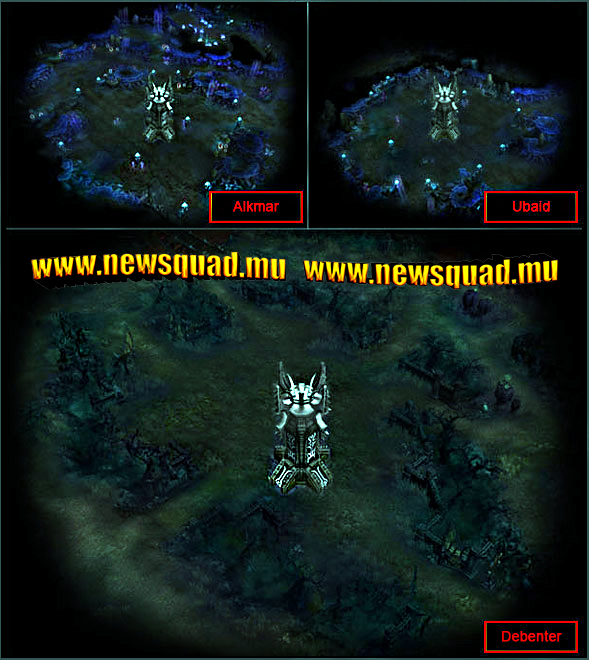
-
Crywolf Game-play This is a server-wide event where anyone can participate and contribute. The main objective is to protect the Wolf Statue while killing monsters, Dark Elves and the final boss Balgass. The Wolf Statue This enormous tutelary statue was created from the ancient strength of elves so it has the power to protect itself from the evil spirits which keep away Kundun's troops. But the statue becomes weak once a week and gets attacked by Kundun's troops led by Balgass. There are 5 altars around the statue for protection and when these altars are destroyed the statue will lose its power to protect the Fortress of Crywolf. The Wolf Statue has 5 Wolf Altars around it. The statue can be strengthened by Elf characters who can make a Connection with the Wolf Altar. If there are no Elves connected to any of the Altars, the event will fail. If a player makes a Connection with a Wolf Altar, then he must remain inside the Wolf Altar. If the player leaves the Wolf Altar, then the Connection is broken. The Wolf Statue HP will increase according to the character's HP which holds a Connection with the Wolf Altar. Crywolf Invasion Start The participating players must work together to prevent monsters from breaching the area and destroying the Wolf Statue and the Wolf Altars. The monsters try to quickly move towards the Wolf Statue. The goal is to eliminate the entire army, including Balgass. Balgass is a Boss that will spawn in the last 5 minutes of the event. When Balgass is killed, the Event is successfully won. If the Wolf Statue gets destroyed, the event will fail and end. Crywolf Invasion Waves Wave 1 Defeat Dark Elf x12 Time Limit: 15 minutes Wave 2 The Boss spawns when 5 minutes are remaining: Defeat Balgass x1 Time Limit: 5 minutes

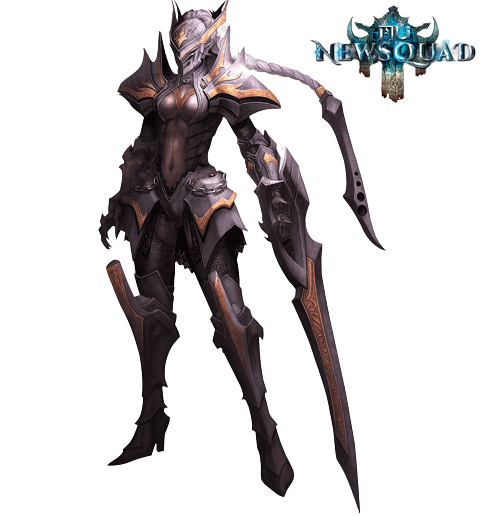
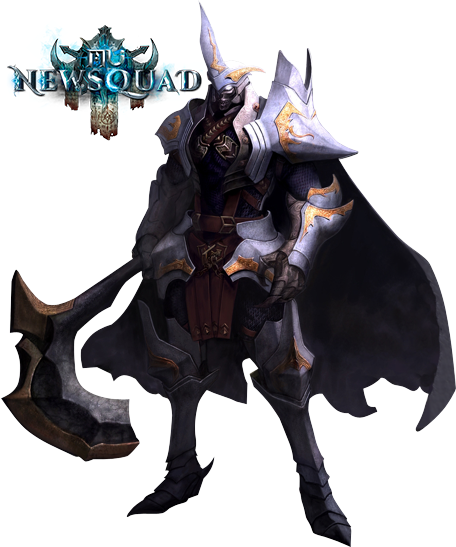
-
Illusion Temple Illusion Temple is a Capture The Flag PvP battle arena where players can compete against each other. Two randomly made teams of a maximum of 5 players each will have to fight to obtain a Sacred Artifact and use it to capture Stone Statues to earn Event Points. How do I participate? Entry is free and doesn't require any special item. Illusion Temple 1: Level 250-400 Illusion Temple 2: Level 401-699 Illusion Temple 3: Level 700-999 Illusion Temple 4: Level 1000-1299 Illusion Temple 5: Level 1300+ Game-play The battle arena is a large area in which the Red Team is fighting the Blue Team to capture the objectives. Each team spawns on the opposite side of the map. The objective is to return the Cursed Sacred Artifact to your team's pedestal to earn a Game point. The cursed artifact is located in the central part of the map, on the Temple Pedestal. Illusion Temple Pedestal The player who picks up the artifact will have its Movement Speed highly reduced. The Event time limit is 15 minutes. How to win Illusion Temple Returning the Cursed Sacred Artifact to your base grants a Game Point Earn 7 Game Points to win Illusion Temple Event Rules Any character with a PK Status cannot enter the Illusion Temple map. No penalty upon character death. PVP is allowed, once the Event starts Town Portal Scroll warps characters to the Event Square map. Upon death, characters are moved to their Party's respawn area, which is inside their base.
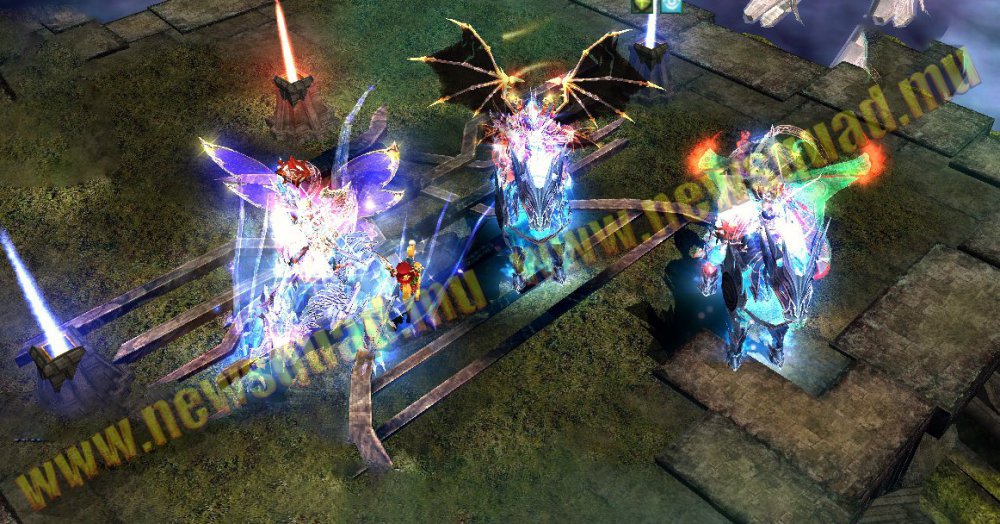

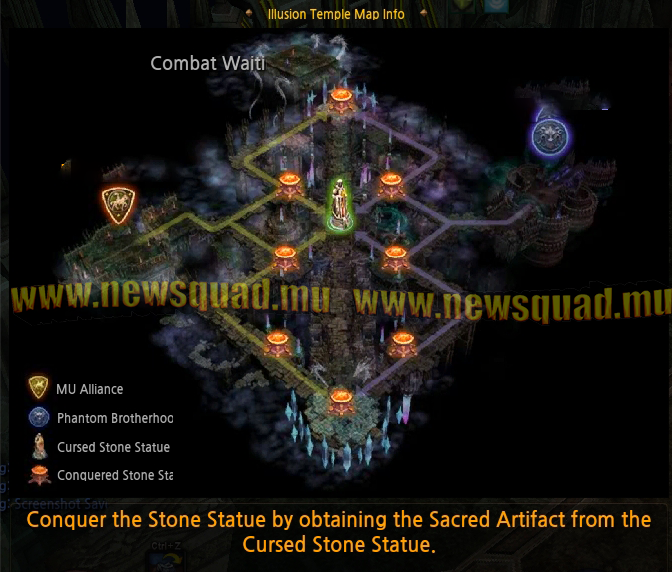
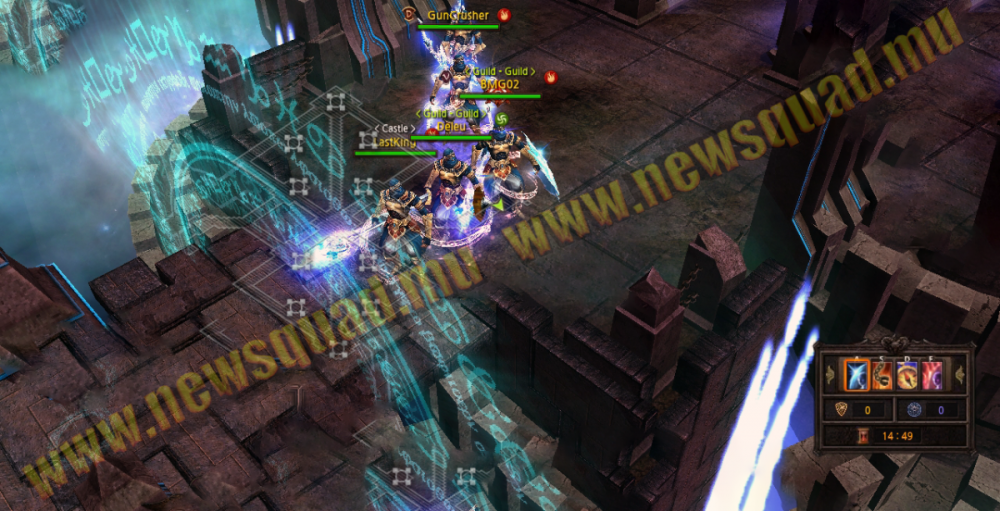

-
Doppelganger Doppelganger is a unique dimensional arena. Here, teams of players can compete against each other in a "tower defense" style game. You must fight off the monsters that spawn to prevent them from breaching your base. If multiple teams of players survive the hoard of monsters, you'll fight each other to the death to determine the winner! It's an all-around exciting competition. How do I participate? You must craft a Mirror of Dimensions to enter. Mirror of Dimensions can be crafted by gathering Sing of Dimensions. Sign of Dimensions is dropped by monsters. Entry requirements: Doppelganger 1: Level 250-400 Doppelganger 2: Level 401-549 Doppelganger 3: Level 550-699 Doppelganger 4: Level 700-899 Doppelganger 5: Level 900-1100 Doppelganger 6: Level 1101-1299 Doppelganger 7: Level 1300+ Game-play: There are 4 different maps on which the Event might take place, The Fire Zone, The Ice Zone, The Water Zone, and The Crystal Zone. The arena is a long narrow trail, with Magical Barriers on either side. Each Party will spawn on one side of the arena, alongside all Party Members. Once the Entry Period has passed, there is a 1-minute delay before the Mini-game starts. The participating Parties must work together to prevent monsters from breaching their Magical Barrier. During the Doppelganger event, there will be a total of 2 waves to complete. Monsters are spawned in small groups, from their spawn point, over some time. They spawn on average, every 3 seconds. The monster will quickly move towards the Magical Barrier, without attacking too much on their way, their main focus being the barrier. The goal is to prevent the monsters from breaching your team's Magical Barrier. The Barrier is breached once a monster passes through it. When the first Boss Monster is killed, a Silver Chest will appear. Silver Chests contains individual rewards. Both waves must be completed before the time limit is reached. After the 2nd wave is completed, a Golden Chest will appear. The Golden Chest can be opened to receive a party reward. If multiple Parties are still alive after the final wave of the monsters, a PvP Battle between parties will take place after 1 minute. Doppelganger waves: Wave 1: A Boss Monster (Slaughterer) will spawn after a certain amount of time. Alongside the first boss, the normal monsters will also periodically spawn at their Monster Barrier. Wave 2: A second and final Boss Monster ( Ice Walker ) will spawn at the monster's Magical Barrier. Winning Doppelganger The Event is won by the last surviving Party. The party must first survive the monster waves to even qualify for the winning title. When multiple Parties survive the waves of monsters, each Party must fight to the death to determine a winner. Doppelganger Party Battle If two or more Parties survive the waves of monsters, a battle between the Parties will take place. Your Party must fight any remaining Party to the death to determine the winner under the 3-minute time limit. If multiple Parties survive after the time limit is reached, the winning Party is determined by the number of their surviving Party Members. Event Rules You must be in a party to enter the Doppelganger Event. Each Party must enter with a minimum of 5 Party Members. A maximum of 4 parties can join in a single instance. The Party must be formed outside of the Doppelganger map. All Party Members must be on the same Server to enter the Doppelganger map. Any character with a PK Status cannot enter the Doppelganger map. All rewards earned from the Event will be stored in the Gremory Case. Combat adjustments No penalty upon character death. PVP is not allowed, until the end of the Event. Only during the Party Battle PVP is allowed. Other adjustments: Upon death, characters are moved to the Event Square map.
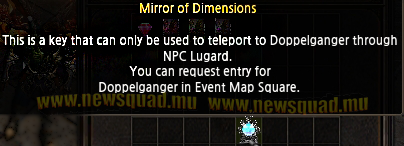

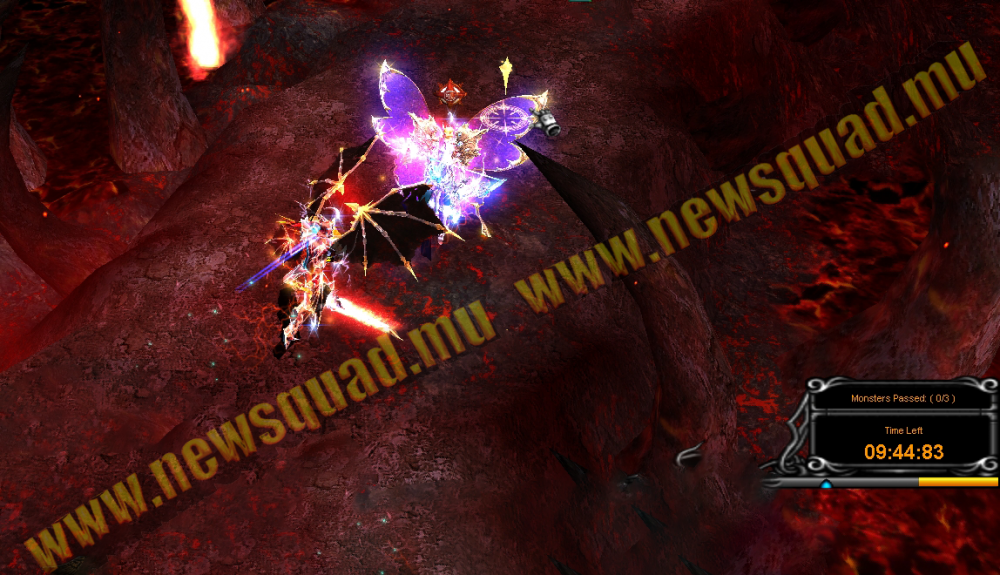

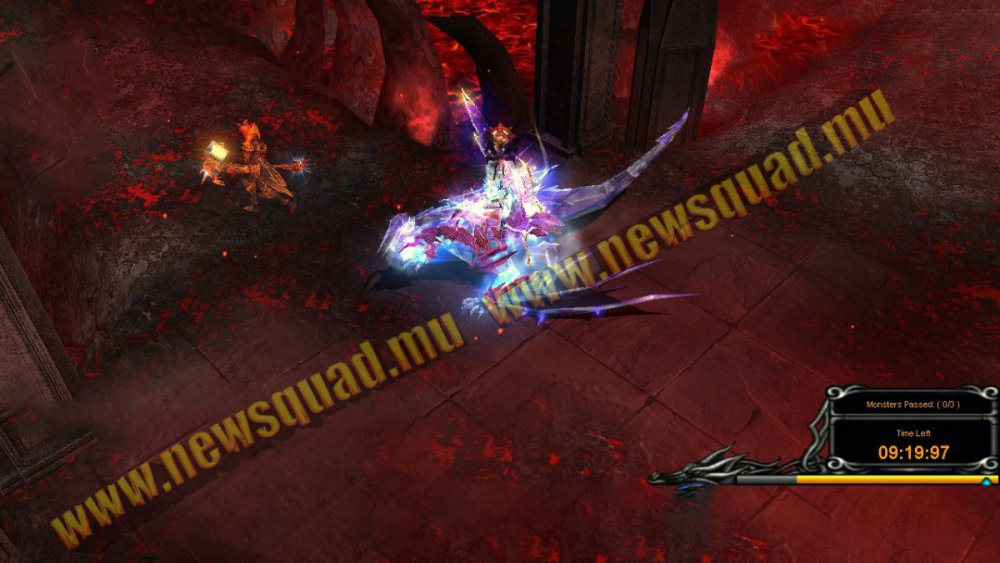

-
Devil Square How do I participate? You must craft a Devil Square Invitation to enter Devil Square. Devil Invitation is crafted via Chaos Goblin Machine. The crafting ingredients can be obtained from monster drops. Additionally, you'll also need one Jewel of Chaos for the crafting. Event NPC: Charon offers entry into Devil Square. Speak with him in Event Square to enter! However, you'll need to craft a Devil Square Ticket to enter. Devil Square Entry Levels: Devil Square 1: Level 250-400 Devil Square 2: Level 401-549 Devil Square 3: Level 550-699 Devil Square 4: Level 700-899 Devil Square 5: Level 900-1100 Devil Square 6: Level 1101-1299 Devil Square 7: Level 1300+ Game-play: Devil Square Arena: The arena appears as a large square, with Guards surrounding each of its 3 main locations. Once the Entry Period has passed, there will be a 1-minute delay before the Event starts. If a monster is killed, another will spawn. Monsters will continue to spawn over 20 minutes. As time progresses, the spawned monsters will change and their difficulty will slightly increase. Devil Square Event Points: Event Points are earned when a monster is killed. The amount of Event Points earned per kill is based on the level of the killed monster. Devil Square rules: When the character gets killed in Devil Square he will be warped out of the event. PK is not allowed in Devil Square.

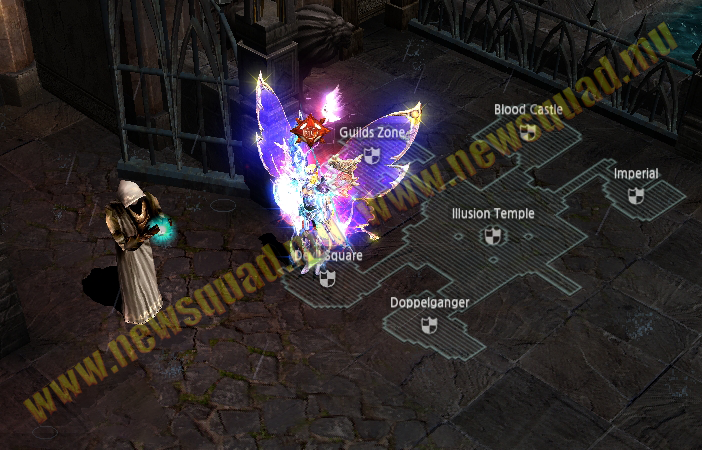
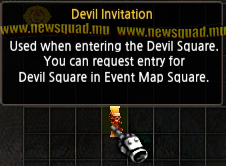
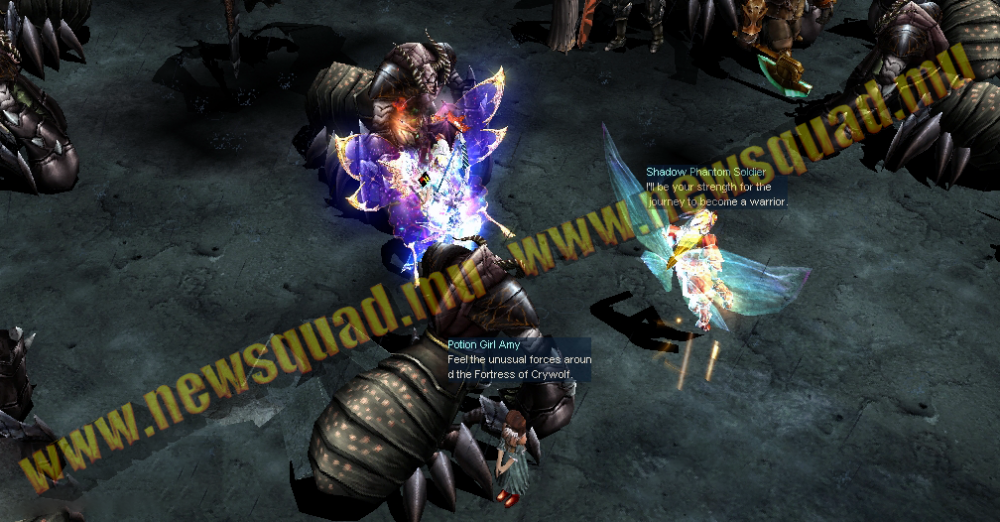

-
Chaos Castle The Chaos Castle event (usually abbreviated as CC) is one of the oldest events in-game, but one of the most exciting and hard to finish. Inside the Chaos Castle, you fight to the death. Fight for prestige or prize, but there can be only one. With the Armor of Guardsman, you are disguised to look like your enemies, where no one will be able to tell who's who. How do I participate? You will need the Armor of Guardsman item to enter the Chaos Castle. The Armor of Guardsman is sold by "Lumen the Barmaid" at the bar in Lorencia and by "Leina the Merchant" on the Event Square map. Players who have PK status cannot enter the Chaos Castle Event. Your character will be transported to the corresponding castle according to its character level and the appropriate amount of zen will be deducted. Chaos Castle Level Requirements: Chaos Castle +1: Level 250-400 Chaos Castle +2: Level 401-549 Chaos Castle +3: Level 550-699 Chaos Castle +4: Level 700-899 Chaos Castle +5: Level 900-1100 Chaos Castle +6: Level 1101-1299 Chaos Castle +7: Level 1300+ The total number of players in Chaos Castle is 100. They are divided into: Maximum number of players = 70 Minimum Monsters = 30 If the number of players is less than 70, then the remaining places will be occupied by monsters. The Chaos Castle event starts only if there is at least 1 player in it (for every level). Upon entering the Chaos Castle, the player's appearance will be changed to that of the guardsman, the same as the Guardsman monsters inside. Only the appearance will be changed, and the player's status and parameters will remain the same. Game-play When the event starts, the monsters will instantly spawn throughout the arena. Including players, there will be a total of 99 enemies in the arena. As enemies are killed, the Character Counter will decrease. The arena is square-shaped with sections of the floor missing. Players can fall off the edge of the arena, either by being killed or pushed by the monsters. When you kill a monster, they have a chance to activate a special Skill called Explosion which causes a strong Knock-Back and pushes you in a linear direction, so positioning is very important. If a character falls off the edge of the arena, they are disqualified. As the event progresses and more players and monsters are killed, the arena is shrinking, making things more difficult. Positioning hard to manage to not fall off the edge. The last standing player that manages to survive and kill all the other players and monsters, is declared the winner and rewarded. Event rules: All characters in Chaos Castle are treated as enemies, so there is no need to use the Ctrl key for PvP. Players cannot attack each other during the waiting time. The party is not allowed in Chaos Castle. Chatting is allowed only while waiting, but this feature is disabled immediately after the start. Buffs can only be applied to yourself, you cannot cast another player. If, after all the monsters are killed, 2 players remain, and the time runs off, the winner will be selected based on points gained from monster kills.

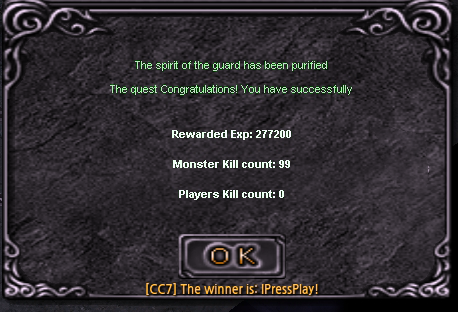
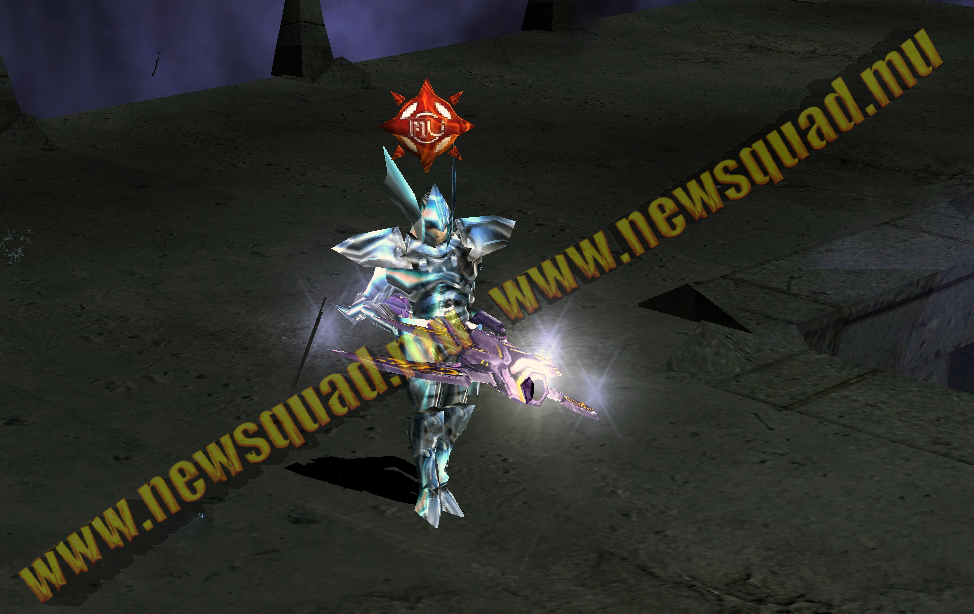

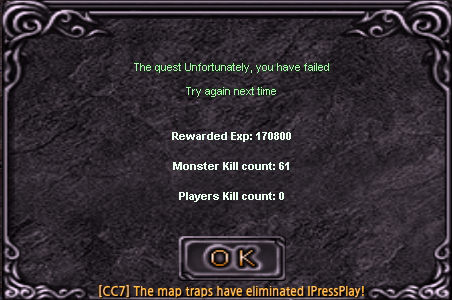

-
Blood Castle How do I participate? First, you need to speak with the Messenger of Archangel located in the Blood Castle quarter of the Event Square Map. There are 7 levels of Blood Castle in the game and you can enter depending on your level. You can participate in the event by crafting an invitation first. You can check levels needed as well as your current entries available by pressing "T" -> "Event Entries" -> "Event Entry Level". You need Blood Bone, Scroll of Archangel (dropped from mobs, both need to be the same level as the BC you are trying to get into) and Jewel of Chaos mixed in the chaos machine. Blood Castle Level Requirements: Blood Castle +1: Level 250-400 Blood Castle +2: Level 401-549 Blood Castle +3: Level 550-699 Blood Castle +4: Level 700-899 Blood Castle +5: Level 900-1100 Blood Castle +6: Level 1101-1299 Blood Castle +7: Level 1300+ Before the Event starts you need to speak with the Guardian Angel NPC who is lying down on the ground. Once the Entry Period has passed, there is a 1-minute delay before the Event starts. The first phase of the Event takes place on the long bridge filled with monsters that the players need to defeat. Each player needs to defeat 40 monsters to get to the next stage of the event. If a monster is killed, another will spawn to keep a constant monster count. Monsters will continue to spawn over the next 15 minutes after the event starts. The clutter of monsters on the bridge will make it difficult to move. Players need to make their way on the bridge through the wave of monsters, to reach the Castle Gates on the opposite end. After reaching the Castle Gates, players need to destroy them to infiltrate the Castle. You can only attack the gates after you reach your 40-kill count. A message will appear on the screen when all monsters have been defeated. Upon destroying the gates, the player can enter the Castle. Inside the Castle, you will have to kill a specific monster named Magic Skeleton. The amount required depends on the players participating in the event - 2 monsters per player. After you've killed the required monsters there is one last challenge - to destroy the Statue of Saint which drops the quest item, an Archangel weapon. The final step is you return the weapon to the fallen archangel. There are 2 NPCs for your convenience - one at the beginning of the map and one in the castle room. After you hand in the weapon to the NPC you are rewarded. Blood Castle Rules Keep in mind that the player (party) with the most damage will get the weapon from the statue so you need to be careful. Only one party will get rewards for returning the quest item. The weapon can be delivered (and the event closed) only in the last 3 minutes remaining from the BC. BC is mainly used for experience (and rewards if you're the lucky party). A good spot for experience is right in front of the castle gate as there are more mobs than in the room. Warp command will work in Blood Castle Only a maximum of 20 players are allowed for every Blood Castle level sub-server. If you die in Blood Castle you will not lose zen, experience, or drop items but you will fall off the bridge and you will be locked out of the Event.

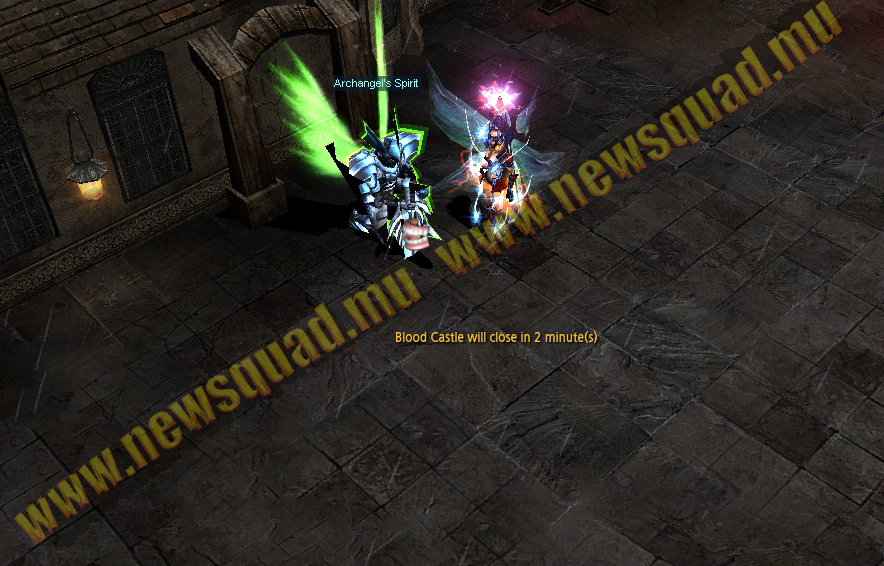
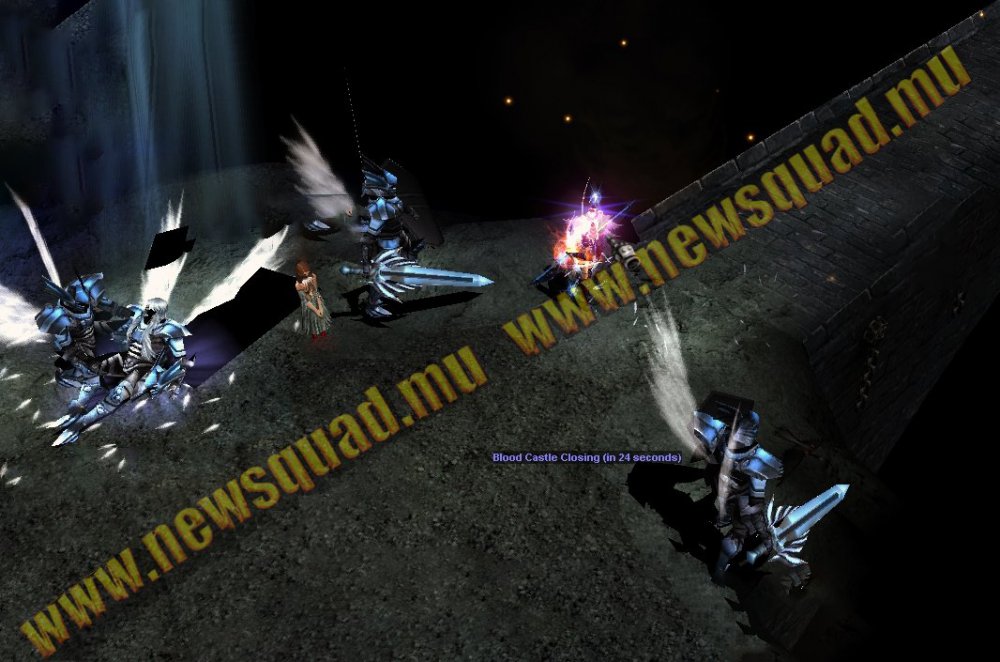
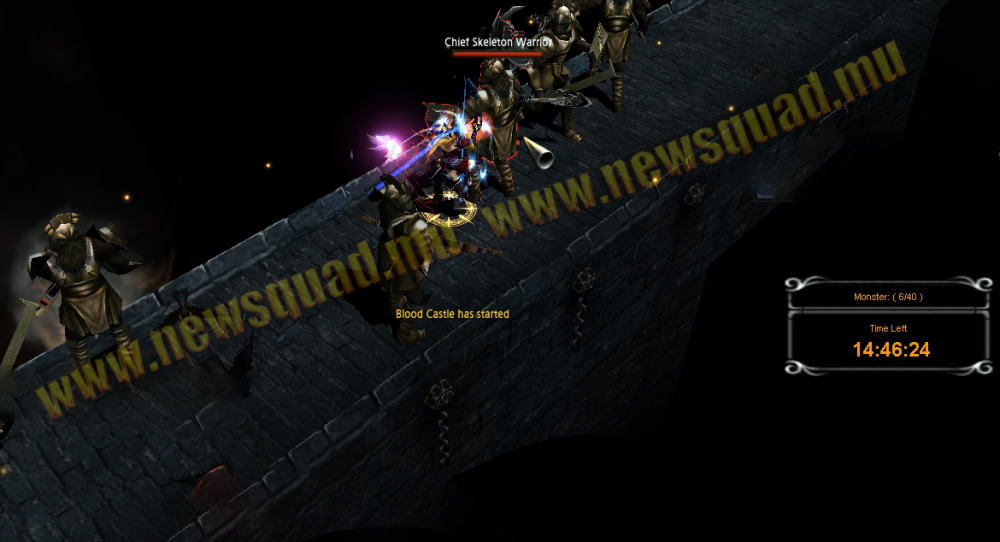
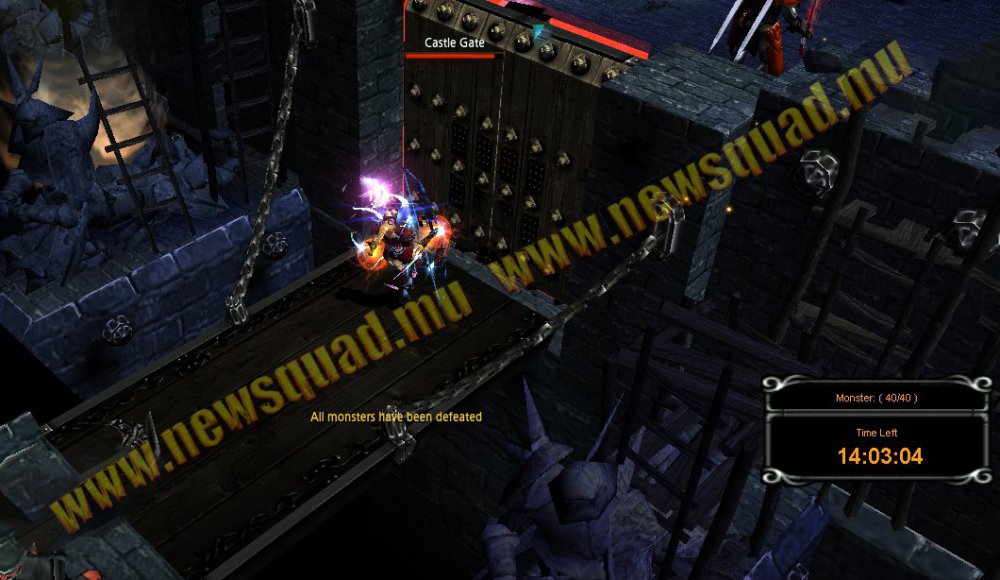
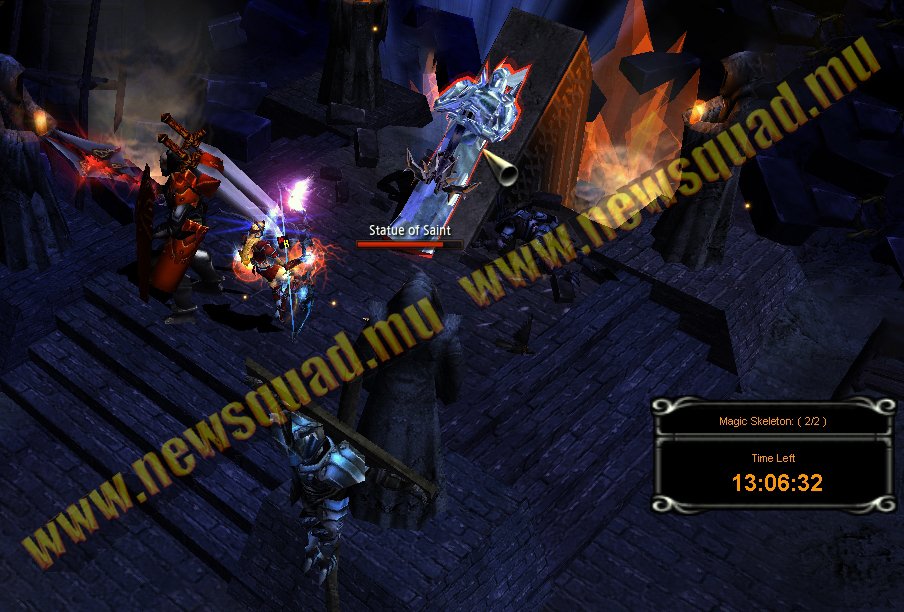
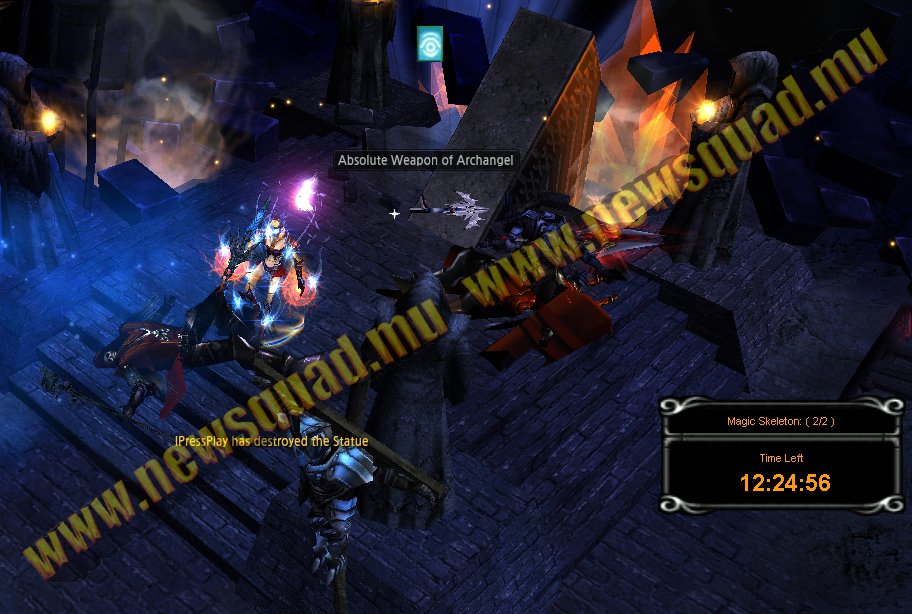
-
Lord of Ferea - The Hell's Commander Lore Location & Schedule The boss can be found in Ferea - located in his room around {35, 123}. It will respawn between 5 and 8 hours after it is killed. Stats Difficulty Tier: End-Game Health Damage Defense Defense Rate Attack Rate Attack Range Attack Speed 196.650.000 2.200 ~ 2.700 1.200 980 6.000 8 1 hit / 1 second Elemental Damage Elemental Defense Elemental Defense Rate Elemental Attack Rate 1.350 ~ 1.750 1.250 2.800 5.000 Skills & Mechanics PRE-FIGHT Lord of Ferea is summoned when the Crystal Orb of Ferea is destroyed. PRE-FIGHT: ORB'S BARRIER When the orb is taking damage, warriors from Ferea will spawn. The crystal orb has immunity status until the summoned monsters are defeated. MINE EXPLOSION The Boss spawns a mine explosion to the player's location. The explosion comes 3 seconds after the diagrams appear on the floor. Being hit by the explosion will cause huge damage to the player. It has 50% chance to successfully cast the skill. If it fails the cast, it instantly continues its attack pattern (with either another skill, a normal attack or another try for Mine Explosion). WHIRLWIND The boss uses the whirlwind to deal with AoE damage. ROAR When the boss reaches an HP threshold of 30%, he uses the Roar skill, right before Lord's Summon. When Roar skill is used, he drains AG and MP from all the characters that are near him. FEREA WARRIORS SUMMON During the encounter, random warriors from the Ferea Land are summoned and brought to the fight by the Lord himself. LORD'S SUMMON Lord of Ferea summons Ferea General. As soon as the Ferea General is summoned, the Boss teleports himself to the Crystal location and gains invincible status. The invincible status also comes with HP recovery that persists until Ferea General is defeated. Requirements & Restrictions There is no restriction on the level to enter the boss zone outside of the map level (400+) but the recommended level is 1000+. Closed-Entry: After the boss is spawned, only the characters that are already in the boss room can participate in the boss fight, the entrance for other characters is closed, as well as for characters that die inside the room. Boss Type: Gens - PK is free and enabled between opposite gens families and is disabled between same gens families. Summon (DL) is working normally while the boss is alive. If everybody from the boss zone dies the boss fight will end, the entrance will be released for everyone and the Crystal Orb will reset after 5 minutes. If Lord of Ferea stays in the same place for more than 25 seconds, it will be teleported to its spawn location. Anti-Switch Protection: If you switch/disconnect in Lord of Ferea's room on in the entire zone outside of Lord of Ferea room, you'll be moved to Ferea safe-zone. Credits: Adapted by NewSquad. Information is matching our Zenith server.

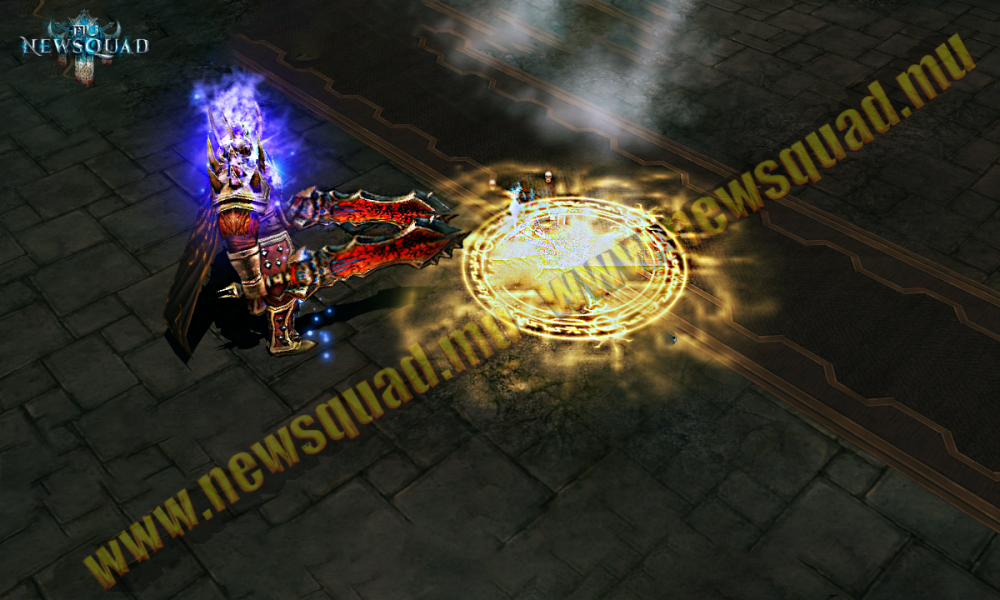
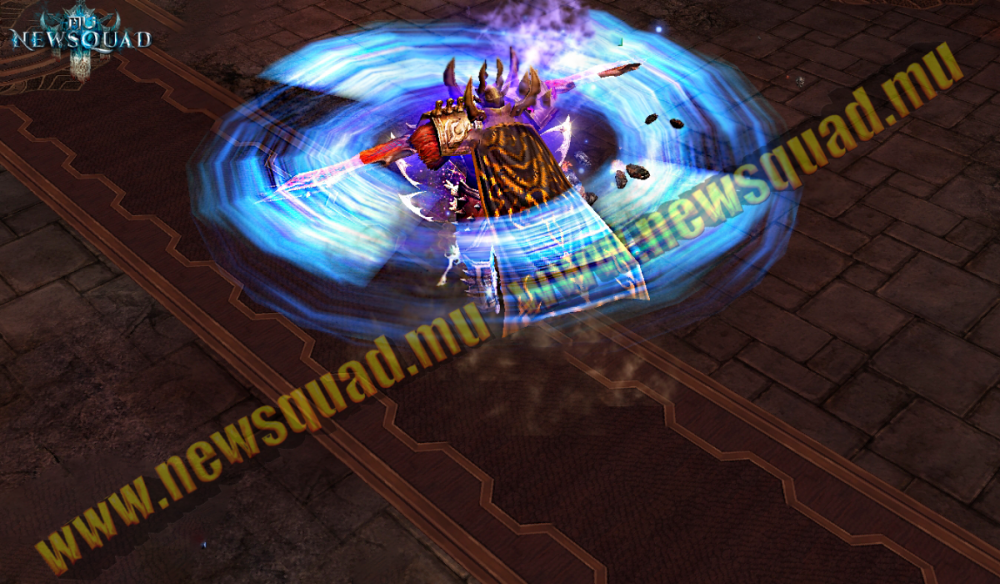
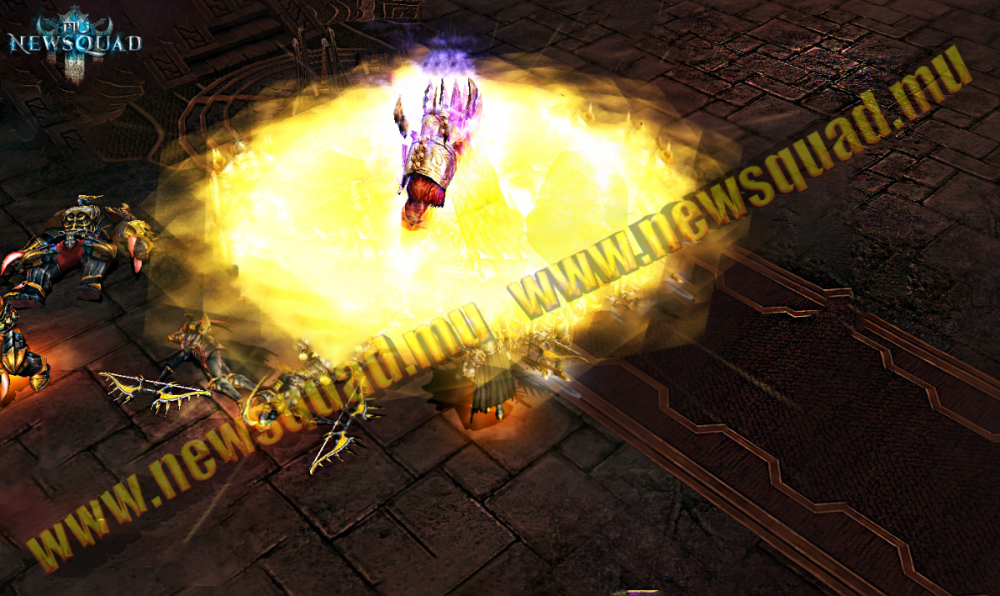
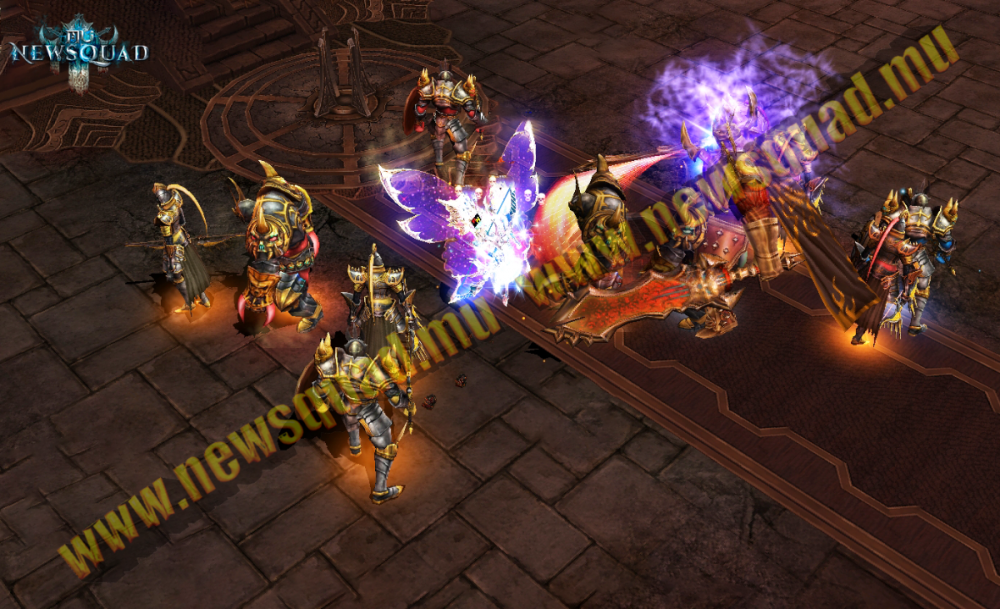


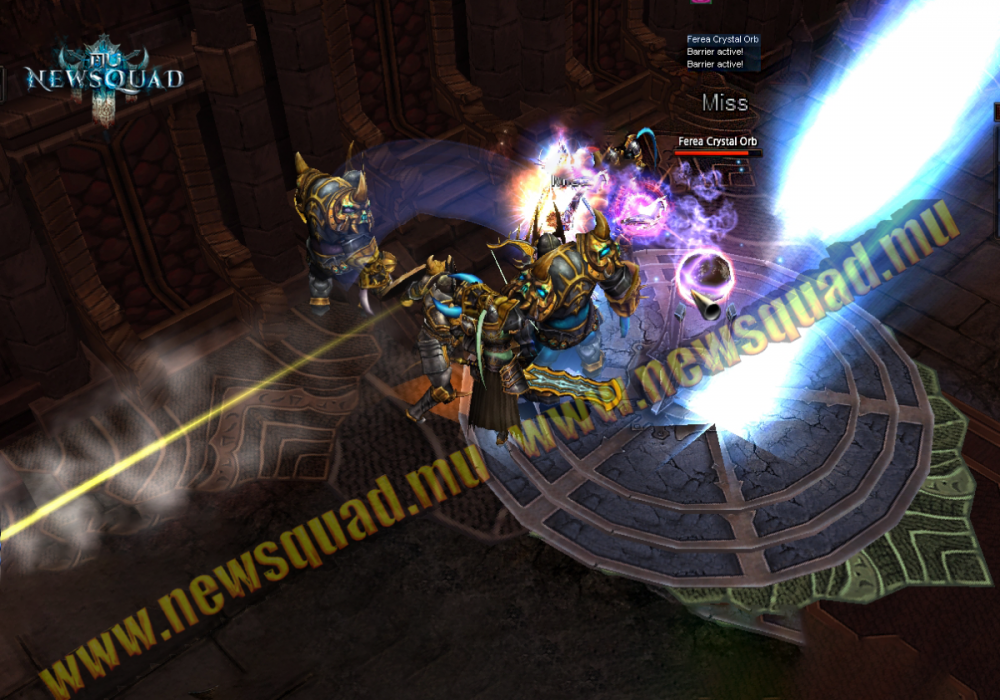
-
Core Magriffy - The Nars Doom Bringer Lore Location & Schedule The boss can be found in Acheron - Nars - in his room that is reached by entering the Boss Gate located at {180, 150}. It will respawn every 7 hours after it is killed. Stats Difficulty Tier: Mid-Game Health Damage Defense Defense Rate Attack Rate Attack Range Attack Speed 180.000.000 2.100 ~ 2.600 960 850 6.000 5 1 hit / 1 second Elemental Damage Elemental Defense Elemental Defense Rate Elemental Attack Rate 950 ~ 1.150 920 1.800 5.000 Skills & Mechanics POISON Regular attacks have a chance to poison the target. TWISTER Launches multiple Tornadoes around the boss that will damage and knock back the characters around them. SHOUT Deals AoE damage while knocking back the hit characters. CLONE Creates a copy of the boss that has a random elemental aspect. The clone is identical to the boss and while it is active, the real Boss will be hidden. The fake boss will use the same skills as the real boss. LIFE REGENERATION Recovers an amount of his HP every second, if no character is around him. Requirements & Restrictions Only characters over level 700 can enter the boss room and the recommended level is 800+. Open-Entry: Anyone can participate in Core Magriffy while he is alive. Boss Type: PvP - PK is enabled and it is free in Core Magriffy's entire room. You can use Summon (DL) inside Core Magriffy's room but not in Nars, as long as the boss is alive. Anti-Switch Protection: If you switch/disconnect in Core Magriffy's room on in the entire zone outside of Core Magriffy room, you'll be moved to Acheron safe-zone. Extra Information & Mechanics Core Magriffy's Push range is 4 tiles. Credits: Adapted by NewSquad. The information matches our Zenith server.